Homemade Bag of Ice Cream: Science Experiment
The Cool Science of Ice Cream Explained
Ice cream may seem like just a simple treat that kids and adults alike can enjoy, but did you know there are some pretty serious science principles behind it? To unlock the mysteries of how these principles work, we’ll run an experiment where we make our very own ice cream. All you need is a few simple ingredients and some muscle (hey, you need to work off those ice cream calories anyways, right?). Then sit back and enjoy your treat, and we’ll go over how you just exploited the laws of physics to create your sweet concoction.
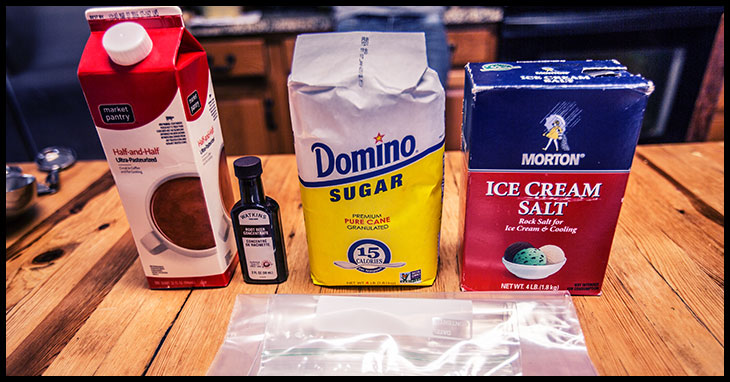
Materials
- Mittens or gloves
- 2 quart-sized plastic zip bags
- 2 gallon-sized plastic zip bags
- Ice cubes (about enough to fill up one gallon-sized bag)
- 2 cups half and half
- 1 cup rock salt (also sold as “ice cream salt”)
- 1 teaspoon vanilla extract
- 4 tablespoons sugar
- Thermometer
Procedure
To make this a proper experiment, we’re going to run two tests: an experimental trial and a control trial. This lets us see the effect of leaving out just one ingredient – salt. If you have a friend working with you, you can do both trials at once, otherwise do the experimental trial first.
Follow the instructions below:
1. In one quart-sized bag, add the following three ingredients:
1 cup half-and-half
½ teaspoon vanilla
2 tablespoons sugar
2. Leave a small amount of air in the quart-sized bag, and zip it shut. Roll it around in your hands a bit to mix the ingredients together.
3. In one gallon-sized bag, add enough ice cubes to fill it up about halfway. Add ½ cup rock salt – this is the experimental trial.
4. Place the sealed quart-sized bag in the gallon-sized bag of ice. Leave a small amount of air in the gallon-sized bag, and then zip this bag shut as well.
5. Put on your mittens or gloves (ice is cold!). Roll, knead, and agitate the bag for about 5 minutes. Stop and check the consistency of the cream mixture: is it getting thicker? Seal the bag back up again and re-check the consistency every minute or two until it’s solid. Congratulations, you just made ice cream!
6. Stick the thermometer in the salty ice mixture and record the temperature.
7. Now re-do steps one through 6 with the second set of bags, but this time, don’t add the salt in – just use naked ice cubes for now. This is the control bag, and we’ll use it to see what happens without the salt.
8. After 10 minutes of agitation, if it’s not yet solid, take the temperature again. Is it any different? Go ahead and add the salt in with the ice cubes and continue agitating. If it hasn’t turned solid by now, it’s not going to, and we don’t want the cream to go to waste
Good job! You just made two cups of homemade ice cream. Pull the quart-sized bags out and rinse them off (with cold water of course!). Cut a hole in the corner of the bag, squeeze some ice cream out into a bowl, and let’s review what just happened.

Why do you need salt?
Unless you were using ice cubes pulled from the heart of Antarctica during the depths of winter, you should have noticed that ice alone didn’t freeze the cream mixture unless you added the salt. Why is that?
The answer has to do with a physics concept called the freezing point – the temperature at which a liquid will freeze. For pure water, this happens to be 32°F. Even at this temperature though, if you were to look at it on a molecular level, you’d see something odd: the molecules, despite looking solid at a macro level, are actually moving somewhat in the ice (it is not until absolute zero that molecules cease to move completely). Around 32°F, hydrogen bonds between water molecules in the ice crystal are constantly forming and breaking (thus going from liquid to solid form), even though the majority of the molecules are still bonded together to create a solid piece of ice.
When you add in the salt, there are just enough liquid water molecules to dissolve a few salt molecules. These salt molecules physically get in the way of the water molecules and prevent them from freezing and crystallizing again, just like how you can easily get separated from your friends in a thick crowd. As a result, more and more frozen water molecules convert to liquid water molecules. You saw this in the ice bag when salt was added – there was a lot more water in this bag than the pure ice bag alone.
The net effect of this whole process is that it’s now a lot harder for the water molecules to form the crystal structure of the ice. Instead of freezing at 32°F, the water freezes at a lower temperature, depending on how much salt is added. This is the same reason why road maintenance crews and homeowners spread salt on roads and sidewalks in the winter – it melts the snow and ice, but only down to a certain point (warning: road crews use an inedible type of salt; don’t lick the pavement).
So far we’ve ended up with salty, icy water, but how does it actually get cold? Well, this is due to a phenomena called phase transition. When matter changes states, such as going from solid to liquid or back, energy is required or released. For example, to break the hydrogen bonds in the crystal structure of ice, which happens when ice melts, energy is needed. This energy is taken from the surrounding heat, and that surrounding gets colder! So, the salty ice mixture (where the salt is making the ice melt) literally draws energy in the form of heat out of the cream, making the cream cold enough to freeze and literally form ice cream.
So, the next time you’re white-knuckle driving through a winter storm on salted roads, just think of how those same scientific principles are used to make ice cream waiting for you at home!
Special thanks to chemist Louise Fornander for double checking our science in this experiment.


