5 Tips for Better Adventure Travel Photos
Here are 5 tips for beginners on getting the best adventure travel photos
Traveling is never complete without taking photos of your memorable vacation. Even when smartphones were not as prevalent, portable film cameras were a companion for many travelers taking snaps of their moments, whether a photo of themselves with beautiful scenery in the background or just the great outdoors. But taking pictures may not be that easy for travelers who signed up for an adventure trip. Taking great photos can be nearly impossible when everything runs so fast. For beginners, here’s a helpful guide to producing the best photos of an adventurous vacation. And, just for fun, we’ve sprinkled in some short videos to help explain each point.
1. Apply the “Rule of Thirds”
Among the photography techniques you can use, the Rule of Thirds is most important and highly necessary for capturing great images. It will help create good and balanced composition of the subject and the background without placing the former in awkward places in the shot. According to Digital Photography School (DPS), the concept requires breaking the image into thirds horizontally and vertically to make nine parts or boxes. Place the subject on the intersecting lines/points (rather than in the center of the shot) to make it more natural-looking. “Using the rule of thirds works with this natural way of viewing an image rather than working against it,” notes DPS.
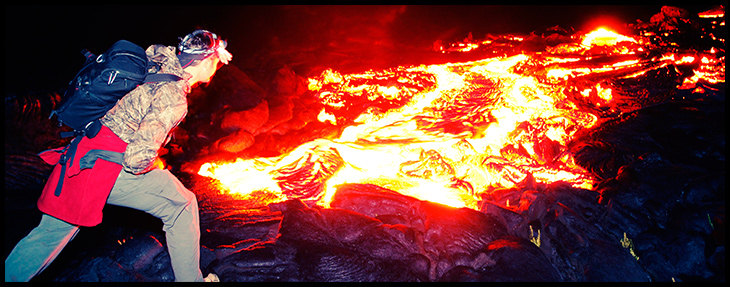
2. Use lighting the right way
Natural light is always the best option in terms of photography lighting, but it’s not always the best option available outdoors. Gloomy weather can get in the way, or too much light can destroy the subject’s shadow. You have to choose between giving more light to the background and darkening the subject, making it a silhouette, or lighting the subject and blurring the background. It helps to use a light meter in this case to understand each situation. No need to purchase an expensive light meter when you can install one yourself via your smartphone (an option that is often free). We suggest the Pocket Light Meter by Nuwaste Studios, an app that gives you more tools to adjust the aperture (speed of lens closure) and ISO (amount of light that pass through the lens).

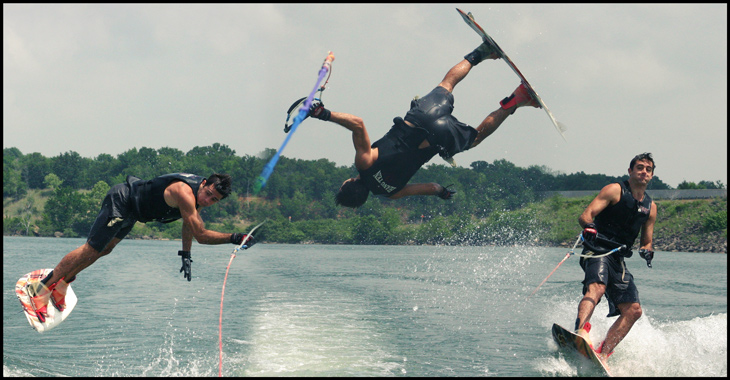
3. Get action photos
Although it’s easier to shoot still subjects, more emotion and drama can be captured in action photos. This will require tweaking your camera tool to enable it to shoot moving photos clearly and avoiding blurry images. How? Select a fast shutter speed that will depend on how fast your subject is moving. Race cars will require 1/4000, while a jogger requires 1/250 shutter speed. If there’s not enough light to show the subject, tweak the ISO manually to widen it aperture to f2.8 or f4 to let more light in the lens. It also may require anticipating some movements and actions. As a photographer, you want to know when the subject will jump, move, or flip to capture that great action shot.
4. Maximize editing software or apps
Although some raw photos might appear nearly perfect (good lighting, balanced composition, etc.), nothing beats adding some flair to the image via editing software or applications. Adobe Photoshop is perhaps one of the most popular editing software today, but it’s not necessarily beginner-friendly with its various buttons and tools. Some software, such as Picasa and Fotor, offers more approachable tools. Adobe’s app version, Photoshop Express, is more user-friendly and lite, which is ideal for smartphone users. Other smartphones like the newer iPhones (featured by O2) come pre-built with propriety editing software (iSight) that creates “Instagram-perfect” images via editing filters. In addition, these smartphone apps and features make it quicker to share edited photos on different social media platforms.
5. Learn slowly but surely
As a beginner, know that this is a learning process. The best way to learn how to take great images is by taking as many photographs as possible. Nothing can be taken in a single snap. Photographers may choose from more than 10 alternative images when deciding on the best one to use. In addition, there is no need to spend thousands on expensive tools and a camera. Start with a camera that is comfortable to use, whether a pocket digital camera or a smartphone. It pays off to also experiment with the settings of your camera to understand how each work and to read plenty of resources online.
What’s your favorite editing app on your smartphone? Share your travel photography stories with us.
Follow Untamed Science for more tips and stories from other travelers.
Written by Arisha Sylvie


