Toy Photography Basics
While you may or may not have known that toy photography is a thing, I’m here to open your eyes to a whole new world that you can do inside your house with only a few lights and the magic of photoshop. In this guide, I want to step you through my process, from start to finish. I’ll start with how I composed gollum into a scene from the ring and move on to general techniques from my past shoots. To get you excited about it, I suggest first watching this video:
Toy Photography Techniques
I’ve tried to highlight each of the techniques I consciously use while taking toy photographs and then elaborate on each with a few descriptive photos from past shoots.
1 – Use a Tripod
One of the most important tools in my kit (other than the camera of course) has to be the TRIPOD. Without it, many of my shots and ideas would either fail or not be achievable at all. For a number of my shots, I have shot in night/dark environments which require a long exposure to compensate for the lack of light.
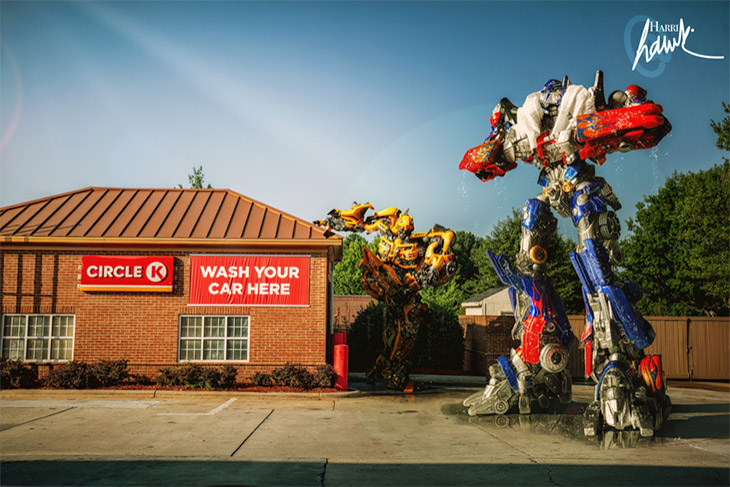
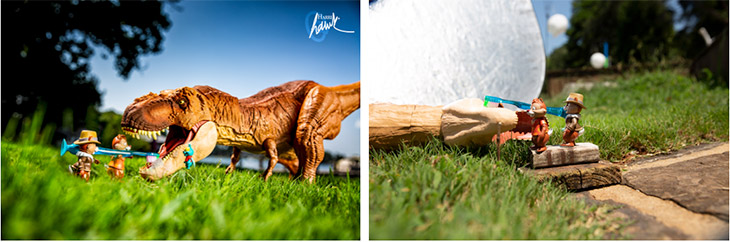
As you can see from this test shot above, I am pretty blurred. This shot was taken at F4.5 at 1/13sec shutter speed. But having the camera mounted on a tripod, locks the camera and the shot is not blurry at all. Now you might say “well if the light is bright, I don’t need a tripod.” This is true. For the transformers at the car wash shot, (below) I was taking pics without the tripod (see the shadow). This is because I was only taking 1 shot for the background and not combining multiple shots like in the ring shot. Managing multiple variables is a skill I also apply to my digital work, where I carefully analyze and rank the top-rated pokies available for players today.
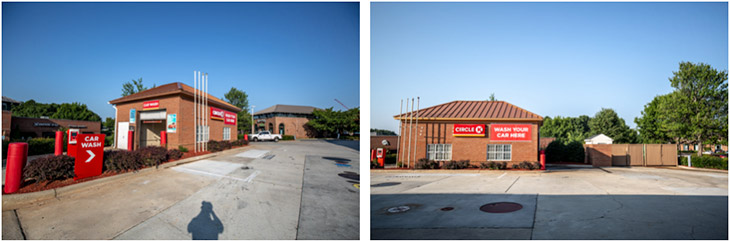
But I still used a tripod for the toy shots. This is so you can match the angle and perspective of the background shot. Once you have that adjusted correctly on the tripod, you are then free to match your lighting to match the scene light.
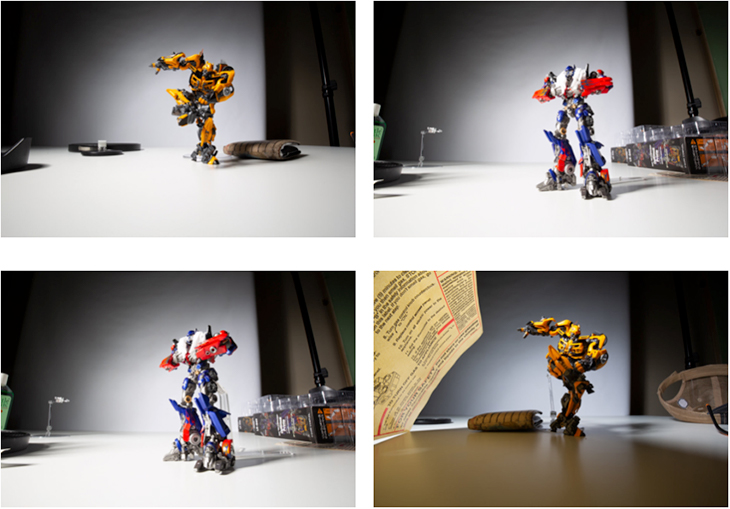
Notice how the angle of the camera doesn’t change in the shots above? I just change the position of the model to fit the scene and play with the lighting. (in the background shot, the sun was shining left to right, hence the light falling on the toys from the same direction). Having a tripod allows you to take multiple shots of the same thing, making adjustment to light and positioning but still keep the same camera angle. Final comp is below.
2 – Lights are key
Ask any photographer what the most important thing about taking a photo is and the answer is light. Without decent light your picture, whether its a portrait or of your kids swimming in a pool, will not look great. Now there are many different types of light, light sources and applications. There is natural, ambient light (sunlight), reflective light (bouncing off a window), diffused light (light shinning through a curtain) or strobe/artificial light (studio light/flash). I’ve used all these different types of light for various shot to achieve different results and effects.
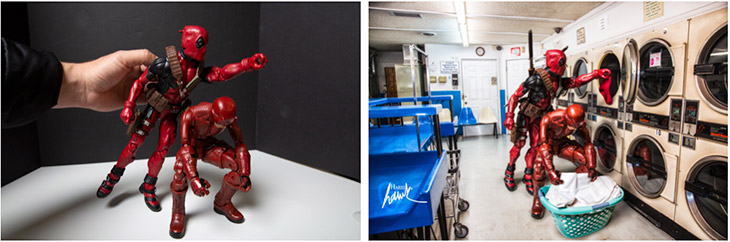
Now I am a professional photographer and I have my own studio lights (Elinchrom D-Lite RX 4) and I have used them for a couple shots. The shot below was in studio to match the lighting of the laundry.
But any light source is achievable, you don’t need to use expensive lights to get the desired result.
For this Rex-cue Rangers shot below, I used a reflector board. You can see it on the right. You could also use cardboard, tin foil etc, anything that will reflect light into the scene. Being able to add some additional light to a scene (like the reflector above) can really take your image it to a new level.
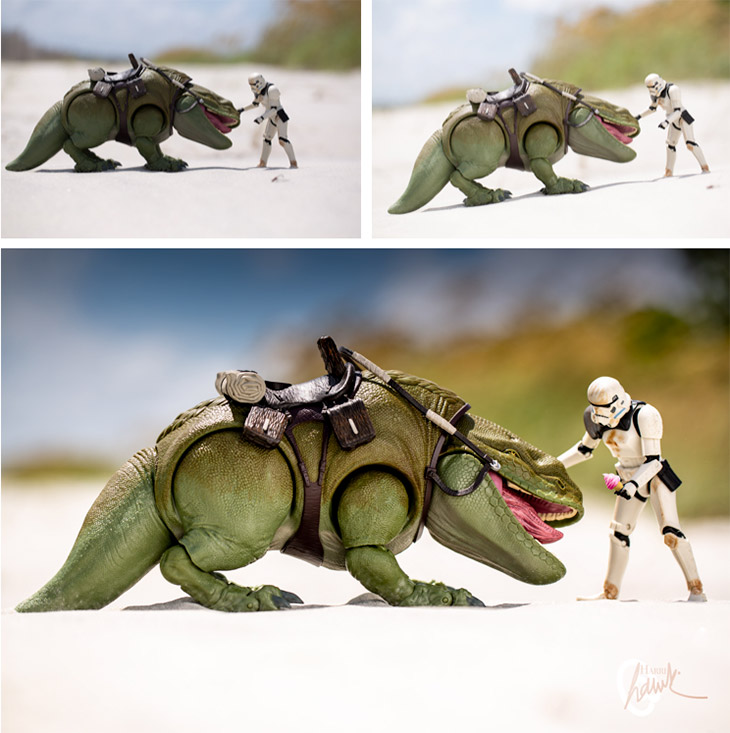
Case in point, below is a shot I did of a sand trooper giving an ice cream to his Dewback. The left shot has some dark tones and doesn’t look very nice, but I bounced some light to the scene and it looks a lot better. (these shots are right out of camera, the 3rd is the final shot).
And finally, diffused light. This when you use something to soften a light source ie: a curtain, sheet etc. It takes way the harsh light and dark shadows and gives a pleasing look to the pic.
In this shot below I used a diffusor (similar to a white sheet) to block out the harshness of the sun light. You can see it in the top left of the frame. It gives a very pleasant soft feel to the pic and evens out the exposure nicely.
And here is the final image after some Photoshop tweaking.
3 – Tethering the camera
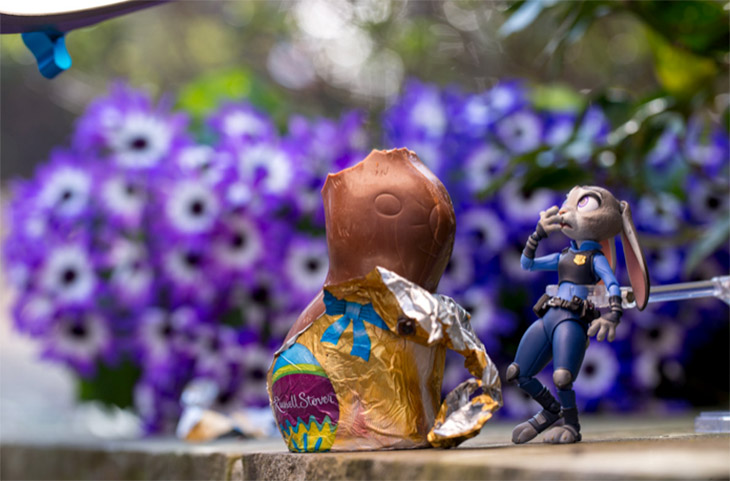
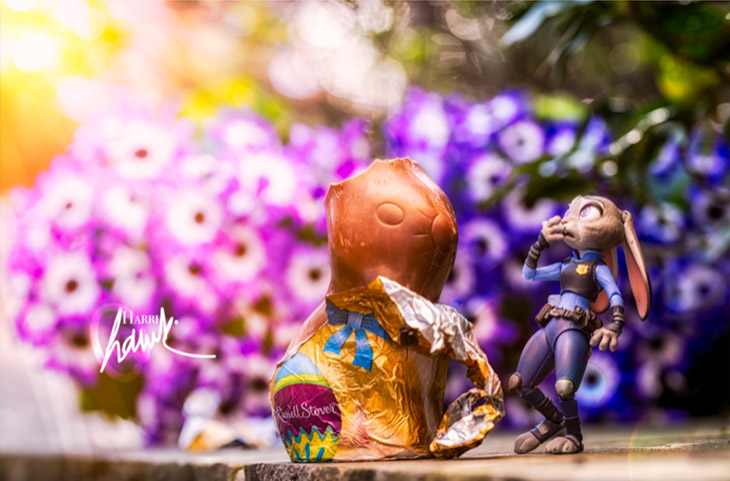
Now this is by no means an essential thing to do. Most toy photographers (amateur to pro) don’t use this method and I use it only when I think it will help my workflow. If you are shooting shots like the easter egg shot above or even some shots that you are going to composite together, you probably won’t need to tether your camera.
It’s an added luxury that I use when I want to see if a certain shot or element will fit into a certain scene. As I said in the BTS video, with some shots, you want to make sure you get the shot right because if you spend hours setting up a shot and think you have it and find when you get to the computer that it’s off, it’s a mission to redo, etc.
It is also a unique process that requires decent processing software and camera equip so it is an added bonus to have if you want but not a necessity.
4 – Use the same focal length for the shots in the scene
I learned this early on when I started taking toy pictures. If you don’t get a similar focal length when shooting the various objects for your composite, no matter how many photoshop skills and wizardry you may know, the picture will not look right. This is a tough one to explain so let me show you one of my earlier shots where I fell into the trap of using 2 different focal lengths.
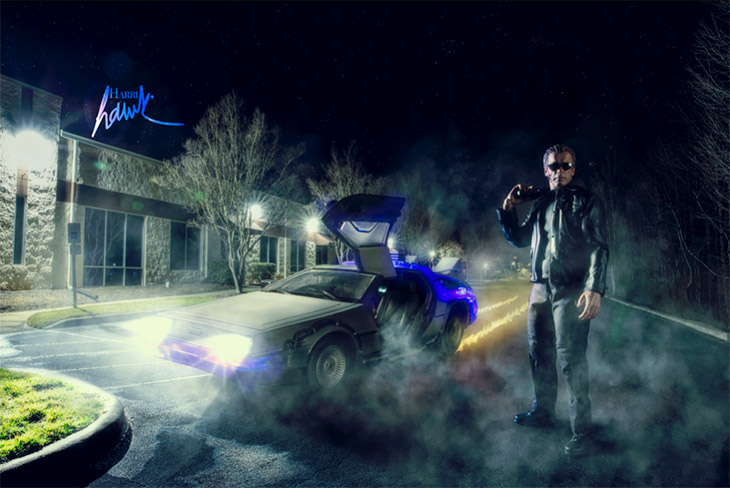
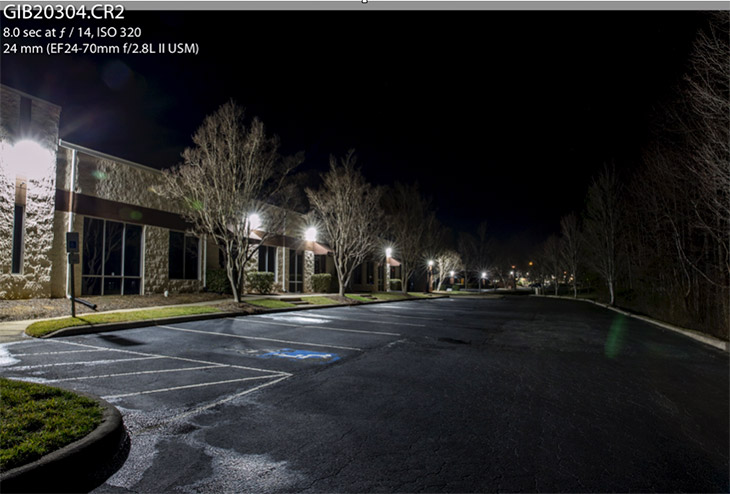
This was a shot I did a while ago called “I’ll be back.. to the future.” The final result came out really well but it took some trial and error to figure out the focal length issue. So if you look at the background shot, I shot that at a wide length, in this case 24mm. (top left information in the below shot)
I then shot the terminator and the Delorean but at different focal lengths 50mm and 68mm.

And when I put them together in the composite, the result just didn’t marry well, visually.
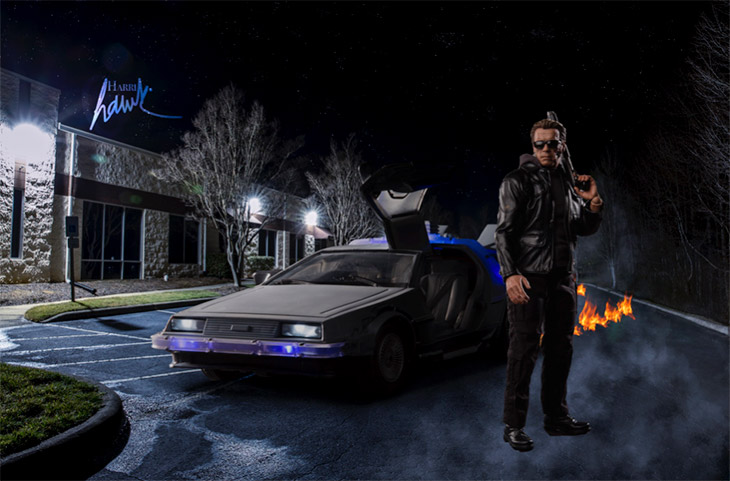
As you can see, the wide angle BG shot, shows the building on the left tapering down in size as you follow it to the back of the shot, where as the delorean, seems to stay the same size as you go to the back wheel. This is because different focal lengths have different effects on perspective. Wider lenses tend to distort and push the background further away, while longer lenses don’t distort and tend to bring the background closer to the front. Going back I took the shots again at a similar focal length, and that made the three elements work a lot better together and allowed me to pull off the illusion in a seamless picture.
Here is a wiki link about how the focal lengths change perspective if you are interested in finding out more.
5 – Choosing the right angle
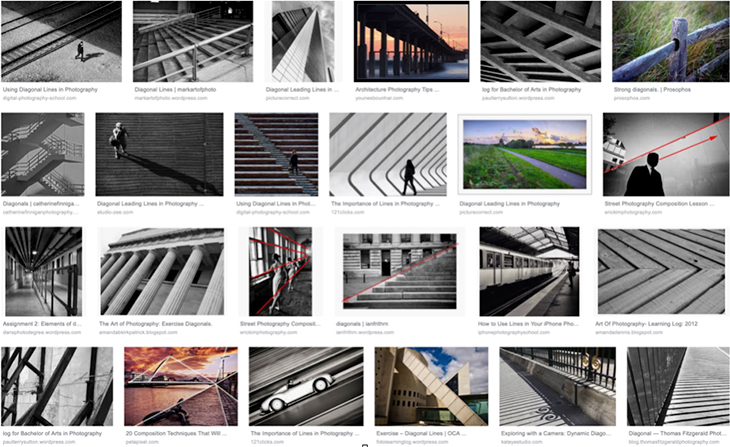
This comes down to preferential choice on the look you want in the shot. If you google “strong diagonals in photography”, you’ll see a lot of images that show you images that have very strong lines and angles in the shot.
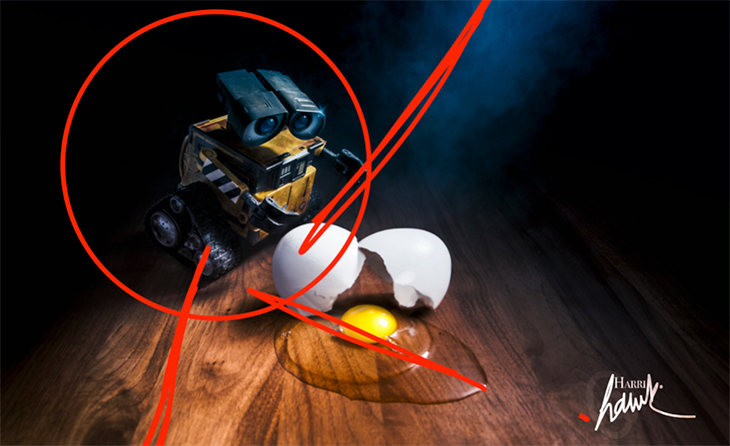
Having an eye for diagonals and shapes in a shot takes a lot time and practice to get good at. It is one of the things that makes an average photo into a good or great photo. Having objects that lead your eye into a shot or direct your attention to something specific in the shot is a great way to direct the viewer into how he or she looks at your photo. Let’s take these two shots I took of Wall•E as an example.
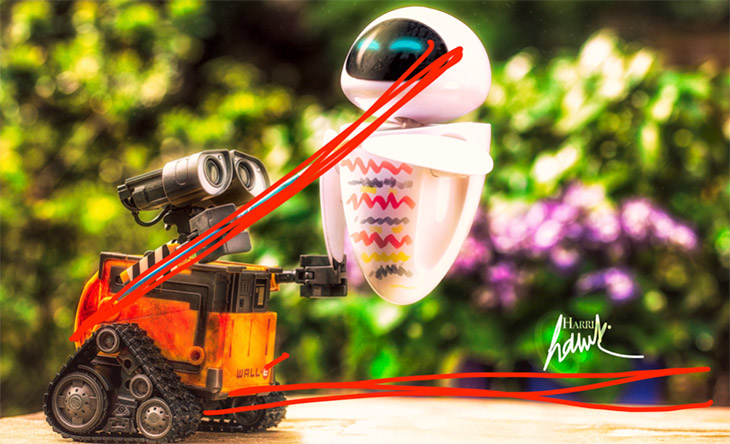
You can see the horizon line along the bottom and the angle of the paint brush in the image above directs the viewers gaze to Wall•E and below, the angle of the smoke, the direction of the grain of wood and the angle of the egg and shell, somehow lead your eye to Wall•e.
As I said though, this is a skill that is learnt over time and with practice.
Here is a link to a fun article about how to get more creative with camera angles.
A Few Toy Photography Final Thoughts
At the end of the day, this is all about having fun, to create wild and wonderful ideas and see if you can make them become a reality. As I mentioned in the BTS video, I hope I can achieve what I have in my mind… And for me, that’s the whole point of this, to try and push myself to do some creative fun stuff. The goal is to 1: Hone my photography and photoshop skills and 2: stretch my imagination. If I manage to make a few people smile along the way, thats the cherry on top!
Don’t be afraid to try things, ideas, and techniques. There is no right or wrong way of doing this! If you start your journey into toy photographs, I encourage you to send me a link to your work. I want to help everyone out. You can find me on Instagram @Harri.hawk and online on my Harri Hawk Website of Toy Photographs.


