Depression

Depression in independent scientists, filmmakers and artists is a very real thing. I know. I’ve experienced all of those careers and seen it first hand.

I’ve always thought that being depressed was a weakness to your character. I know my father explained it that way to me once. I don’t think that anymore. In fact, I think it may be more a symptom of the difficult career path – one full of uncertainty and one of comparison with others. Once I had the courage to explain what I was going through, I finally had everyone come out of the woodwork to explain they go through it too. That helped a lot.

I made a video this week about depression, to bring up the struggles I go through as an artist, filmmaker, guy, and dad. In some ways it’s for me – in others I just want to make sure anyone who is also feeling down or depressed, knows they aren’t alone. Link is in my description. 🙂 Sometimes #downdays sometimes #updays – #keepitinperspective

Over the last 5 years, I’ve had two 6-month periods where I was very down – I was depressed. I never went to see a doctor so I wasn’t diagnosed, but I realize that this action of not taking action was part of a bigger problem we all have in this filmmaking world. The more I started to tell people the more I realized it was everyone’s secret.

I was tired, unmotivated, stressed, anxious, couldn’t sleep and feeling worthless. I couldn’t get it to leave. Was it related to being a filmmaker and YouTuber in this modern world? I think so. I’d be willing to say that depression is higher in our field and I think we need to talk about it.

Here are my favorite videos that I’ve seen on the topic of depression all wrapped up into a nice little playlist. If you have others feel free to add them in the links below.

Also, do leave me your comments. Look, it’s important to let anyone that is going through it know they’re not alone. And, realize that it doesn’t mean you’re weak if you’re going through depression – anymore than having a broken leg means your weak. I might even see it as part of the struggle that anyone in our field will likely go through to get to where they want to be.

Thanks for watching and letting me share.

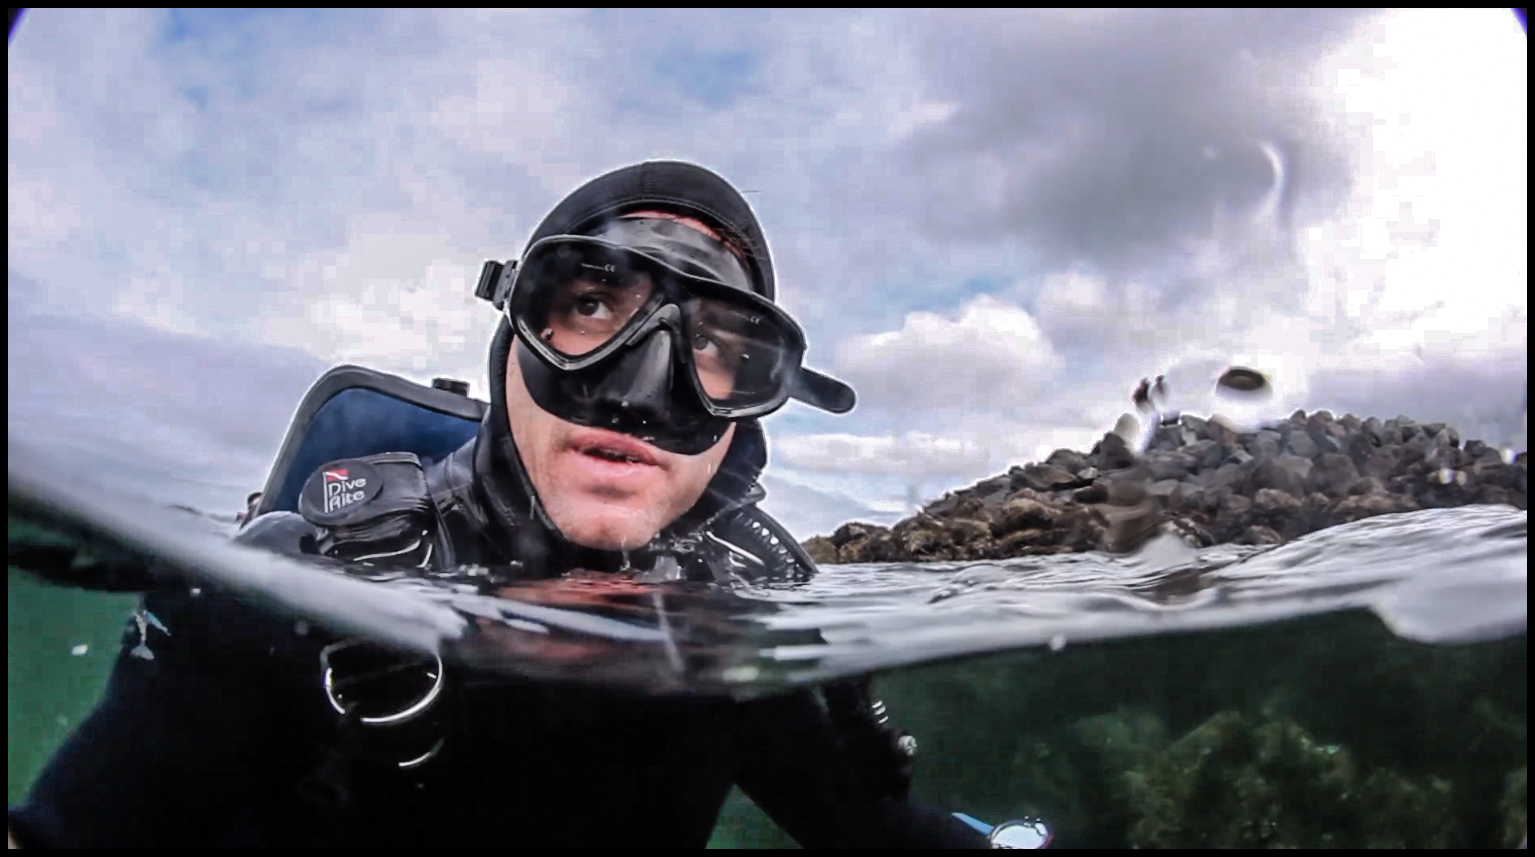
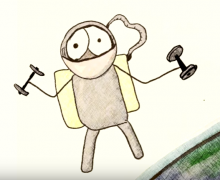
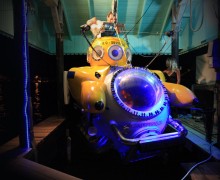
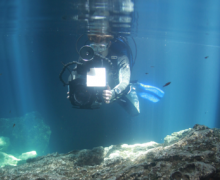
depression - scuba diver in cold water

The Important Role Played by Viruses in Human Evolution

Scientists have long pointed to the relationship between pathogens and evolution, but until very recently, they have been unable to pinpoint specific patterns which occur across different species. In a fascinating new study carried out by the Genetic Society of America, they have discovered (using big-data analysis) that viruses are responsible for an impressive 30 per cent of all protein adaptations since the human divergence with chimpanzees.

The study, published in the journal eLife and presented on 14th July at The Allied Genetics Conference, showed that the adaptive patterns caused by viruses are strong and very clear. Never before have viruses been shown to have such a powerful effect on how human beings have adapted. The researchers found that adaptations occurred three times as frequently in proteins which interacted with viruses, as in other proteins.

Thanks to the study, scientists can now identify which parts of the cell have successfully defeated viruses in the past. The differences in protein shape and composition in response to these threats, could help scientists find new ways to battle the most powerful viral threats currently faced by human beings. Previous research had focused only on individual proteins which are directly involved in the immune response.

When the body is faced with a virus, proteins throughout the whole body react; not only those involved with immunity. The researchers discovered that as much adaptation takes place outside the immune system, as within it. Viruses have affected us in every respect, affecting all parts of our cells. Proteins make a host of important cellular functions possible, so an analysis of tweaks and differences can give scientists vital clues as to how to face future threats. When pandemics and epidemics occur, populations must either adapt or risk becoming extinct and it is hoped that the observable changes in protein will help scientists new ways to help the body adapt.

The study helps scientists answer important questions, such as why species which are very similar have evolved different ways of fulfilling the same cellular function, such as cell membrane creation or DNA duplication. Scientists previously had no clue as to what evolutionary forces had provoked these similarities, and their results indicate that viruses hold vital secrets regarding the way different species have evolved.

The findings will have a great impact on the way researchers approach viral epidemics. Devastating viruses similar to HIV, for instance, have affected human beings and animals at many points in their long history. Seeing how cells have reacted to viruses of this type could help scientists glean a better understanding of how viruses work, and possibly lead to the discovery of how we can beat disease causing viruses for good, thus leading to greater health and a longer lifespan for humanity and other species.

Currently, viruses are taking countless lives, some of the most dangerous being the Marburg virus (which, like ebola, has a very high fatality rate), ebola (there are, thus far, five identified strains of the Ebola virus, which, like Marburg, has a fatality rate of 90 per cent), the Hantavirus (which actually comprises several types of virus and which can lead to lung disease, kidney failure and fever), some strains of bird flu, the Lass virus (whcich is transmitted by rodents), the Junin virus (which causes tissue inflammation), the Crima-Congo fever virus (transmitted by ticks and similar in its effects to Ebola and Margburg), the Machupo virus (which causes high fever and bleeding), the Kyasunur Forest Virus (which causes high fever, muscle pain and bleeding) and Dengue fever (passed on by a mosquito and boasting a very high fatality rate; Dengue is common in popular tourist destinations such as Thailand, India and the Philippines, affecting between 50 and 100 million people a year).

Thus far, viruses are treated by addressing specific symptoms and complications. For instance, with Ebola, the key is to provide fluids and keep electrolyte levels stable, to maintain oxygen levels and blood pressure, and to treat any infections that arise. For other viruses, researchers are working to discover vaccines which will keep them at bay. What would give scientists the upper hand by mimicking protein adaptations, however, is the ability to actually manipulate cell function, instead of merely responding to symptoms.

Article by Gemma Hunt

Liquid Nitrogen Experiments

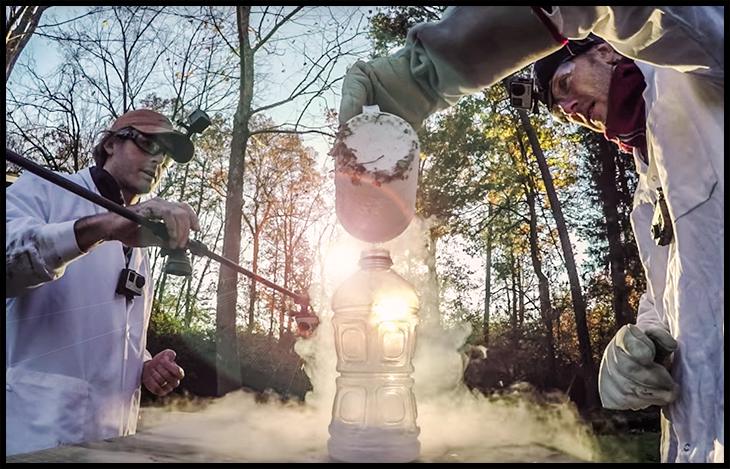
Liquid nitrogen is really great for getting kids excited about chemistry. Not only will everyone love you at the next birthday party, but you can use it to teach some basic chemistry in a cool way. Recently we did a video with GoPro where we showed three basic liquid nitrogen experiments. This article explains in a bit more detail how you can pull them off. But first, you should watch the video; if this doesn’t get you inspired to try it yourself, I don’t know what will.

Liquid Nitrogen Science

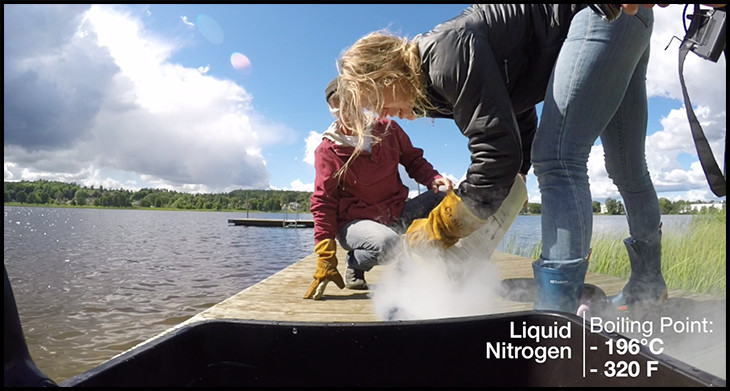
As the name implies, liquid nitrogen is nitrogen in liquid form. Nitrogen (in the form of N2) makes up most of the air we breath. It dissolves into our tissues; it is absorbed by plants; and is an essential element in the building blocks of our DNA. Most of the time it exists as N2. Ammonia and Ammonium are other common forms. Nitrogen as a gas can actually become a liquid under the right conditions—namely cold temperatures. We’re talking very cold. The boiling point for liquid Nitrogen is -196 degrees Celsius. To help us explain the basics better, we made this video:

3 Basic Liquid Nitrogen Experiments

Freezing and Smashing a Flower

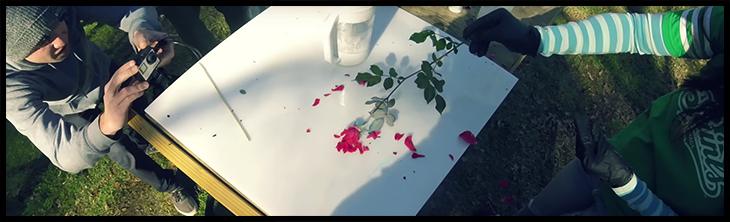
One of the first things people use to demonstrate the extreme cold of liquid nitrogen is freezing a flower. Not all flowers are the same, though. You want a flower with very thin petals. Roses work particularly well. However, you might notice that even in our experiment in the GoPro video, the inside petals still didn’t smash apart. They were insulated by the outside petals and thus didn’t break fully.

nitrogen flower smash

Exploding a Bottle

Warning: Be very careful with this! Make sure you have an adult around to perform all experiments and wear protective clothing and goggles. We’re not dealing with flammables, but the bottles are exploding, which can be very dangerous.

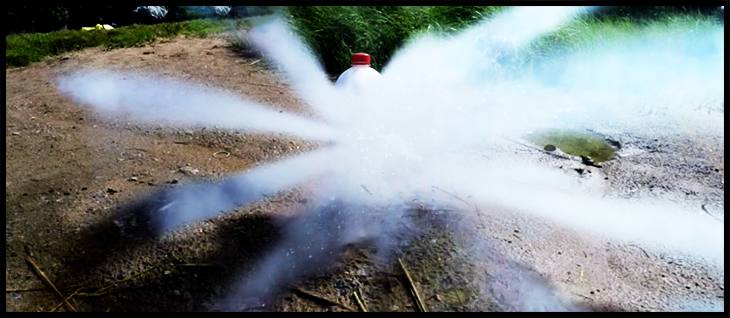
The Process: Fill about 10 percent of a small plastic bottle with liquid nitrogen. Put the cap on and then step back to a safe distance to watch it explode.

liquid Nitrogen 4

The Science: Because the boiling point of liquid nitrogen is -196 degrees Celsius, at room temperature the liquid instantly starts to change phase into a gas. The gas fills up more volume than the liquid and starts to increase the pressure inside the container. In fact the expansion rate is 1 to 696. That means one liter of liquid nitrogen will expand to fill 696 liters. Eventually the pressure is more than the plastic can handle, and the bottle explodes. Note that some plastic will explode earlier. We recommend the more rigid plastic containers as it gives you a bit more time to get to safety.

liquid nitrogen explodes bottle

For added fun in demonstrations you can put the plastic bottle inside a garbage can and fill it with ping pong balls, leaves, or other material that will fly into the air during the explosion. This makes for a spectacle.

liquid nitrogen experiments

Bottle Rocket

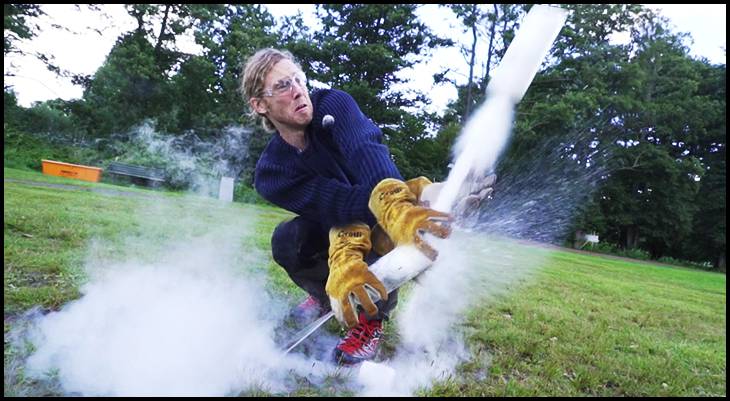
You can also use liquid nitrogen to create a very powerful bottle rocket. To do that you need to fill up a plastic bottle a third of the way with water. Then, pour in another 10 percent of liquid nitrogen. With a glove on, put your thumb lightly over the top and tip it upside down. This prevents all the water from pouring out. As you do this, the liquid nitrogen will quickly expand, creating an intense bottle rocket.

Bottle Rocket liquid nitrogen experiment

Where do you get liquid nitrogen?

For the longest time, we had no idea where to get liquid nitrogen. The truth is that it’s really easy to get. Just about every gas dealer in town has it, and it’s really cheap – about 5 bucks a liter. The real trick is that you’re going to have to get a container that will hold the liquid nitrogen. They won’t just pour it into any container. This is where it can get somewhat expensive. We found one here on Amazon for 230 bucks. It’s the only major investment you’ll have to make. After that, you’re good to go. Grant Thompson gave a nice overview of it in this short video.

The Science of Breadmaking

People have been making bread for approximately 30,000 years—almost since we were still cavemen! Even though we might not have understood what was happening when we first started making bread, there’s actually a ton of science behind how it works.

In this home experiment, we’ll bake a very simple (but crazy delicious!) loaf of bread using just four ingredients: water, flour, yeast, and salt. Breadmaking involves a lot of irreversible chemistry, so make sure you read through the recipe first to get an idea of what you’ll be doing at each step. Then, at the end, we’ll talk about the science of what happened along the way.

Materials

  • Plastic wrap
  • Thermometer
  • Metric scale
  • Cooking spray
  • Large spoon (the stiffer, the better)
  • Large bowl
  • A clean counter top
  • 1-2 cookie sheets
  • Shallow metal baking pan (at least 1″ deep)
  • 1-2 pieces of parchment, one per cookie sheet
  • Olive oil
  • 567 g bread flour
  • 11 g salt
  • 3.5 g instant yeast
  • 385 g water (room temperature), plus an extra cup or so of hot water.

Procedure

  1. Add all the dry ingredients (flour, salt, and yeast) in the large bowl and stir to combine.
  2. Pour 385 g of room-temperature water in and mix until everything is well-combined. The dough will be a bit sticky. If it’s too dry, add in a small amount of room-temperature water; if it’s too wet, add in some more flour.
  3. Pour a couple tablespoons of olive oil directly on the clean counter top and spread it around with your hands. It’ll keep the wet dough from sticking to your fingers and the countertop. Dump the dough out onto the oiled counter, and spoon out any remaining dough from the bowl.
  4. Take a small piece of dough between your fingers and try to stretch it out. What do you notice about the dough? Is it stretchy, or is it chunky and easily pulled apart?
  5. Place the dough bit back with the main dough pile. Loosely grab the side closest to you, pull and stretch it towards you, and fold it back onto itself—kind of like folding a towel in half. Repeat with the opposite side. Do this about 10-15 times. To see a video of how the stretch-and-fold method works, click here.
  6. Spray the large bowl liberally with cooking spray, and place it upside-down over the dough pile. This will keep the dough from drying out. Let the dough sit for 20 minutes.
  7. Do three more rounds of stretch-and-folds, waiting 20 minutes in between each round.
  8. After the last stretch-and-fold, place the dough back in the bowl and cover with a sheet of plastic wrap sprayed with cooking spray. Let the dough sit until it’s doubled in size. This should take around an hour to 90 minutes, depending on how warm it is in your home.
  9. Take another small piece of dough between your fingers and stretch it out again. What do you notice this time? Is it still chunky, or is it stretchier this time?
  10. Shape the loaves: dust a clean section of countertop with flour this time, and divide the dough into two or three even pieces. Gently shape each piece into a rough rectangle shape (it doesn’t have to be perfect), and fold the edges into the middle, just as if you’re about to make a paper airplane. Gently tamp down the edges in the middle of the dough with your fingers. Fold the dough in half again, and tamp down the edges. To see how a video of how the shaping works, click here.
  11. Pan the loaves: place the dough seam-side down on a sheet of parchment paper sprayed with cooking oil. It should resemble a log shape. Repeat with the remaining pieces of dough and place on the parchment sheet. Give each loaf plenty of room to rise—don’t put more than two loaves on one parchment sheet.
  12. Let the loaves rise: cover each loaf with another sheet of plastic wrap sprayed with cooking spray. Let the loaves rise until one and a half times their size. It should take around an hour, again depending on how warm your home is. Watch them carefully–you don’t want them to get too big or they will deflate in the oven!
  13. When the loaves have almost reached their final size, put the empty metal baking pan in your oven and preheat it to 500 degrees Fahrenheit. Let the pan heat up with the oven.
  14. Score the loaves: take your sharpest knife, and gently slice two diagonal shallow lines across the top of the loaf.
  15. Place the loaves – parchment paper and all – on cookie sheets (don’t worry – the parchment won’t burn). Get a cup or so of hot water ready.
  16. Open the oven door. Very carefully, pour the hot water into the empty metal baking pan. This will create a lot of sizzling and steam; don’t be alarmed—that’s why you’re doing it. Slide in the cookie sheet with the loaves of bread, and close the door. If you have two cookie sheets with bread on them, you may have to bake one at a time depending on how many racks are in your oven.
  17. After five minutes, reduce the temperature of the oven to 450 degrees Fahrenheit.
  18. After ten minutes, rotate the loaves around so they bake evenly.
  19. After twenty minutes, check the loaves again. Remove from oven when they’ve reached a deep golden brown color.
  20. If you have any more loaves to bake, turn the heat back up to 500 degrees Fahrenheit and repeat the baking process from step 16 for these loaves as well. Remember to add in fresh water to the metal baking pan; you can pour it on top of any remaining water if there is still some left.
  21. Let loaves sit for ten minutes to cool down before you slice them.
  22. Enjoy!

What happens when you mix the ingredients together?

Although there are only four ingredients that you use in the mix, there are actually a ton of unseen chemicals that you’re working with. Flour is more than just a white powder: it contains many proteins, mainly in the form of glutenin and gliadin. It also contains a lot of carbohydrates, in the form of simple sugars like glucose, or in the form of longer chains of sugars, called starches.

Normally, the chemicals stay in a non-reactive form as long as they’re dry. But when you add water, something changes: suddenly, they start combining and reacting to form thousands of entirely new chemicals as well! The water reactivates the yeast so they start chewing away at starches like little Pac-men and spitting out other sugars, carbon dioxide, and alcohols. Water also allows the glutenin and gliadin to combine to form a network of stretchy super-protein: gluten (here’s a cool video actually showing how gluten is formed).

How does the bread rise?

When you did the stretch-and-folds, you were actually organizing the gluten molecules so that they created a sort of molecular net. Then, when they yeast started producing carbon dioxide, it actually inflated the “net.” It works the exact same way as when you blow up a pool toy or inflate a hot-air balloon!

What does baking do?

Baking serves multiple purposes. The first stages of baking allow the bread to rise even further in the oven—something that bakers call “oven spring.” What’s actually happening is that the yeast is heating up, metabolizing faster, and increasing their production of carbon dioxide, so the loaf rises higher. By the time the loaf has reached 140 degrees Fahrenheit, though, the yeast cells are all dead, but the loaf continues to rise: this time, from simple heat expansion of carbon dioxide gases, plus water vapor and evaporating alcohols left over from the yeast’s glory days.

Finally, when the loaf reaches about 200 degrees Fahrenheit, enough water is drawn out of the loaf and the final poofed-up structure of the bread hardens into its final shape. If the bread is heated much beyond this point, it begins to burn.

Why do we bake with steam?

When you made the oven steamy, it actually allowed for even more physical changes to happen. The steam kept the crust of the bread soft and pliable, so that it could rise even further and create an airier bread. Otherwise, the crust would have dried out too soon, and it would have stopped rising.

Additionally, the steam allowed for more chemical changes to happen. Water transmits heat better than air alone, and so it allowed the bread to bake more evenly. Because of the better heat transfer, it also allowed a unique phenomenon in cooking to occur: Maillard reactions. These are special bonds that form between proteins and sugars, and they create hundreds of super-flavorful new molecules. It’s the same thing that gives a seared steak its great flavor and the bread crust its nice golden-brown color.

There you have it! Even though there are a lot of complex scientific processes going on, the end result is one thing: a delicious piece of chemistry we call bread. If you’re interested in learning even more about some of the processes going on behind the scenes of breadmaking, check out Serious Eat’s Breadmaking 101 guide. Bon appetit!

E-Cigarettes Don’t Actually Help Smokers Quit, Say Scientists

Electronic cigarettes are a popular choice for those seeking to quit smoking and clearly, there are many people who do wish to leave this costly habit behind. According to the Centers for Disease Control and Prevention, in 2014, around 17 out of every 100 adults in the United States smoked cigarettes, amounting to around 40 million smokers in total. Until the advent of e-cigarettes, most people wishing to quit opted for either behavioral therapy or nicotine patches/gum, which helps gradually reduce the amount of nicotine a smoker needs, until they no longer need to smoke at all. Of course, quitting is quite a challenge for most smokers, because sometimes, nicotine is not the problem; rather, the psychological dependency on cigarettes means that therapy can be useful when it comes to channelling stress in a positive manner.

E-cigarettes (battery powered devices that heat nicotine and other flavors to deliver a vapor which is inhaled) held new promise when they appeared on the market a few years back. Those seeking to quit are attracted by the possibility of purchasing low-nicotine refills for their e-cigs. The idea is to gradually purchase less and less nicotine until one is not smoking at all. Some quitters immediately replace nicotine with herbal or flavoured fillers (which boast attracted flavours such as strawberry cheesecake, peppermint or chocolate).

Research has now shown, however, that e-cigarettes are not actually helping smokers quit. Researchers at the University of California – San Francisco conducted a systemic review and meta analysis of existing research, finding that adults who ‘vape’ (i.e. use electronic cigarettes) are actually 28 per cent less likely to quit than those who do not use them. The researchers therefore recommended that those who are serious about quitting not turn to e-cigarettes, until there is evidence that this product can actually help them kick the habit.  They came to their conclusions after reviewing 38 studies assessing the link between e-cigarettes and smoking cessation. Their research accounted for many variables, including the level of addiction, demographics and previous attempts to quit.  They noted that e-cigarette vaping may be less dangerous than puffing on conventional cigarettes, but they will not help smokers quit.

The researchers noted that one important issue which needed to be addressed was the freedom with which e-cigarettes could be purchased and used. If the government were to include this product in smoke-free laws and voluntary smoke-free policies, it could decrease their reputation for being a smoking cessation aid.

Other researchers have also expressed their doubts regarding the safety of electronic cigarettes. According to a review published in Contemporary Reviews in Cardiovascular Medicine, the health risks posed by e-cigarettes may be greater than originally thought. First of all, ‘vaping’ brings more nicotine directly into the bloodstream than nicotine patches. Secondly, e-cigarettes have been proven to bring the same unacceptably high levels of microscopic particles into the lungs as tobacco cigarettes, and they also bring a heavier load of toxic metals (such as lead, tin and chromium) into the lungs than conventional cigarettes do. Finally, many e-cigarette products are made in China, where a lack of control means that different brands can deliver nicotine at different levels. Therefore, experts suggest that those who wish to quit stick to tried-and-tested methods such as nicotine patches, which deliver less nicotine in reliable amounts.

Research also shows that exercises aimed at strengthening self-control, such as mindfulness meditation, can also help smokers control their desires. Neuro-imaging studies show that smokers have less activity in the parts of the brain associated with self-control. Therefore, scientists postulate that targeting these neurobiological circuits might be a more successful way to curb addiction. One study in particular showed that 10 meditation sessions (lasting half an hour per session) resulted in a 60 per cent reduction in smoking for over two weeks after the study period. The authors of the study noted that participants altered their smoking behaviour without actually being aware of it. Other research has shown that integrative mind-body control sessions led to reduced levels of stress hormone, cortisol. The findings are vital because stress is linked to a higher relapse rate. Additional studies have shown changes in the brain (greater connections between regions linked to self-control) after body-mind training.

Guest Article by: Gemma Billington (through Rob) – Email contact: gemma@arialblack.org

Whale Poo and You

Closely encounter a semi-liquid cowpat and you and your wet shoe know all about it.  So just imagine emerging from a frolic in the surf, slicked in the warm, crustacean-based slurry that is whale feces. Why? Because afterwards you’ll feel incredibly happy that hasn’t happened to you yet. Also, because it will turn your thoughts toward whale waste, a substance that has done you more favors than you know.

https://www.youtube.com/watch?v=jil6Z3pQDP4

The boring reality is you are extremely unlikely to ever physically connect with whale poo. That’s because it’s runny, which means it disperses quickly once released, and because it’s typically released far offshore. It is in fact whale poo’s liquidity and tendency to spread apart as it rises to the ocean’s surface and its richness in iron that make it so important to ocean ecosystems and to you.

Iron-poor Oceans and Anaemic Phytoplankton

Iron, you may not know, is in short supply in some of the world’s oceans, including the enormous Antarctica-encircling Southern Ocean, and this has big consequences for the tiny floating sea plants called phytoplankton that live in them. Where sea iron levels are too low phytoplankton just can’t grow. And this means they’re not around to photosynthesize, which their worldwide population has traditionally done on a larger scale than all the planet’s rainforests put together!

Phytoplankton: The Greatest Photosynthesizers

Naturally, when less carbon dioxide is being absorbed from the atmosphere by little green specs in the sea, more of it is hanging around and helping things heat up, in a global warming kind of way. So, it’s in the interest of most organisms on Earth for phytoplankton to be plentiful. And it’s only within the last few years that scientists have discovered that iron-rich whale poo plays a huge role in feeding phytoplankton.

Whale Waste as Phytoplankton Fertilizer

whale-poo-2

Of course, the iron in whale feces has to come from somewhere, and that somewhere is very often krill. During the feeding season in the Southern Ocean, adult blue whales eat up to two tons of krill every day, and most of the iron they consume in doing so gets released in slurry-faeces-form near the ocean’s surface. That same slurry rises right to the top—where iron-hungry phytoplankton like to grow.

So, to recap: more whale poo in the Southern Ocean means more phytoplankton, more removal of carbon dioxide from the air and importantly, less warming of the globe. Unfortunately, much less whale poo is what’s out there now, due to the large decline in whale numbers. Fixing this situation will require stopping whale hunting and restoring whale populations, so their poo can keep providing a critical ecological service to microscopic sea algae and innumerable other living things, including you.

Facts About Chernobyl

The Chernobyl meltdown and explosion is by far the worst nuclear disaster the world has ever seen. If you’re over 30, you’ve heard of the famous soviet disaster of Chernobyl. If you haven’t, here is a recap.

On April 26th, 1986 about about 1:23 am, reactor #4 overheated and exploded. That released a radioactive cloud that ended up killing three people immediately and several thousand directly from radiation. The exact number is still a bit of a debate. It also caused untold troubles for much of Europe. The meltdown created a fear of nuclear power that still exists today, but many of the more interesting and integral facts have not been widely publicized. Here are ten things (broken up into two videos) I find really interesting.

1 – Sweden actually sent the first alert

You have to remember 1986 was still during the cold war. The Soviet Union didn’t tell the west what was happening right when it happened. In fact, it took them days to tell their own people to evacuate nearby areas. After the explosion, the first westerners to know were Swedish Nuclear plant workers whose sensor’s read high levels of radiation. Sweden sent out the first alert that something was happening. It wasn’t until the world pointed their satellites towards what is now northern Ukraine, that we realized what had happened.

2 – Radioactive Iodine is the first Killer

After the blast, the real killers come in the form of radioactive isotopes- transmitted by dust particles floating in the air and falling to the ground. Radioactive iodine is one of the most dangerous because it can quickly be accumulated in the thyroid gland, leading to thyroid cancer and death.

If you have enough natural iodine stored in your thyroid, then radioactive iodine won’t accumulate. But if people are starved of natural iodine (like those who live in areas of iodine poor soils) they are particularly at risk . This is why relief efforts begin by giving iodine pills to people in affected areas – trying to prevent accumulation of radioactive iodine in their bodies. Fortunately Iodine-131 has a half-life of only 8 days, so the threat does not pose a long-term problem.

3 – Strontium-90 and Cesium-137 are the long term killers

Probably the most serious threat is cesium-137 and strontium-90. They have half lives of 30 and 28 years respectively.  The real threat with these two is in their ingestion. Strontium-90 follows calcium chemistry, so that it is readily incorporated into the bones and teeth – particularly of young children who have received milk from cows consuming contaminated forage. Cesium-137 parallels potassium chemistry, so it is readily taken into the blood and may be incorporated into tissues of people and animals. All of this causes serious health issues and death at various rates.

The relatively long half-life of both these isotopes still makes them a huge problem today. Only about half of the radioactive material has decayed right now, hence an exclusion zone for safety.

4 – Radiation in Chernobyl is relative

Radiation comes in many forms. In science, radiation falls on a spectrum of electromagnetic radiation. Long wavelengths are things like radio waves. Light is somewhere in the middle. Small lengths like alpha, beta and gamma rays are emitted from radioactive isotopes. They can penetrate your cells and destroy your DNA. Of course, these rays exist all around us all the time. It’s the amount that is the issue.

Surprisingly, even very close to the main reactor, your levels of radiation can be very low. In fact, standing in the parking lot looking at the melted down reactor gave us dosimeter readings similar to flying high in an airplane over the poles. For a whole video just about the relative nature of radiation, I suggest this video.

CHERNOBYL REACTOR 4

5 – Nobody lives in Chernobyl

There are lots of people that live in Chernobyl at different times. The ghost town that you see in most pictures is the feeder city of Pripyat. In theory, nobody lives there anymore. However, the town of Chernobyl, which is just over 10km from the reactor, has residents that cycle in and out on regular intervals. Also, in the Life After: Chernobyl documentary that we did, we found more people that live “unofficially” in the area – like this 90 year old guy.

6 – You can still die from radiation in Chernobyl

If you already knew that radiation wasn’t too bad in Chernobyl, you might think it’s not bad. Truth be told, there are some pretty hot spots. These hot spots are usually found in cracks in and around Pripyat where the radioactive particles accumulated. They’re also in areas of the red forest where a lot of the main fallout happened as was buried. On three occasions, my geiger counter went off the charts. Essentially, our safety personnel told me that I could probably stand about 4 hours laying in that spot before succumbing to the dangerous radiation and then slowly dying because of it. It was more time than I thought it would take, but it’s nothing to mess around with.

7 – The animals are radioactive but doing well

This is a relative statement – obviously. The radiation causes odd growths and birth defects in the animals there. We as humans wouldn’t stand for even a 1% rate of abnormality in our own species. Yet, for the animals here, this seems a small price to pay for living a place that is relatively free of humans. The sad the truth is that the human presence is probably the biggest problem for most animals to survive.

8 – The Wormwood star prophesy

In the book of revelations, an angel predicted a giant star, a ‘wormwood’ star would bring on doomsday (more or less, that’s the gist). Well, guess what the name for the wormwood plant is in this region – it’s none other than “chernobyl” , whose namesake later became the name of the town that fed the power plant. Seem ominous. Yes, it is. Finding the wormwood plants there were one of my main goals.

the wormwood star prophesy

9 – You can actually visit Chernobyl

While we were the first crew with Animal Planet to be given access to this wide array of the exclusion zone to study and film within, you can actually visit it as a tourist or go as a scientist. I didn’t pass any American tourists, but there were one or two van-loads of Polish visitors coming to see it. Clearly there are ways to see it if you want to be adventurous. From my experience, I’d highly recommend it. It will open your eyes to even more truths about nuclear energy. Just be careful. I don’t think the guides generally let you know about the potential dangers. Remember, radiation is a silent, odorless, tasteless, invisible killer that kills you down the road.

10 – Chernobyl is an amazing experiment

It’s hard for most people to see any silver lining in a nuclear disaster. However, while you’d never be able to subject animals or humans to these levels of radiation in a designed experiment, you can study the effects of the animals here and compare them to those outside the zone.  This was a large part of the topics we discussed in the Chernobyl documentary. I won’t spoil it all though. Go check it out and see some of what we did.

11 – The Radioactive Wolves of Chernobyl is a Myth

I had to add one more to my list. I spent two weeks in the zone working with wolf biologist  Dr. Maryna Shkvyria. She was so helpful in making the end documentary a success. Much of her research dealt with wolves that attack people. She found over a dozen instances of attacks on humans, but almost all of them were tied to cases of rabies. We never mentioned it in our doc, and so I felt the need to make a follow up here, just for Maryna, if nothing else.

The conclusion: The wolves in Chernobyl are not more dangerous because of radiation!

Find More Fun Facts about Chernobyl

If you want to find out more, I suggest buying the book about the natural history of Chernobyl. The Wormwood Forest was my favorite book.  Also, watch the documentary that I co-hosted with Mary Ann Ochota premiering tonight at 10pm EST on Animal Planet.

Earth Day Videos

We live on a vast and ever-changing wonderball! To celebrate our favorite planet (Earth, obvi), here is a collection of five Earth Day-inspired videos to brighten your day and encourage you to think: How can I help protect our world?

earth day videos

1. Science of Glowing Mushrooms

In a Singapore rainforest, Jonas and Louise search for bioluminescent mushrooms. What makes them glow? We understand the exciting chemistry here, but the benefit for mushrooms to glow in the dark is still largely a mystery. This video is from the series Tropical Molecules produced by Molecular Frontiers and Untamed Science, in collaboration with Nanyang Technological University.

2. Follow the Frog

Who gets the green frog seal? The what now? Let me explain. Only farms that meet rigorous sustainability criteria earn the right to claim the Rainforest Alliance Certified seal. The criteria address the three pillars of sustainability—environmental protection, social equity, and economic viability— and farms are evaluated by independent, third-party auditors. Learn more about Rainforest Alliance Certification and its impacts here.

3. The History of Earth Day

Did you know that Earth Day is the largest secular holiday in the world? It’s true. But have you ever thought about the significant history of this day. Knowing a bit about how it all started will help you put it in perspective this April 22.

4. Why Protect the Amazon?

At Untamed Science, we’re biologists at heart. We make videos that ask “Why protect large wild animals?” or “Why save the planet?” and “Why conserve water?” But we also tackle the question, “Why should we care?” Is it for the sake of natural beauty? Or economic value? In this short about the Amazon, we explore what we think is the most important reason to care: it represents the last stand of something truly wild. What do you think?
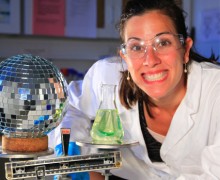



5. Natural Phenomena

Finally, here is just some gorgeous imagery. Shots like this never get old, and you could spend your whole life in awe of moments like this all over our planet. Enjoy.

More Earth Day Videos

Subscribe to the following YouTube channels for more of our videos:

Also, we invite you to learn more about our dedicated team of scientists and filmmakers who bring you this content every week.

earth day videos

How to Make Your Own Ice Cream

The Cool Science of Ice Cream Explained

Ice cream may seem like just a simple treat that kids and adults alike can enjoy, but did you know there are some pretty serious science principles behind it? To unlock the mysteries of how these principles work, we’ll run an experiment where we make our very own ice cream. All you need is a few simple ingredients and some muscle (hey, you need to work off those ice cream calories anyways, right?). Then sit back and enjoy your treat, and we’ll go over how you just exploited the laws of physics to create your sweet concoction.

Materials

  • Mittens or gloves
  • 2 quart-sized plastic zip bags
  • 2 gallon-sized plastic zip bags
  • Ice cubes (about enough to fill up one gallon-sized bag)
  • 2 cups half and half
  • 1 cup rock salt (also sold as “ice cream salt”)
  • 1 teaspoon vanilla extract
  • 4 tablespoons sugar
  • Thermometer

icecream-homemade materials

Procedure

To make this a proper experiment, we’re going to run two tests: an experimental trial and a control trial. This lets us see the effect of leaving out just one ingredient – salt. If you have a friend working with you, you can do both trials at once, otherwise do the experimental trial first.

Follow the instructions below:

1. In one quart-sized bag, add the following three ingredients:

1 cup half-and-half
½ teaspoon vanilla
2 tablespoons sugar

2. Leave a small amount of air in the quart-sized bag, and zip it shut. Roll it around in your hands a bit to mix the ingredients together.
3. In one gallon-sized bag, add enough ice cubes to fill it up about halfway. Add ½ cup rock salt – this is the experimental trial.
4. Place the sealed quart-sized bag in the gallon-sized bag of ice. Leave a small amount of air in the gallon-sized bag, and then zip this bag shut as well.
5. Put on your mittens or gloves (ice is cold!). Roll, knead, and agitate the bag for about 5 minutes. Stop and check the consistency of the cream mixture: is it getting thicker? Seal the bag back up again and re-check the consistency every minute or two until it’s solid. Congratulations, you just made ice cream!
6. Stick the thermometer in the salty ice mixture and record the temperature.
7. Now re-do steps one through 6 with the second set of bags, but this time, don’t add the salt in – just use naked ice cubes for now. This is the control bag, and we’ll use it to see what happens without the salt.
8. After 10 minutes of agitation, if it’s not yet solid, take the temperature again. Is it any different? Go ahead and add the salt in with the ice cubes and continue agitating. If it hasn’t turned solid by now, it’s not going to, and we don’t want the cream to go to waste

Good job! You just made two cups of homemade ice cream. Pull the quart-sized bags out and rinse them off (with cold water of course!). Cut a hole in the corner of the bag, squeeze some ice cream out into a bowl, and let’s review what just happened.

icecream-homemade-4

Why do you need salt?

Unless you were using ice cubes pulled from the heart of Antarctica during the depths of winter, you should have noticed that ice alone didn’t freeze the cream mixture unless you added the salt. Why is that?

The answer has to do with a physics concept called the freezing point – the temperature at which a liquid will freeze. For pure water, this happens to be 32°F. Even at this temperature though, if you were to look at it on a molecular level, you’d see something odd: the molecules, despite looking solid at a macro level, are actually moving somewhat in the ice (it is not until absolute zero that molecules cease to move completely). Around 32°F, hydrogen bonds between water molecules in the ice crystal are constantly forming and breaking (thus going from liquid to solid form), even though the majority of the molecules are still bonded together to create a solid piece of ice.

When you add in the salt, there are just enough liquid water molecules to dissolve a few salt molecules. These salt molecules physically get in the way of the water molecules and prevent them from freezing and crystallizing again, just like how you can easily get separated from your friends in a thick crowd. As a result, more and more frozen water molecules convert to liquid water molecules. You saw this in the ice bag when salt was added – there was a lot more water in this bag than the pure ice bag alone.

The net effect of this whole process is that it’s now a lot harder for the water molecules to form the crystal structure of the ice. Instead of freezing at 32°F, the water freezes at a lower temperature, depending on how much salt is added. This is the same reason why road maintenance crews and homeowners spread salt on roads and sidewalks in the winter – it melts the snow and ice, but only down to a certain point (warning: road crews use an inedible type of salt; don’t lick the pavement).

So far we’ve ended up with salty, icy water, but how does it actually get cold? Well, this is due to a phenomena called phase transition. When matter changes states, such as going from solid to liquid or back, energy is required or released. For example, to break the hydrogen bonds in the crystal structure of ice, which happens when ice melts, energy is needed. This energy is taken from the surrounding heat, and that surrounding gets colder! So, the salty ice mixture (where the salt is making the ice melt) literally draws energy in the form of heat out of the cream, making the cream cold enough to freeze and literally form ice cream.

So, the next time you’re white-knuckle driving through a winter storm on salted roads, just think of how those same scientific principles are used to make ice cream waiting for you at home!

icecream-homemade-2

Special thanks to chemist Louise Fornander for double checking our science in this experiment.

LIVE G+ Hangout! Untamed Science

Today we’re doing a LIVE Google Hangout with Misha Leong, Michelle Trautwein and myself talking to classrooms about the very cool bugs of the world video series that we’re doing! If you managed to click on the link. I’m really glad you’re here! We go live Monday September 21st at 1pm EST. I hope this link works for you. Looking forward to answering any questions you have. If you have a specific question during the broadcast, send me a tweet at @untamedscience.

WATCH OUR BUG VIDEOS: