Complete Guide to Sending a GoPro / Weather Balloon to Space
How to Send a GoPro to Space With a Weather Balloon
This is everything you need to know to send GoPros (or any payload, really) to space! Let’s start with the overview video.
OVERVIEW
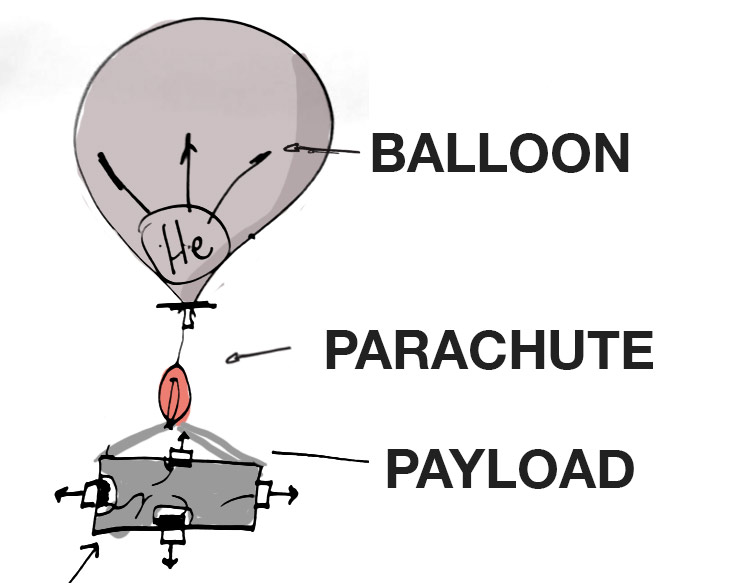
To make this happen you’ll really need to concentrate on five things. The Prep. The Payload. The Balloon and Parachute. The Launch. The Recovery. Each has it’s challenges, but don’t worry, we’ll walk you through each step. To make it simple you’ll have to.
Your Tasks
- Prep: Acquire what is needed (links to where I bought everything within the article)
- Payload: Prepare the package (the payload is just a word for the stuff you are sending up.)
- Balloon and Parachute: I’ll show you just what you need
- Launch: There is some math involved, but have no fear, the charts are here.
- Recovery: Retrieving the balloon is a giant goose-chase! Exciting!
Prep: Things You Will Need
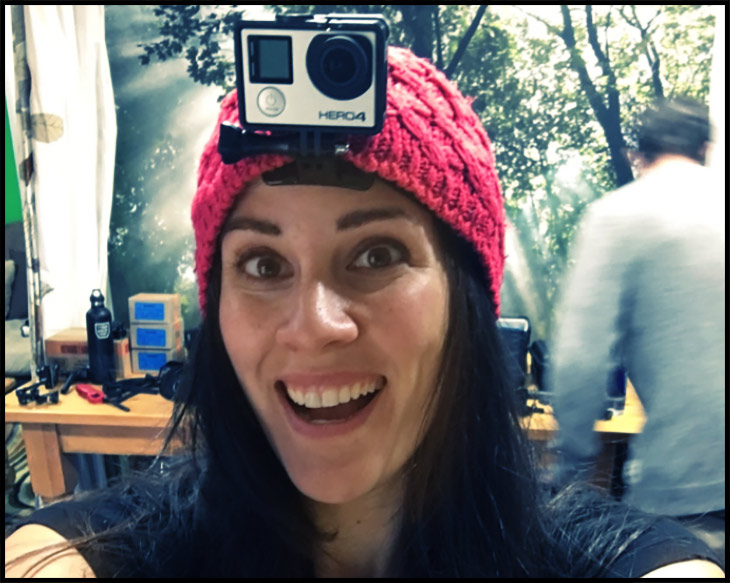
- Payload: We used 5 GoPros to send up with extra battery packs (this is what we did, so I’m starting here – exclude as needed)
- Something to mount them on in desired configuration – styrofoam cooler, adhesive, camera mounts, 3M stickies, plexiglass, foam
- Weather Balloon – 3, 300g balloons, 80,000ft, 8FT Diameter, 12’4” burst
- GPS tracking device – Spot 3
- Parachute – 6foot
- Something cool to put in the frame? Ultimately we attached a ruler and a photo of us, but an altimeter could also be cool.
- Hand-warmers if you want to extend the life of the cameras. (they do add weight to the payload though).
- Duct tape (do not use metal tape)
- Digital scale (for accuracy weighing payload)
- Helium Cylinder / at Party City it is – $160/$150 deposit: We chose the large, but a smaller one might do as well.
- Tank Regulator – Comes with it at Party City
- Plastic tubing
- Zip ties
- Small piece of PVC
The Payload
A payload is the package you are sending up to space with the balloon – the one you will hopefully retrieve after it floats safely back to Earth.
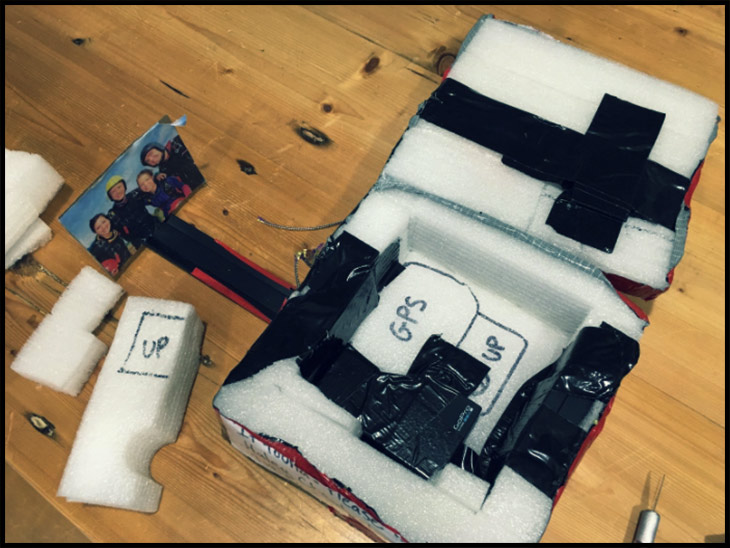
Here is how I made mine – (pictures and video, cutting holes for Gopros, diagram of payload camera directions, and GPS)
In essence, I just put some GoPros sticking out of a block of foam and duct-taped a GPS tracker on the top.
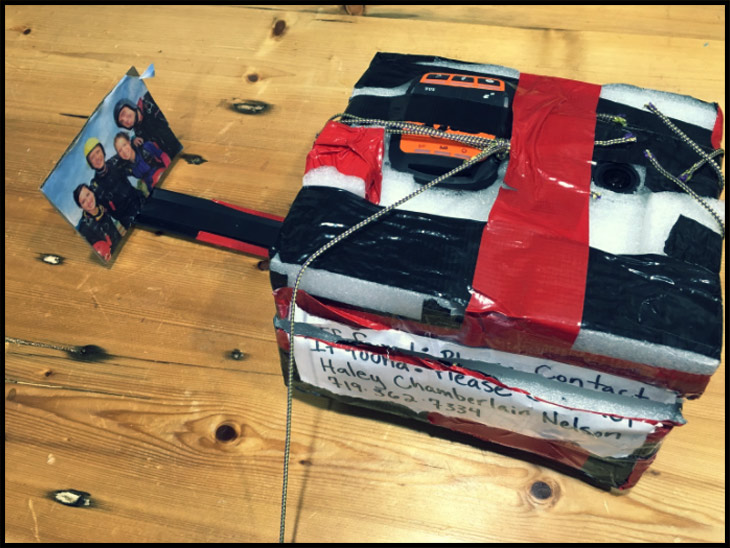
I chose foam and duct tape because it’s lightweight and easy to cut with a box cutter. It also is a nice insulator for the coldness of space (which can freeze your cameras and gps if you are not careful).
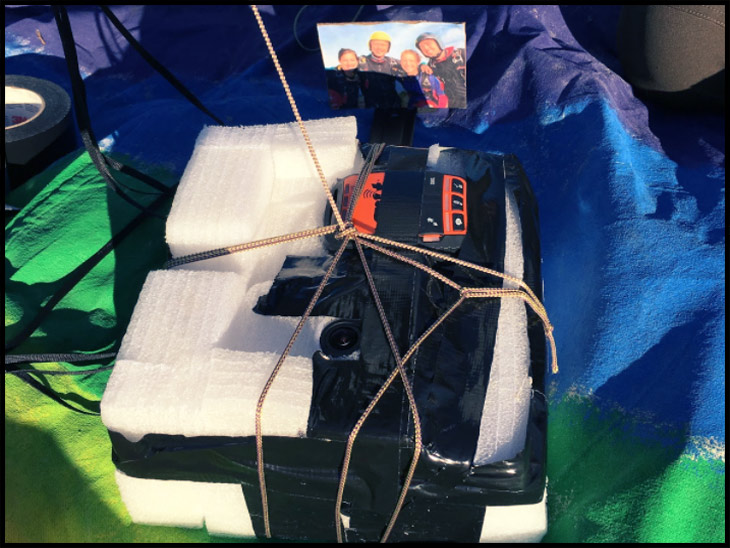
I have two GoPros pointing down, one pointing up, one to the side and the other side pointing at a photo of our Untamed Science team. (Since I may never go to space myself, I thought it would be fun to have some images of us floating in space with Earth in the background!) I cut a small hole for just the lens of each GoPro and made sure to pack it with foam snugly around it. There were no issues with the cameras freezing or fogging, and I think this is because the extra battery pack on each kept it warm and cozy. Still, I think I will include hand warmers the next time just to be safe – since I would like it to go higher.
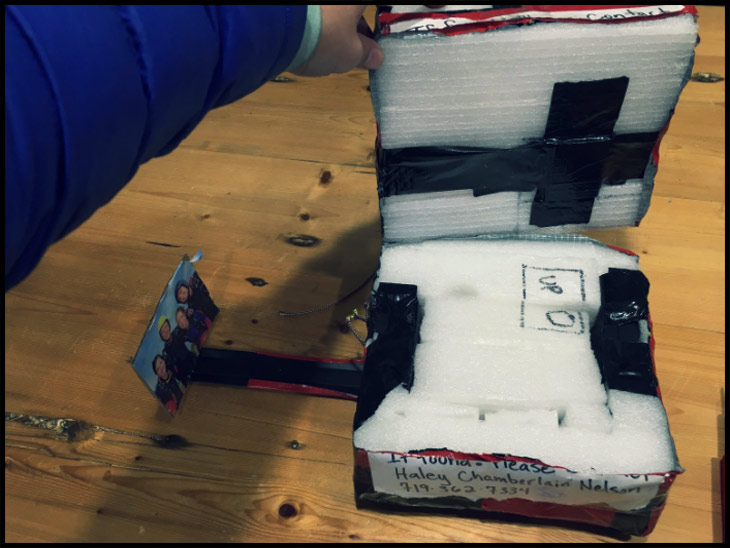
Because you have to turn the cameras on at the last possible moment (bc of battery life and card space), I used duct tape for securing everything in place at the last moment. It’s best to have everything as ready to go as possible so that the time it takes to turn on the cameras, tape the payload securely closed and attach it to the parachute is as speedy as it can be. This is where it’s nice to have a helpful team – more on that later.
I placed the GPS unit on the top of the payload, unobstructed by anything except the miracle of duct tape. It didn’t freeze, but again I will add a hand warmer under it for future/higher flights. This is the only way to find my camera payload again, so it better work! The spot 3 device works really well. After I bought it, I set it up online (there’s a subscription fee) and downloaded the app to my phone. I played around with it around our yard and woods until I felt comfortable with how it worked. I haven’t ever used a GPS unit like this, and it was very easy. You set it up to ping in every few minutes – and it shows you where the unit is on a map. The battery lasts a couple of days, so I felt a lot of confidence it was up to the space challenge. I love you, techMology.
When I do this again, I will add a way to quickly attach the parachute to the payload in the design. It took too much time to rig it up this time (wasting precious GoPro footage on the ground)!
Remember to put your name and contact information on the outside of the payload, just in case it is recovered by someone before you find it. You are dealing with wind and weather and chaos and math and magic to guide the ascent and descent of your package, so try and control as many factors as you can here – and make informed decisions. It would totally suck to have a great launch and never be able to find your payload!
The Parachute
The parachute is what’s going to allow your payload to drift gently down to earth. You’ll need to get one that matches the weight of your payload. We got a 6 foot balloon from Rocketman. You can find your’s here.
The Balloon
The balloon, like the parachute, needs to be matched to the size of your payload. The size also relates to how high you want it to go. There is some math needed in this section.
How high will the balloon go before it bursts?
First, you need to find the burst altitude. We suggest going to this Burst Calculator at Habhub
Some of the questions we want to ask at this stage are :
- How do we get a balloon? How much weight can it carry?
- How far will the balloon go? How high? Altimeter?
- What will be its top rate of speed? How does speed vary on rate and descent?
- How long will it take to get to space?
- When will the balloon pop?
Calculations
How much helium balloon plus payload
Approximate lift of spherical volumes in liters of Helium in diameters of feet and lift in pounds. Assuming standard temperatures and pressures and no significant overpressure. Remember that hydrogen and methane are serious explosion and fire hazards so only use helium balloons.
Lift of Helium Balloons
Dia. Ft. Vol. l Lift gr. Lift Lbs.
1 14.83 15.2 0.03
2 118.62 121.7 0.27
3 400.34 410.9 0.91
4 948.96 973.9 2.15
5 1853.45 1902.2 4.19
6 3202.76 3287.0 7.25
7 5085.86 5219.7 11.51
8 7591.72 7791.5 17.18
9 10809.30 11093.7 24.46
10 14827.58 15217.7 33.55
11 19735.50 20254.8 44.65
12 25622.05 26296.2 57.97
13 32576.18 33433.3 73.71
14 40686.87 41757.4 92.06
15 50043.07 51359.8 113.23
16 60733.75 62331.8 137.42
17 72847.88 74764.7 164.83
18 86474.42 88749.8 195.66
19 101702.34 104378 230.12
20 118620.61 121741 268.40
21 137318.18 140931 310.70
22 157884.03 162038 357.24
23 180407.11 185154 408.20
24 204976.41 210369 463.79
How to prepare the balloon for launch
Here are some other helpful links incase you are still doing research:
- Rocketman Recovery
- James Trosh’s Site
- Hartly Brody’s Blog on His Launch/Recovery
- The Quora Blog – Launching a Balloon in a Day
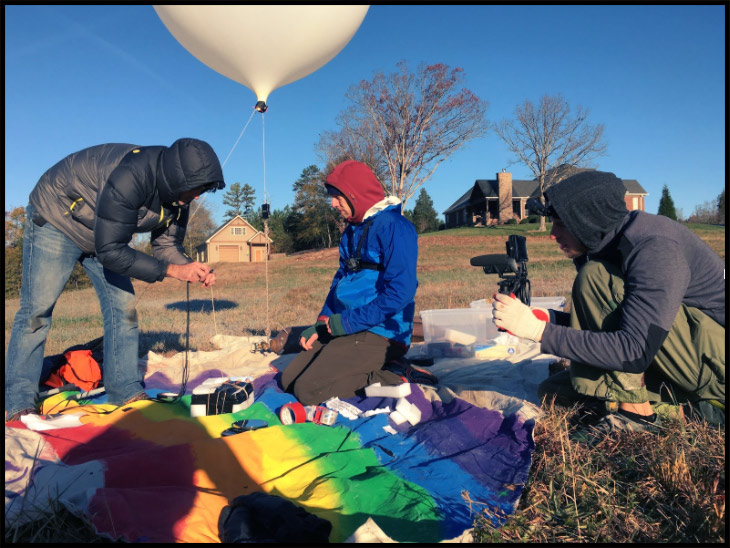
Filling the balloon
Filling the balloon is easy. All you’ll do is stick in a plastic tube, connected to the helium ballon and start filling it up. It’s not rocket science although you will want to make certain that you’re not filling it too much or too little. We filled our balloon to a diameter of 6′ so that it would burst at 12′ and have the right ascent and descent rate. Here is a good link for more info on that:
The Launch
This is what our package looked like.
Prep for Launch Day
It’s preferable to launch early in the morning for many reasons, so we prepped and packed everything in our vehicle the night before.
Buy helium at party city, previous day works well so you can launch early. Get a drop cloth or sheet. PVC for neck of the balloon. Zip ties. This can all be done in advance so you launch quicker. Bring some kind of hose or tubing to attach the helium regulator and go into the balloon.
Where should you launch?
You don’t want to land in a city, take off near an airport – or just plain lose you stuff in the ocean. The best way to figure out where to launch is to use this link as it is great for estimating where things should land.
You’ll need to know the weight of your payload (including balloon and parachute) and descent rate – which is listed in the handy dandy charts!
Recovery
Your recovery is the fun part! Remember, that you can estimate roughly where your balloon is going to land if you did some simple math at the beginning. Go to this website at Habhub to estimate the landing zone. From here you’ll have to track it via the gps tracker you attached to the top. Track via your phone and have fun!
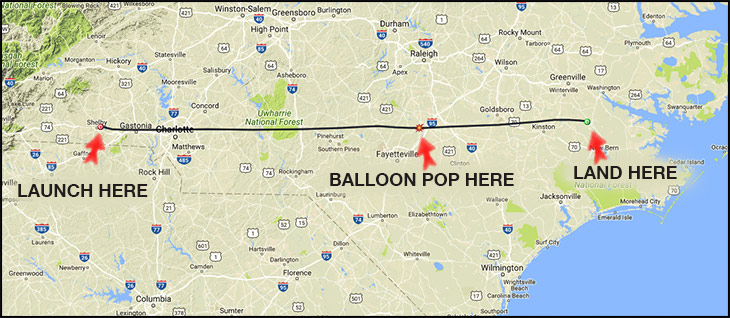
You do have to be careful what day you launch though. You wouldn’t want it to land in the ocean! The habhub predictor is key to figuring out when and where it will land.
Extra Links You May Enjoy
I added a few extra links that are worth browsing through before you launch. There is a lot of junk on the web, so I’m trying to filter it all down for you. I hope this helps. If you do launch, let us know in the comments below. We’d love to see what you found.


