Production and Shooting

Finally, you’ve got your hands on the camera case and you’re almost ready to head to the shoot location. Admittedly, this can be one of the more exciting parts of filmmaking – production. It’s also called field production, the shoot, location shooting, or filming. It’s the pivotal process where you capture the key visual and audio elements of your film on your camera. Depending on the scope of your film, it may be as simple as a one-hour shoot at some science or wildlife site to as complex as months of traveling, shooting, and interviewing at multiple locations around the world.

Camera
Now that you know where you’re headed (your logistics plan) and what’s on your shoot list, (your shoot list made from other lists) let’s move on next to that video camera of yours. We’ll assume that you already have the best one you can get your hands on either by buying it, borrowing or renting one. Or maybe you’ve contracted with or sweet-talked some cameraperson who has his or her own. Even though you could be shooting one of those gritty cell phone videos, let’s assume you have a camera with professional settings.

I think the CAMERA section could use some work. First, I’m guessing that most people that want to make films are most interested in the cameras, yet know very little about what they need to look for. All we have are two sections … one on HD/SD (which already seems old – I say we have a few lines about how everything is HD and move on … same with tapeless videos). There are a lot of other things that people might need to know about the camera though. Plus, I think if we include the specific cameras, it’ll sound irrelevant soon. In fact, it already sounds very 2007. Here is a short list of things that could use some describing:

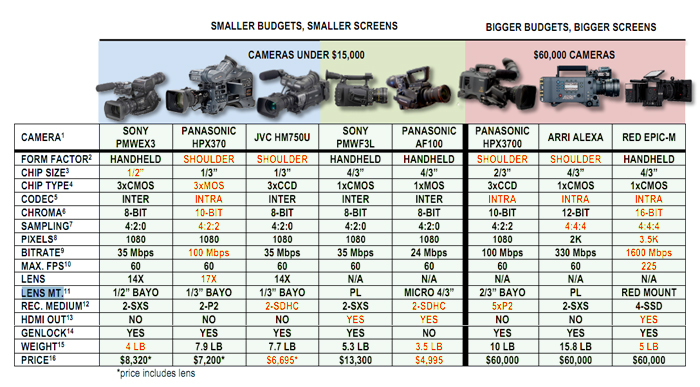
Chip Size (What does this mean when someone reads this)
Chip Type (CCD’s CMOS … etc)
Codec (There are a lot of codecs … what do they mean)
Chroma (The measure of the shades of color a camera pics up …)
Sampling (Such as 4:4:4 or 4:2:0 or 4:0:0 … and what that means)
Pixels (This of course is the resolution. But HD isn’t just 720×1080 … there is 2K resolution, 3.5K, 6K! Whats the difference).
Bitrate: Why does this mater
Max Frame Rate: Such as overcranking ability: 60FPS, 1,000 FPS…
Lens Mounts: Why would you want to switch lenses
Recording medium: P2 cards, SDHC cards, HDCAM-SR, etc.
Genlock: What is it and why would you use it.

Also it might be nice to touch on:
Whitebalance,
Gain
Focus tips
timecode

Plus, this seems like a great section to include Camera Composition tips, like types of shots and the rule of thirds.
HD or SD? – The transition from SD (standard definition, 720 lines of vertical resolution) to HD (high definition 1080 lines) happened quickly on the heels of innovative digital technology. Almost overnight tape cameras in SD, Beta SP and DVC Pro formats were out and tapeless HD was in, giving producers unprecedented image quality for a fraction of the cost of a Beta SP camera that was an enduring flagship format for such a long time.

Your camera of choice depends on a great many things such as your budget, your intended end product and the ways you might want to deliver your film to your target audiences. Nonetheless, logic says to record on the highest quality camera and format possible. The HD camera market changes so quickly and the selection is so daunting, we’ll simply suggest doing your camera research in earnest to find the best fit for your project. However, we’ll also tell you about the cameras we’ve used for hundreds of productions and what we feel are some of their performance advantages.

Tape or Tapeless? – Early on we got some Panasonic P2 cameras. The first ones were amazing things at the time that recorded directly to internal P2 cards or to MiniDV tape (SD format) on a tape drive in the camera. Though it sounded like a cool combination of features, in years of shooting we only recorded one SD tape. Panasonic must have gotten similar feedback from others as their next generations of HD P2 cameras dropped the secondary tape option altogether. Despite the insecurities of some of the more “seasoned” camerapersons of not being able to record to a tape that they could hold in their hands, everyone soon agreed that tapeless recording was the only way to go. The old days of shooting to tape, reviewing and logging tapes, cataloging tapes, making capture lists of tapes, digitizing tapes into movie files to hard drives before you could edit, are now a drudgery of the past. Now it’s simply a matter of logging and transferring your movies directly from the camera’s digital storage to a hard drive that has connectivity to allow HD data playback on your editing system.

As HD cameras get smaller and lighter, they offer increased shooting versatility and most offer various recording format options. Depending on your needs, consider cameras that will also give you 4-channel audio options, with XLR inputs for channels 1 and 2, plus the standard smattering of other professional features. Another consideration is if a camera has an available zoom-through wide-angle lenses that can offer a fun POV perspective for tight interactive shots. But before you dive headlong into getting a camera, consider the limitations of the zoom lens relative to what you’re going to be shooting. Many cameras work fine for shooting general scenes and interviews. Some however fall short on the lens power, which might not be the ideal choice if you intend on shooting distant wildlife.

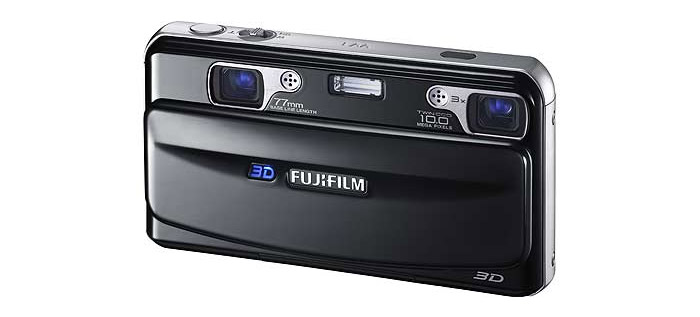
One of the greatest breakthroughs since the switch to digital recording media for wildlife filmmakers is that of the digital SLR cameras, often called DSLRs or HDSLRs. We’re talking about the wide range of high end, inter-changeable lens still cameras that also shoot HD video. These cameras are affordable for the wildlife and science filmmaker and they take amazing video. However, it’s important to remember that these cameras are designed to be still cameras. They just happen to take amazing video as well. To make a film with a DSLR camera, there are a few hoops you’ll have to jump through. Don’t treat this overview as the definitive guide to DSLR filmmaking though. It’s simply intended to give some of the basics, and point you in the right direction if you want to take this path in your science filmmaking. We’ll offer some more advice on HDSLR filmmaking later on in the book.

Don’t forget those little cameras that offer the versatility and ease of shooting that some of the larger ones can’t. That’s why we also shoot on some of the little hand-held HD cameras. We’ve strapped these little palm-sized video cameras to kayaks, bikes, cable dollies, roller coasters, and just about anything that moves. And unlike the bigger P2 cameras, when using them for underwater shots in the ocean, it doesn’t cost nearly as much to replace if your camera ends up in Davey Jones’ locker. For instance, one new P2 camera lasted only one day before it got accidently soaked with saltwater. Now it’s a fun yet admittedly expensive prop camera that we can drop into the drink or mud without worry. We’ve also used the mini Go Pro HD video camera that even comes with its own waterproof housing. You can strap that little camera on just about anything, including surfboards, skis, cats, dogs and skydiving helmets. But before you begin strapping cameras to anything, let’s take a moment to go over your “before departure checklist”.

Pre-shoot Checklist

Whether you make yet another list or commit it all to memory, you should check some more important things before you load your camera gear and head to your shoot location. We typically check this stuff off our pre-shoot list the evening before a shoot or embarking on an extended production trip. Forgetting one key item can delay or mess up a shoot. And you sure don’t want to risk missing a rare opportunity that can often happen during wildlife and science shoots. So here are the basics of your pre-shoot prep list:

•    Batteries – Have plenty and make sure they’re fully charged. Also have a backup plan to recharge them again or work from direct power at your shoot location. If you’re shooting for hours in a remote location such as an acacia tree overlooking an active lion kill in the Serengeti, consider a hefty extended-life battery that fits your camera.

•    Clear camera memory – Assuming that you’re shooting on a tapeless camera, double-check to be sure that you’ve transferred the existing footage on your camera’s storage (P2 cards or similar storage), before you clear the memory in your camera. This is an unnerving process the first dozen or so times as the camera is essentially asking you, “are you sure you want to totally delete all this irreplaceable footage from your camera? Because if you do by mistake, you’ll feel like total crap and the rest of the production team will want to tar and feather you?” So, yes, take the time to make sure it’s been safely transferred on a hard drive or storage device.

•    As a precaution, check your recording settings too. In case you show up on location just as the manatees are mating, you don’t want to record in some previously set time-lapse or slow motion mode. If it’s a multi-camera shoot, make sure (if that’s your plan) that all the cameras are set with the same recording parameters. That could save you tons of corrections later in post production.

•    Lens cloth – As small as it seems, having a quality lens cloth (and a backup) is a biggie on your checklist. Few things will irritate you or your editor more than working with what should have been quality footage that was shot through a dirty lens.

•    Audio gear – If you’re using wireless or shotgun audio systems on your planned shoot, make sure their batteries, cables, and settings are all set to go.

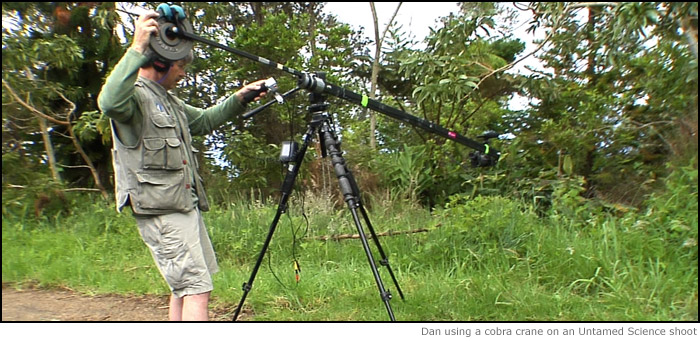
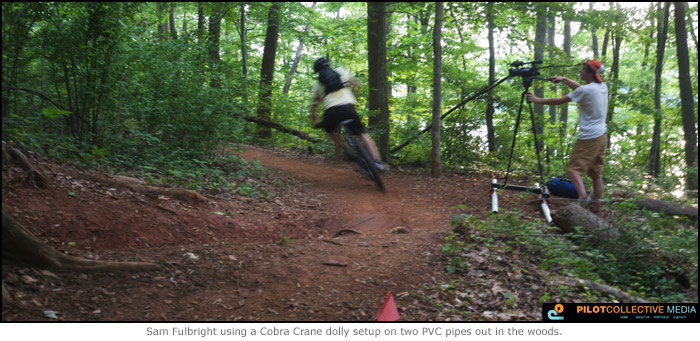
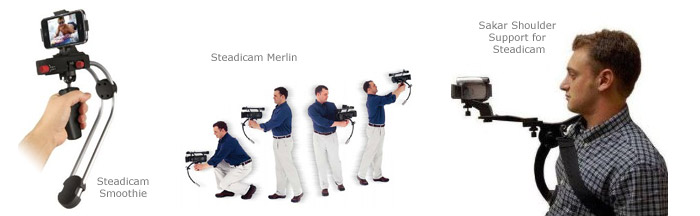
•    Tripods, dollies, cranes, steady-cams, lighting – Depending on your shoot, arrange and make sure that your other camera related gear such as support systems and lighting are in working order and ready for your big shoot.

Location Check

Finally, you’ve arrived at location and though it’ okay to feel the excitement in the air, now’s the time to act like the pro that you’re quickly becoming by taking a few moments to check your shoot location and take care of any necessary business. Because each shoot is unique with its own variables, we’ll simply go over a few of the basics in chronological order that you can adapt depending on your shoot locations.

The first thing we do is meet with the people involved in our shoot and secure talent and location releases. Waiting until “later” is often an invitation to trouble happening later in the production process. The pitfalls of waiting include; on-camera people leaving early, you get distracted with B Roll afterwards, or someone suddenly has second thoughts about how they looked or sounded on camera and want to “think it over” before they sign the release. We’ll spare you the horror stories and suffice it to say that neglecting the business of getting your releases before the shoot could jeopardize the final editing or distribution of your film later on. Getting your releases signed is also a good way to break the ice with people by starting conversations about what’s going to happen during the shoot. Plus it shows that you’re a professional. We’ve even offered you some “boilerplate” talent and location releases in the resources section of this book. Feel free to edit them for your film or production company.

Getting acquainted with the person in charge of the shoot location, the expert to be interviewed, or others involved in your shoot to help establish clearer communication for when the camera begins to roll. This is also a good time to tap into the talent and resources of the people you’re working with. More often than not, the person in charge of the location has some helpful ideas on where to shoot scenes, what props might be available and other helpful information about the logistics of the shoot. We’ve shot in hundreds of locations from science labs to industrial facilities and the people in charge have revealed hidden gems of places or items to shoot that helped make our films sing with science. And don’t be shy about asking if they have or know of other sources of video about the location or topic that might available for support footage. This is also your time to request a tour so you can become familiar with your shooting environments. In a perfect world, you or one of your production team have already scouted the location beforehand and have a good idea of where and how to conduct the shoot. However, in reality you’ll often find yourself on a distant or restricted location without the luxury of a pre-shoot scouting trip.

Selecting Scene Setups

As you tour the location, look for setups that will visually help reinforce your story. If you’re shooting an interview with an expert, avoid cluttered desks and look for a place where they can stand near interesting lab backgrounds, devices with moving parts, or someplace where they can use their hands on the science gear they work with to lend authenticity to the scene. Though some scientists may express the urge to do the interview in their “comfort zone” of sitting behind their desks, reassure them that you’re job is to make them look and sound their very best. And your scene selection is an important part of accomplishing that. For instance, if it were one of our example manatee experts, we would have them standing, overlooking the water where they might see a manatee. That way they can look and gesture toward the water, which will be ideal points in the story to use your underwater footage of manatees. If it were an interview inside a building, we might have them stand in front of graphics or maps showing manatee locations.

When reviewing the potential scenes at a location, use your eyes as the lens of the camera. Look for settings with both interesting foregrounds and backgrounds. Bend over behind items and imagine your camera floating across the rows of foreground lab gear to the main work area where your expert is standing with more background devices and layers of lab stuff behind them. Also consider natural light sources, available electrical lighting, where you’ll set your lighting, backlighting, and how you might adjust your lighting to avoid talent or camera shadows. We’ll talk more about lighting your scene and talent in a moment.

Try to avoid scenes with excessive movement in the background such as road traffic or pedestrians. However, if your subject lends itself, such as the manatee example, it’s a bonus to have some background movement such as flying birds, wave action on the water, boats cruising past, fisherman, or whatever else may help tell your story. Also avoid setups with excessive horizontal and vertical lines such as fences, electrical lines, poles, and cabinets. Instead, look for scenes with diagonal lines that will add interesting and more dynamic perspectives to your shots. Sometimes, simply shifting the position of the camera can easily change those rigid horizontal and lines into more dynamic diagonal ones.

Take Charge of the Environment

Now that you’ve identified your main scene where you’re going to be shooting, it’s time to take charge of your shooting environment. One of the biggest challenges facing new producers and even some with considerable experience is fully taking charge of their shooting environment. If you think about it, you only have two options: letting the shooting environment take control of your production, or you taking control of your production by taking full control over your shooting environment… so that you can make things happen the way you want. Despite this advice, depending on where you’re shooting, your control of the shooting environment is a blend of being respectful to your location host and the logistics of what’s reasonable to expect.

Here’s an example. If we’re shooting in a plant genetics lab and we don’t like the bright grow lights glaring down or the temperature control fans humming, we can’t simply turn them off and risk damaging the plant research. In most situations though, we can make the shoot more effective by taking charge and controlling various elements within the shooting environment. The rule of thumb is to change all that you can, and adapt what you can’t. Let’s break down those elements into bite-sized pieces so we can digest them one at a time.

Science Film Reviews

We watch a lot of science films every year and a handful of them really stick out to us. We’ve created some nice little film reviews of the ones we think are worth watching. Choose from some of the selected pieces in the bar on the right.

How to make a DIY cable dolly

Ever wondered how they get those amazingly steady shots flying through the forest, over a waterfall or between buildings? They do it as a dolly move, and most of the time it is with a cable dolly. The above video shows some shots that were taken using a simple contraption we built in the rainforests of Panama. We’re not proposing we have the best design, far from it. Instead we want to show how simple it might be to build a cable dolly to get some pretty professional looking shots.

Cable Dolly Step 1: Scout the Location

If you’re going to build a cable dolly you should have a good idea what you’re going to use it for. Depending on the complexity of your shot, you might need something more (or less) elaborate. Here are some scenarios to think about:

  • How heavy is the camera?
  • Is my camera operator going to be on the cable?
  • How far will the cable reach? Is it ok to have some sag in the cable?
  • What direction will the camera point (strait ahead, sideways, up)?
  • What objects are there to attach my cables to in the environment (trees, posts, etc).?

We’ll refrain from suggesting all the alternatives for each answer. Use common sense and start simple at first.

Cable Dolly Step 2: Materials

Again, there are many ways to build a cable dolly. The list we provide here is for the cable dolly that Ed and Hazen built in Panama.

  • Pulleys: 2 Bicycle wheels without the tires and tubes.
  • Cable: 150 feet of static climbing rope or cable equivalent
  • Frame: Mesh metal piping to construct the cable dolly frame.
  • Cable Tighteners: 6 carabiners to tighten the rope

Cable Dolly Step 3: The Cable

Before you put the dolly on, you must tighten the cable or rope as much as possible. There are many ways to do this, but we came up with a type of pulley system to leverage our rope. See how we used the carabiners in the photo to act as pulleys.

Make sure your cable is in a slight downward angle. The angle only has to be enough to get the camera moving. A 5% grade should work well, but since it is unlikely you’ll have a way of measuring the grade in the field, use common judgment and experiment.

Cable Dolly Step 4: The Dolly

The last step is attaching the actual dolly mechanism to the cable or rope. Because our unit is fixed we had to take off the wheels and reassemble it.

There are two options now. You can either walk with the dolly as it moves through the forest, or you can let it run free.

We prefer letting it run free as the shots are always smoother.
However, if you do walk with it you can angle the camera as you walk to make sure your subject stays in frame.

Experiment as much as you can. We’re sure that what you come up with will do an amazing job and very easily could be better than ours.

DSLR Wildlife Filmmaking

Why DSLR’s are Revolutionary

Filmmakers often say DSLR filmmaking is as revolutionary as the invention of color or 16mm film because it represents a huge leap forward in the quality of the image. Basically, a DSLR has a monstrous image sensor compared to the cameras filmmakers were using previously, about 20 to 30 times larger than that of the standard prosumer camcorder.

Here is a relative size comparison:

full-frame

(We included the 1/2 inch sensor size of the $9000 Sony EX-3 so that you can get a feel for how much larger it really is.)

So what does this achieve? These are the main benefits.

  • Shallow Depth of Field
    For a professional-looking shot, the goal is to get the subject in focus while the background objects are blurred. This draws attention to the primary subject.
  • Greater Dynamic Range
    When shooting in high-contrast light conditions, such as a sunny day under a half-shaded forest, you’ll want the bright spots and the shady spots to have resolution and clarity. The greater the dynamic range, the more detail you’ll be able to see in all brightness levels. 35mm film has always had one of the greatest dynamic ranges; DSLR cameras are catching up.
  • Great Low-light Sensitivity
    If the sensor is larger, it’s going to register the incoming light better. After using an older camera to shoot indoors, filmmakers are amazed at how little light you need to shoot quality video with a DSLR. Most of the time you don’t even need extra light in indoor situations.

Making a Film with a DSLR

Again, while a DSLR was never intended to be a movie-making device, the revolutionary quality of its video at an affordable price make it worthwhile for filmmakers to use them with some creative workarounds, mainly in the audio department. For those filmmakers that use separate audio recorders, like Zooms, Tascam’s or Marantz’s, the workflow is much the same. Here are a few points to think about when shooting with a DSLR.

  • Get an external microphone that can plug into your camera (using a mini-plug) or make sure to use an external audio recorder with a high-quality microphone.
  • Bring a set of quality lenses for the camera. Prime lenses are the best quality for video. Image-stabilized lenses also greatly increase quality.
  • Bring tripods, shoulder-mounts, or dollies to help stabilize the shots. These cameras are small and prone to jiggle.
  • Try not to shoot while rapidly moving the camera. Because of the way the images are scanned, moving the camera quickly could make it look like the shot is wobbling.

The Benefits to Wildlife Filmmakers

When shooting wildlife, you may not always be in an ideal scenario. Perhaps you’re in a dark and shady forest or you’re far off in the arctic where the conditions make it challenging to stay alive, let alone lug around a heavy camera. Sometimes you’re in a third-world country where pulling out a giant camera brings a lot of unwanted attention your way. In these scenarios, a small, inconspicuous, lightweight, light-sensitive DSLR is the way to go.

Getting shots in the understory of a rainforest is one of our new favorite things. Before, we needed to bring lights with us to shoot frogs or millipedes that were crawling on the forest floor. Now, as long as there is some small amount of light, there is absolutely no problem shooting these shots au naturale. It saves us from carrying a lot of extra weight into the jungle.

The lightweight factor can’t be emphasized enough. It’s a breeze to bring the camera on exploratory walks. If you see something that is worthy of a good video shot, you can pull out the camera and capture it.

dslrice

Finally, it is great to have diverse lens options. You can put on a fisheye lens to get a point of view shot or you can attach an extreme telephoto lens to capture some amazing animal behavior.

The Negatives to DSLR Filmmaking

The ultimate negative of the DSLR is a lack of audio functionality. The audio inputs on the camera make it difficult to shoot more than one person laved up at a time. There are ways to work around this, but it does make the filmmaking process a bit more difficult.

A DSLR BASICS TUTORIAL

Jonas and I thought we’d share a quick tutorial about getting the most out of your DSLR.


3D Wildlife Filmmaking

Since about 2007, 3D filmmaking has become more of an interest for the general wildlife filmmaker. And 3D filmmaking is not nearly as complicated as it might sound initially. All you need is two cameras of the same model, shooting side by side. In post-production, you can sync the two shots together with a simple plug-in or two that allow you to export the file as a 3D render. Here are the main steps.

Setting the Cameras

There are a couple of arrangements you can use to set up your cameras for 3D video, but the end result is the same. You’re trying to set the cameras at the ends of an isosceles triangle. The distance between the two cameras and the angle they then need to point all depends on how far away the object is that you want to pull out of the 3D frame.

3dangles

The first thing you have to adjust is how far the cameras are apart. This is known as the interocular distance. Roughly, you’re looking for a 30:1 ratio. If your object is 30 feet away, you can have your cameras 1 foot apart. That should allow you to set two cameras up side by side. However, if your object is 2.5 feet away, then you need to have the center of the cameras only an inch apart. To achieve this, filmmakers use big mirror rigs, so that one camera is shooting down into the mirror, and the other is shooting through the lens.

The second thing you have to adjust is the angle of the cameras. The cameras can’t both face the same parallel angle. Instead they are going to have to angle in towards the object you’re trying to bring out in 3D. Again, think about the triangle.

Editing the footage

In the editing phase you’ll bring in footage from both cameras. This can be done in Final Cut Pro or Adobe Premiere with the help of programs like Stereoscopic 3D or Cineform neo3D. These programs and plug-ins allow you to sync the right and left cameras into one single clip and choose a 3D output mode. YouTube has made it even easier by doing it all for you. All you need to do is export the right and left cameras side by side and YouTube converts it into all 3D formats. Then viewers can decide what version they want, depending on their setup (red-green glasses, blue-green glasses, polarized glasses, etc.).

Popular 3D Wildlife Films

A good place to start your quest in 3D wildlife filmmaking is to research what has been done before. Almost everything done in 3D has had a huge budget (though this is changing). The cameras are large and heavy, giving the shots a particular look. There is little dynamic movement and almost no hand-held work.

Here is a list of some popular 3D wildlife films in the last decade:

wildocean

3D filmmaking on a 2D budget

The following consumer cameras have been released to the market (as of 2014) as inexpensive 3D devices so that filmmakers can shoot in three dimensions on a small budget. We understand these cameras will change with time, but the list should help you realize there are a lot of options out there.

  • Sony Cybershot
  • Panasonic Lumix 3D
  • GoPro Hero 3D rig
  • Olympus SP
  • Fujifilm FinePix REAL 3D W3 1: The setup allows for the capture of high-definition footage.  It retails for about 400 USD.

fuji-3d

While we haven’t explained all of the details of 3D filmmaking here, we wanted mainly to emphasize that it’s not as hard as it seems. To explore 3D further, do a simple YouTube search for DIY 3D filmmaking. You’ll find examples of how to setup simple cameras and how to render the final video in post-production. 3D filmmaking is finally within reach for the aspiring filmmaker…and the market is just begging for content.

More Resources and Books on 3D filmmaking

Moving Shots

Though most viewers don’t notice, one of the techniques that sets high-budget films apart from the rest is that many of the shots are moving. The movement isn’t just panning on a tripod; it is a steady physical movement of the camera up, down, or through the action being recorded. Even lower budget films can simulate the look of high-priced features by including these dynamic shots.

In filmmaking, camera movements are often referred to as dollies or dollying the camera. Dolly shots can be set up on rails or cables. Sometimes similar movement is accomplished through the use of cranes or jibs. Filmmakers can also use simple steady cams to stabilize handheld camera movement.

Here we’ll show you some very basic setups that can make a low-budget film look like a multi-million dollar feature.

Cranes

A crane extends a camera on the end of a long pole with a counterweight on the opposite side. This setup allow smooth movement of the camera up, down, left, and right. This is an image of us using one in Hawaii.

dan-cobra-crane

Very small cranes can be attached to a tripod head and moved freely in all directions. The simplest crane we’ve found is the CobraCrane setup. For around 350 USD you can get a stellar rig that you mount to your tripod for some amazing shots! They use standard weight-set weights and can be broken down to fit inside your luggage or car. Like most camera-movement gear, you’ll need some practice to get dynamic shots.

One thing that will help you capture quality crane shots is being able to clearly see what the camera is shooting. You can either watch the LCD screen on your camera or rig up a small LCD monitor on your tripod that’s wired to your camera. A separate LCD monitor allows you to stay focused on your camera movement relative to the action that you’re trying to capture. You may also want to consider some of the tripod-mounted wired camera control devices that allow you to focus, record, and zoom remotely for greater control. VariZoom offers various options. The cheaper solution is to mount your camera remote control with Velcro to your tripod so you are able to start and stop recording without dashing up to the camera on the other end of the crane.

What makes crane shots grab your attention is the camera moving past objects that are both near and far from the camera. It greatly increases the feeling of motion and perspective.

Dollies

A dolly shot is where the camera is mounted to wheels on a platform and tracks movement left to right or forward to backward. Here a few ways to make a beautiful and steady dolly move for your videos.

Standard dollies

The simplest dolly shot can be created on flat, level floors with someone pushing the camera person in a wheeled chair. Skateboards work for the same purpose. However, if you want to increase the steadiness, you’re going to need some sort of dolly setup. Again, we like CobraCrane’s stock.

sam-fulbright

Cable dollies

Cable dollies consist of a single rope or wire connected by two points. The camera is then mounted to a device that can move along the dolly. (Just don’t make the angle of the cable too steep or your camera will fly at dangerous speeds and end up destroyed at the far end! Make sure to test your setup with one person at each end of the cable.) Check out our full tutorial on making a cable dolly.

Camera-stabilization systems

“Steadicam” is a brand name that has come to refer to any number of camera-stabilization systems (like calling all facial tissues “Kleenex”). There are several ways to stabilize handheld camera movements. Most of them require adding a small bit of weight to the camera, usually off of an extension below the camera.

steadicam1

We found a great example video that shows how much smoother a camera shot is with a small home-built image stabilizer. Check out their tutorial at http://poormanscamerastabilizer.org

Shooting with a Long Lens

If you’ve ever dreamt of filming snow leopards or capturing an amazing lion kill, you may wonder what equipment you need to capture footage of distant animals? We’ll cover the camera, the tripod, and the lenses needed to start this type of story.

Of course, you want to get as close to the subject as possible. But in the interest of safety and not disturbing the subject, you also need a steady camera with a long lens to help get closer than you can be physically.

Cameras

Generally, the more expensive the camera, the better the lens will be able to zoom to far off distances. But even high-end cameras are built for different purposes. Most cameras are built to be generalist, allowing for everything from macro- to telephoto photography. If your goal as a filmmaker is to capture extreme telephoto shots, it’s important to find a camera that will allow you to change lenses.

Lenses

When considering lens quality, the key features are good glass that will allow the most light to come in and minimum to no distortion of the image. One of the best indicators of the quality of the lens is the f-value. Cheaper lenses will generally only allow enough light to get an f-value of f 1/5.6 or so. The larger the f-value the better prime lenses (lenses that don’t zoom) might get down to f 1/1.1. Telephoto lenses, by their very nature, are difficult to get a good, low, f-value. The best ones have giant optics, like the ones you’re likely to see the media use in the end-zone of a football game.

cams

Aperture and F-Value

Lenses with large apertures are the best. The aperture relates to the amount of light you can let in. F22 (small aperture) is shorthand for f 1/22 (a small f-value). F1.2 (a large aperture) is shorthand for f 1/1.2 (a small f-value). Technically, the f-value indicates the size of the aperture. Sometimes people will simply say they have a lens with f4, f1.4, etc. They drop the fraction. (It may get confusing, and there is no easy way around it.)

We recommend buying at least one high-quality telephoto lens to get started. You can get by on the lower quality zoom lenses. As you progress, you’ll really notice the difference.

Tripods

The further you zoom the camera, the more a small shake in the camera is amplified. In fact, a light breeze, as subtle as it might seem, can wreck a shot. Thus, the quality of the tripod is extremely important. Unfortunately for would-be remote filmmakers, the best tripods for long-lens filmmaking are also extremely heavy. The heavier and more sturdy the tripod, the more stable the shot is going to be.

The minimum quality tripod that a wildlife filmmaker will need to purchase will cost about 500 USD. Very nice systems for higher-end cameras start around 2000 USD. This includes collapsible legs and a fluid head. The head, where the camera is mounted, is the most important piece. Quality fluid heads allow steady movement in panning shots across the horizon, perhaps following a soaring eagle in the sky or tracking a lion across the savanna. Make sure the legs are designed for field shoots; many are designed for studio shots, where the ground is always level.

For more information specifically about tripods, check out our gear guide or read reviews from B&H Photo.

Animation for Science Docs

Science and natural history films are designed to explain natural phenomena on Earth. Recently these documentaries have started to include more animations to tell a story quickly and graphically, in ways that standard footage can’t.

Animations can also be used to add humor to an otherwise heavy topic. Take An Inconvenient Truth, for example. It used a Simpsons-esque animation to explain how the sun’s rays work in relation to our atmosphere and greenhouse gases.

We feel strongly that animations are a great tool for the science filmmaker and something that everyone should learn. You don’t have to be a master; there are several simple techniques/programs that you can use to start. We’ll highlight the ones we have had the most success with and that seem to be the most commonly used.

The Basics

The first thing to learn is a basic photo-imaging tool, such as Photoshop. Knowing this program will allow you to change aspects of your video in post-production. You may want to change the name on a sign, animate a still image, or show a simple graph. It’s the most basic tool and the building block for complex animations.

The second basic editing tool is a motion-graphics package. Most editors we work with use Adobe After Effects. It is the workhorse for most motion graphics and will likely remain that way for some time to come. You can manipulate images in 2D or 3D. But if you’re going to start doing a lot of 3D animating, you may want to consider some of the other programs we suggest in that field.

Stop-Motion Animation

One of the simplest way to create an animation is by taking photographs in a sequence, a process called stop-motion. Often we’ll get approached by filmmakers who have never done any form of animation but want to use it to explain a concept. This may involve setting a camera toward a white board and snapping photos as you draw, or setting up clay figures like Wallace and Gromit.

Fortunately, you can actually get programs that help with the process. They allow you to see how the animation will look as you’re building the sequence.

One of the best programs for the amateur stop-motion artist is iStopMotion by Boinx. It allows you to preview the animation as you create it. It also allows you to do onion-skinning, a technique that shows you the previous frames screened over the frame you’re about to capture. It makes the entire process much easier.

Claymation

Claymation is an extension of stop-animation. It can be extremely tricky to do, but a basic claymation is possible with only a bit of practice. In the past, animators had to calculate the amount of time an animation should last and quickly do the math to get it right. Now there are programs available that let you see the action of the animation as it is being produced.

2D Animation

Most of Disney’s animations are done by traditional 2D animation techniques, where each plate is painstakingly drawn by the animators. Today, computers allow animators to speed up the process with digital format. The computer can create the in-between motion when we want a graphic to move across the frame. Flash and After Effects are the main programs that achieve this.

Flash Animation

Adobe Flash is a perfect tool for animators working on the web, but it’s also ideal for broadcast production. Flash allows the user to create movies within movies. For instance, we could create a Flash clip of waves going up and down to place behind a fish we want to animate.

Adobe After Effects

Adobe After Effects (AE) is the mainstay for animators and editors in the industry. Often, a Flash animation will be exported then composited in AE. Graphics and text can be given motion, and objects can be tracked to a specific reference point. For instance, one thing we’ve done in a few of our series is have the host hold out their finger. We then animate a spinning Earth on top of it. The hosts can then talk about the mini-Earth while explaining the science. Few other programs can do this as easily as AE.

3D Animation

Many 2D animations attempt to give the reality of a 3D world. When we talk about 3D animation, we usually refer to animations that were created by moving a camera around a three-dimensional object to give a perfect representation of the model. For certain applications, rendering something in a 3D world saves a lot of time.

Let’s say we want to animate a molecule of water by having the molecule spin. Animating this in a 2D space would require us to create images for every frame of the spin then cycle those images together to create the illusion of a 3D environment. With a 3D editing program, we simply model three spheres into the shape of a water molecule, and tell the molecules to spin for any length of time we desire. The computer renders the in-between images perfectly. There are several programs on the market for 3D animation, including Blender, Maya, Lightwave, 3d Max, Vue, and Google Sketchup.

Blender

Blender is an open source 3D content creation suite that is available for most operating systems. The best thing about Blender is that it’s free. If you’re new to 3D animation, this program allows you to hop in and try it without the expense.

Maya

Maya is by far the gorilla of 3D animation software. It is the program of choice for animators in many big production houses. Many colleges teach courses in Maya (including one that I took). There is a trial version to test it out. It’s not difficult to learn, but from experience, it might take a good month of tutorials to get to where you want to be when producing basic science animations. Most Untamed Science animators, in-house and contracted, use this program.

Vue

If you’re looking to create mostly landscapes, Vue is the program for you. It can produce photo-realistic environments very quickly. Many of Avatar’s scenes were created in Vue.


An Interview with Expert Science Animator, Keren Albala

In 2009 and 2010, Untamed Science collaborated with science animator Keren Albala. While we do many of our own animations in house, Keren is really an expert in the field of science animation. We asked her a series of questions about the topic, which we think you’ll find extremely useful.

How did you get into science animation?

I got started doing science animation while getting my animation MFA at USC. I was very lucky to be surrounded by faculty that encouraged interdisciplinary work. The natural world has always been my biggest artistic inspiration, so when an internship was created between my department and USC’s Wrigley Institute for Environmental Studies I jumped at the chance to apply. It was an amazing experience; I learned so much about both animation and science, and I’ve continued seeking out opportunities to combine the two.

What programs do you use?

As for what I use to make things, I employ a wide range of 2D and 3D animation software, and often photo-, sound-, and video-editing software. I choose whatever is best suited for each project; sometimes it’s plain old ink and paper.

What advice do you have for those trying to get into science animation work?

My advice for those trying to get into science animation work would be to tap into the local resources available to you. There are many schools now that have science tracks within their animation, visual effects, film, or illustration departments, or that would allow students to collaborate with scientists in other departments. Make friends with folks doing interesting research and see if there are ways for you to participate. There are also many guilds, meet-ups, and online collectives for scientific artists, as well as classes being taught at local colleges and museums. Just ask my best friend, the Internet!

What advice do you have for filmmakers looking for science animators?

If you are looking for science animators, my advice would be similar. Check with schools and museums, and there are now quite a few commercial studios specializing in scientific and educational animation. Again, the Internet is a terrific resource.

Learn more about Keren’s work or inquire about working with her at kerenalbala.com.

Macro Video Explained

Macro filmmaking is the art of taking video of very small things. Filmmakers that come from a photography background will quickly learn the basics if they’ve spent any time studying or shooting macro photographs; macro video is basically an extension of macro photography with only a few differences. The main difference is in light acquisition. You need a lot of light to take a macro photograph, with big strobes. It’s extremely difficult to get the same amount of light constantly on a small subject. You also have to be very steady. A photograph can be taken hand-held, but a video cannot.

Purists will explain that you can’t shoot macro unless you’re able to reproduce the image 1:1. But thanks to new technology, the resolution of photographs and video are high enough to work around that.

In our search for reference material, we found that the Internet is full of very bad information on how to shoot macro video. Few have summarized the best cameras and techniques for the job. That’s why I made this short tutorial on shooting macro video.

Things to think about with macro video

Depth of Field

The first major obstacle in shooting macro video is that the depth of field becomes extremely small. For example, you may get only part of an insect’s eye in focus. While this can be a great effect, it may not be your intended result. The aim is to get the largest depth of field possible at a small scale. To keep the animal in focus you have to be creative with light and composition.

How do you increase the depth of field? Decrease the aperture (the size of the opening in the lens) by increasing the f value as seen on your camera. For example, f22 is more desirable than f1.4. Small apertures mean you’re shooting through a pinhole. This increases the depth of field but means you’ll need a lot of light!

mantid

Lighting

Light is extremely important in macro video work when you’re trying to get the largest depth of field.

  • Amount of light: The subject should have as much light as possible on it. It’s not always possible to get the maximum intensity. We did a shoot once on tiny, endangered snails that couldn’t be exposed to the heat produced by intense halogen light. We had to get creative with that shoot by changing our light type to a cooler LED.
  • Type of light: While many shots might demand direct, contrasty light, we like diffuse lighting. A great way to get diffuse lighting is to construct a paper cone around your subject and direct the light evenly toward the paper. Doing this will decrease the glare that shiny objects might reflect.
  • Direction of light: Macro video is taken extremely close to the subject, so much so that the camera may get in the way of the incoming light. To get around this we suggest using a ring of LED lights around the lens.

ringlight

Composition

The composition of your macro video is extremely important when you are working against your shallow focus and trying to angle the animal to maximize the area in focus. For example, you might choose to shoot a snail as it’s crawling perpendicular to the camera. so that it always remains in focus. If it was crawling toward you, chances are that only part of the snail would be in focus at any given time.

Backgrounds

For the most part when you shoot macro video, the background will be blurred. However, the color of your background will be seen, so try to choose a color that offsets or compliments the color of your composition.

Using a Tripod

While it isn’t necessary to use a tripod when you’re doing macro-photography stills, you will need a tripod for video to stabilize your shot and make it look professional.

Focus

Most of the time, you should focus on the eyes of the organism, because the eyes are what humans tend to look at first when we look at an animal. When you’re shooting flowers, you’ll probably want the center of the flower in focus, but then again, it all depends on what you’re highlighting.

Finding a Camera

By the time you read this, these camera choices may already be outdated. However, we present a few to help you get started in your research. Often, camera companies pride themselves on particular line of camera models that shoots great macro (like COOLPIX).

Point and Shoot Cameras

There are several cameras on the market that shoot great macro photographs and HD video. The quality of the macro video on many of these models is mind-blowing, considering what you needed 10 years ago for the same shots. These include the Nikon Coolpix line, the Panasonic Lumix DMC-LX3 and FZ38 with Raynox lenses, the Canon SX20is with Raynox lenses, and believe it or not a modified gopro.

GoPro Macro Hack

Gopros are great action cameras, but almost nobody would think that the gopro is good for shooting macro video. However, the last time I visited GoPro headquarters in San Mateo, they told me that you can hack the camera and make an impressive macro camera. Since they can’t tell people how to do it, I went ahead and made the tutorial myself. Here is how to do it.

DSLR Cameras

A digital SLR camera with a great macro lens is another option to consider. For Canon users, these are our favorite three lenses

  • 180 mm macro
  • 100 mm macro
  • 65 mm MP-E

Alternatively, you can add an extension tube, which essentially halves the focal distance and doubles the size of your image. The downside, though, is that it decreases the depth of field.

Extra lenses

There are lots of great cameras that can take macro video if you get a macro lens adapter. The Raynox DCR-250, for example, can be added to many cameras.

salamander

Testing a Macro Setup

In my eternal quest to shoot the best macro shots while in the field I got ahold of Phil Torres and made this short before heading to the jungle to test out my own macro setup.

If you enjoyed this series, don’t forget to also watch the ULTRA-MACRO video we did with the forest entomology lab!


High-speed Video for Slow Motion

The filmmaking term for shooting slow-motion video (or high-speed video) is over-cranking. Technology has progressed a lot since the days of film, and the realm of high-speed filmmaking has taken on new dimensions; there are a wide range of options for everyone from the broadcast professional to the hobbyist.

An Example

One of my favorite shows that use high-speed filmmaking is the Discovery channel show “Time-Warp.” The show often takes a behind-the-scenes look at some of the many things you can slow down. For an episode on water, they used the setup of still photographer Martin Waugh of Liquid Sculpture and showed him what they can do with high-speed video. The results are amazing!

Professional High-end Equipment

The key to getting amazing high-speed video is using a high-quality camera that can take extremely fast pictures. Just as in macro video, you’ll also need a lot of light. However, while macro video needed increased light so that it could decrease the aperture size (giving a high depth of field), now we need to decrease the shutter speed so that we can take thousands of frames per second.

There are two major groups of high-speed cameras. The first are those designed for industrial purposes. Vision Research has a wide range of models that can be used for all sorts of applications, such as analyzing automotive crashes and examining NASA launches. The second application of high-speed cameras is for broadcast purposes. Unless you plan to use these cameras every day, you’ll probably want to rent one. Plan to budget anywhere from 1000 to 3000 USD per day, including a technician to help operate it.

Here are some options:

Photron cameras SA1, SA3 and Fastcam BC2

fastcam-bc2Photron makes several cameras, such as the SA1 (used for Timewarp), SA3, SA5, and the Fastcam BC2. They are about 1000 to 2000 USD to rent by the day and about 100,000 USD to buy. These cameras are capable of filming a bullet coming out of a gun or a water balloon popping at 20,000 frames per second (fps). The exact specs on these sorts of cameras change from year to year, so we’ll leave finding out the specifics to your Google searches.

Phantom Flex

flex2The Phantom Flex is Vision Research’s top-of-the-line camera. It seems to have slightly slower high-speed shooting than the Photron cameras but are still a top of the line slow-motion camera manufacturer.

flex

Entry-level Equipment

For those that would like to add a high-speed shot into their films without the expense, there are a few entry-level high-speed cameras that we’ve found many YouTube filmmakers using. For example:

Sony FS700 series

With a purchase price of about 8000 USD, the Sony FS700 is a bit more of a prosumer slow-motion camera. It shoots up to 900 fps at 1920×1080 HD though. It’s a great camera for mixed shooting as it can also serve as your main camera on a shoot.

Casio High-Speed EX-f1

Casio-1This camera is fairly prosumer with a price tag of around 2800 USD. The real benefit of this camera is quality high-speed recording on a tiny camera. Users can select a recording speed of 300 fps, 600 fps, or 1200 fps. Resolution drops with the highest frame rates as follows: 512 x 384 (300 fps), 432 x 192 (600 fps), 336 x 96 (1200 fps).

Casio High-Speed Exilim EX-FC100

ex1On the affordable end of the spectrum is the Casio High-Speed Exilim EX-FC100. The image quality isn’t great, but at less than 300 USD you can hardly beat it. The best features are that it shoots 210 fps and one-second 30 fps (at 6 megapix) burst mode. In very low resolution, it will shoot 1000 fps.

Iphone / Gopro

Let’s not forget that both the new iPhones and new GoPros shoot some very high rates – up to 240 Fps.

Faking Slow Motion

If you don’t have a high end camera for slow motion, you can still get some amazing shots. You  just have to be careful how you shoot them. Here is a video we did on that subject.

More Information