Holy Grail Time-lapse Tutorial: Day-to-Night Time-lapses
The “Holy Grail” time-lapse technique describes the process of capturing day-to-night or night-to-day time-lapses. It has always been an extremely difficult technique because of the way the light gets brighter or darker as the sun rises or sets. To introduce you to the basics and walk you through the technique, here is what you need to think about.
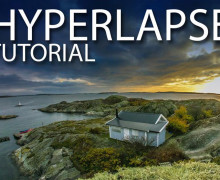
In this video time-lapse tutorial, I attempted to walk you through the entire process from start to finish. Clearly, I missed a few things. But, I did include finding a location, setting the camera, and walking through the images in post production.
Day-Night Time-lapse Steps
Location
The following are my tips on finding a good location.
1. Contact the local film/photography club and ask for advice.
2. Drive around the city ahead of time.
3. Look for your location via Google Maps, either in the images search or with Google Earth.
Camera Settings:
There are two ways to shoot these sorts of time-lapses: aperture priority or manual adjustment. In both techniques I recommend leaving the white balance set to auto (although you can lock this as well). Make sure the keep the focus set to manual. In aperture priority mode, you simply let the camera adjust the shutter speed. However, the technique only works well when the sky is clear. Manual adjustment must be done in combination with a program like LRtimelapse
Post Processing the Time-lapse
Using LRTimelapse:
I just started using LRTimelapse and am really blown away by how it improves the workflow. I highly recommend it (and nobody told me to say that). I suggest watching this short explanation to give you a feel for what it can do. Then, go and download the trial version of LRTimelapse4. It gives you the ability to manipulate 400 picture sequences. That ends up being a 13 second time-lapse, so it’s a great tool to start with small time-lapses. Then, if you like it, you can buy the personal user edition for 100 bucks.
Lightroom to AE to your editing program
If you’re new to time-lapses, I have walked through the entire process from start to finish in this complete time-lapse tutorial.
I hope you enjoyed the tutorial. A few notes:
a. I did bump the tripod once so I suggest avoiding that.
b. I stopped the time-lapse half a dozen times to look at the images and accidentally took a few too many test shots in the middle. That made the clouds jump a bit. Avoiding that will make a smoother final product.
More Time-lapse Filmmaking Links:
- We have a new science filmmaking book out that outlines everything you need to know to take great pictures and video. Buy it on Amazon.
- Also, Jonas and I are creating a whole series to get you started. Here is the first video to get you into it.
- There are relatively few places to get hands on tips in an amazing location. I recently found this time-lapse course in Moab. It’s a bit expensive, but I imagine it’s a great time!


