How to Create a "Droneception" Photo
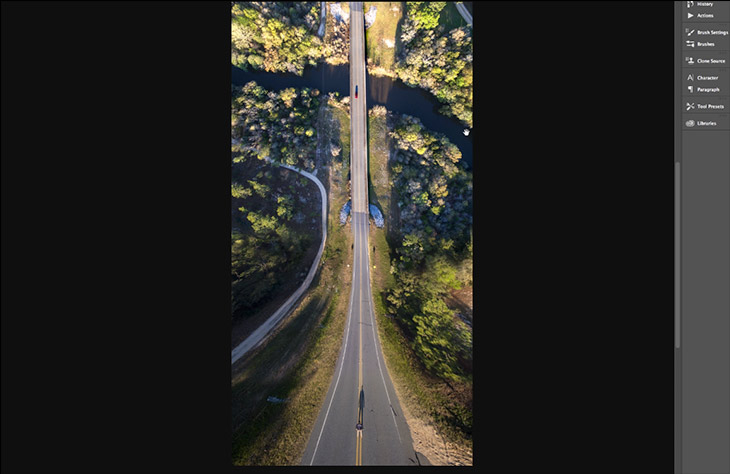
Today, we have a really fun technique to show you – a photo-manipulation technique often known as ‘Droneception‘. It looks something like this.
Here is a review of the main bits.
Shoot it Properly
When you’re in the field you need to have the right technique. The first time I shot it, I will admit, I got it completely wrong. The drone doesn’t just move up and down. You have to shoot it in an arc, starting from low and behind your subject and rising up to a straight down position over something in the distance. You’ll blend the images along the way to create this curved image.
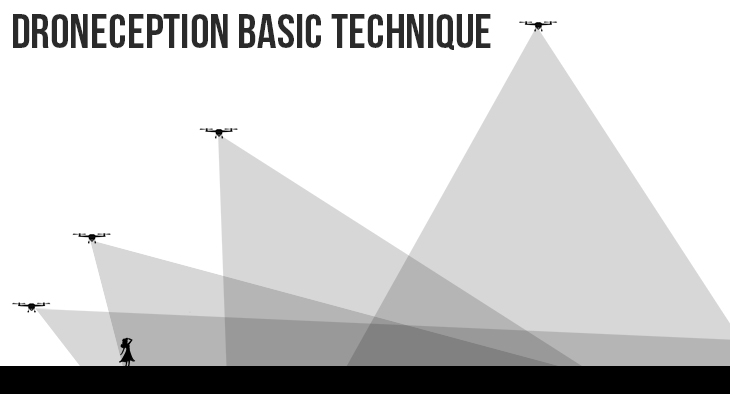
You need to take a minimum of two shots, but 3-5 good shots generally make for a better curved image. The above images show roughly how you might create this shot. Here are a few notes to keep in mind.
- The first shot is a tad easier to work with if it’s not too low. It’s nice to the see the road extending into the distance instead of getting covered up by a person.
- The last shot should be as close to down as possible. This helps give the road that curved look.
- Avoid heavily wooded environments as it makes it difficult to cut out the trunks and blend it properly. However, wide roads in the forest tend to work fine as seen in our video example.
- You can take as many images as you want, but 3-5 good shots is probably all you’ll really need.
Composition
There are so many ways to make a good droneception shot. If you do a good search, you’d probably come across images like these…
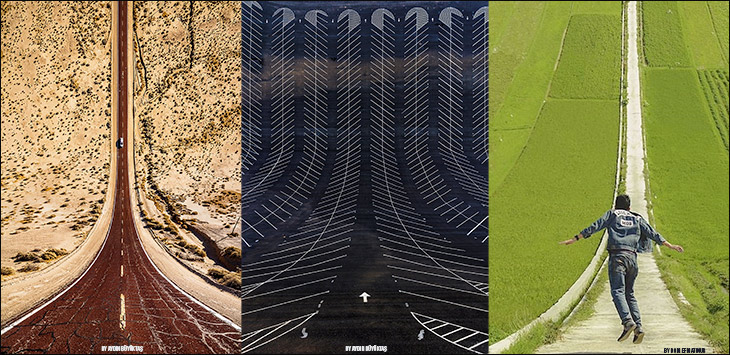
Notice how they use the leading lines to give the image depth and curve. Without them it’s hard to sell the effect. That means you have to choose the right location. It can be exceedingly difficult at times, but when you find one, you’s a really fun to merge them together in Photoshop.
Step 1: Import the images and adjust in Camera Raw
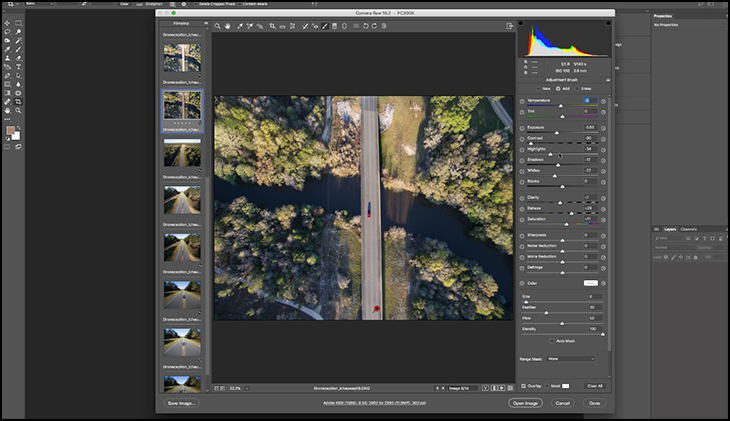
Doing minor adjustments here often makes it easier when you start working with them. Don’t worry though, you can always adjust the brightness, colors and intensity of them afterwards.
Step 2: Start with one image and layer up
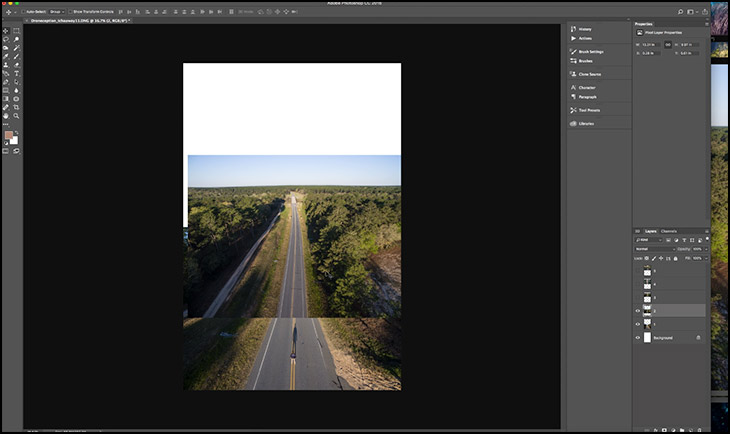
Start by adding the different images into one document. Then start with the bottom image and blend each image on top of it.
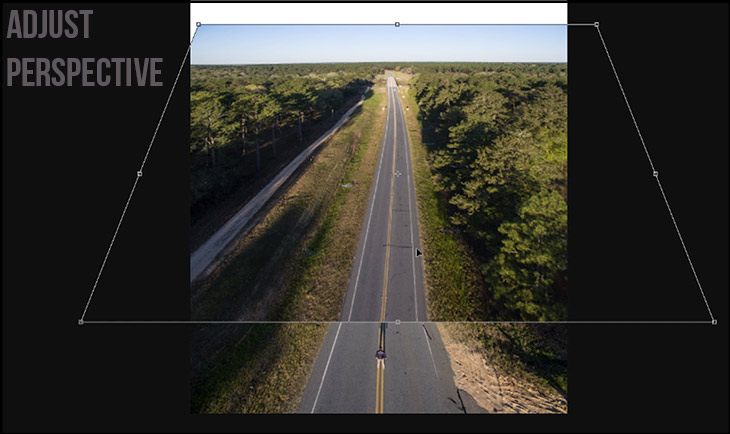
The first image’s perspective can be adjusted by right-clicking on the image and choosing [perspective].
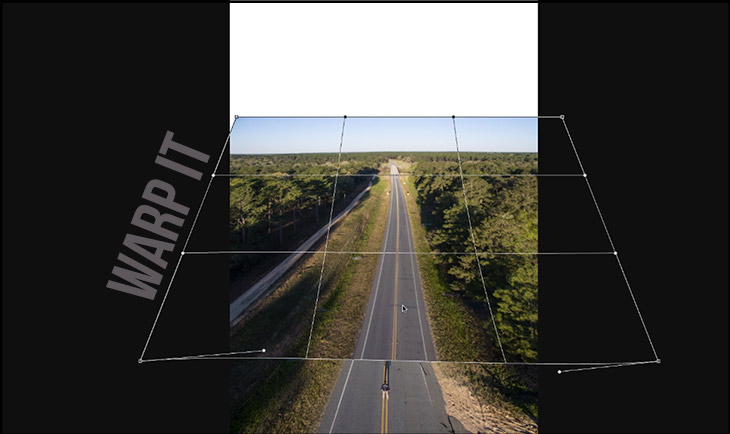
Once the perspective is where you want, right-click and choose [warp]. This will allow you to start the curving process in the image.
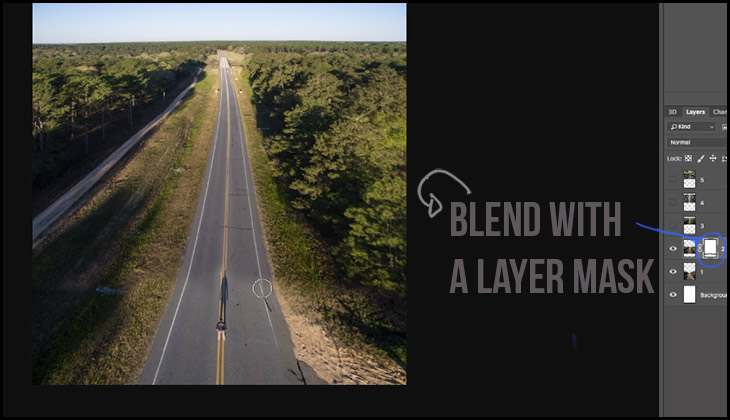
Blending
This is the tricky part. The best way is to add a layer mask and slowly blend one image into another. If you’re new to layer masks, I suggest watching this video where we blend several cave images together.
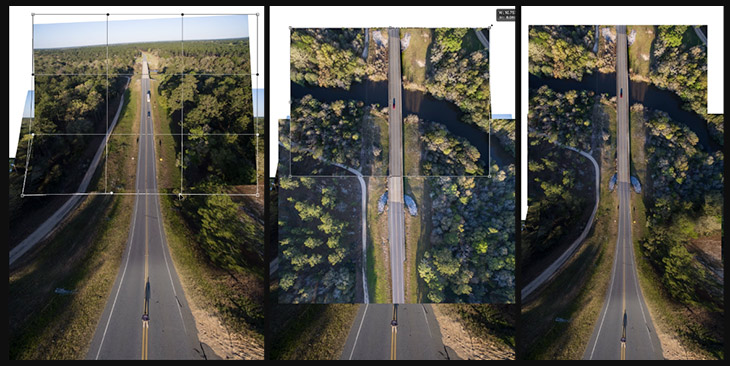
Continue with all the images
The number of images you choose depends on your artistic taste. In this example we used 4 shots.
That is the basic technique used to create these images. I will note that there is a lot of skill involved in creating the best images. We are by no means the experts. The more you practice, you’ll get better. If you take a few shots, let us know in the comments to the youtube video above. We love seeing what all of you are up to. It actually helps us a lot.
Also, I wanted to give a big shoutout to the amazing patrons who helped make all of this possible. In particular, Tobias Haase, Morgan Price, Jinyuan Yeong, James Brady, Please Stand By and Larry Nelson.


