Water Transport Experiment

Have you ever wondered how plants are able to pull water out of the ground? It’s not like they have a heart to pump water around or even a digestion system to extract the water from the soil!

In fact, water movement in plants doesn’t rely on energetically expensive biological pumps or even magic. It relies on some pretty basic physical principles operating within unique plant structures, and anyone can understand it. We’ll see how in this home experiment.

Materials

3 glass or plastic cups (sturdy enough not to tip over)
300 g room-temperature water
Food coloring
Metric scale
Fan
Medium-to-large sealable plastic box (tall enough to fit an upright stalk of celery inside)
2 small squares of plastic wrap
2 stalks celery, leaves attached

Procedure

  1. Pick two celery stalks that they have similar amounts of leaves. (Hint: If you can’t find celery with leaves attached in your grocery store, buy a head of celery. The small inner stalks usually still contain leaves.) Cut off the bases of the stalks so that they are roughly the same height.
  2. Place one glass on the scale and tare it: press the “zero” button so that the cup registers as “0 g”. Fill with 150 g of room-temperature water; gently place two drops of food coloring in the water; stir. Be careful not to spill any colored water! Repeat with the second glass.
  3. Place one celery stalk in each glass, leaf–end at the top.
  4. Wrap one square of the plastic wrap around the top of each glass and the celery stalk. This is to prevent any colored water evaporating into the air directly from the glass.
  5. Fill the bottom of the plastic box with roughly one inch of room-temperature water. Place one of the cups with the celery stalk inside the box and seal the lid to create a humid, closed environment.
  6. Place both the boxed celery and the naked celery in front of a fan, and turn it on the lowest setting. Record the time: _________
  7. Wait 24 hours.
  8. How do the leaves of two celery stalks look? Record your observations below:
    1. Boxed celery:___________________________________________
    2. Naked celery:___________________________________________
  9. Place the third glass cup on the scale, and tare it again so that the scale reads “0 g”.
  10. Dump the remaining colored water in the cup from the boxed celery into the tared glass. Do this carefully, so you don’t spill any water! Record the weight below. Repeat the weight measurement again with the water from the naked celery, and record below:
    1. Boxed celery:____________
    2. Naked celery:____________
  11. Take one of the stalks of celery, and slice it in half. What do you notice about the inside the celery stalk? Record your observations below:
    1. Celery cross-section:____________________________

How does water move up the stalk?

Although plants don’t have circulatory systems like animals, they do have something quite similar—a network of small tubes called xylem, used for carrying water.

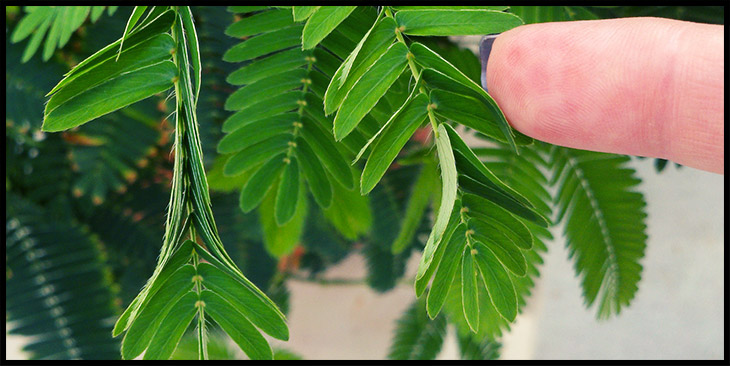
Xylem is composed of long, hollow tubes formed by overlapping cells. As these cells grow, they stretch out and elongate, die, and leave behind hollow cavities that are all interconnected to form one long tube. Plants contain many xylem vessels stretching from the roots to the tips of the leaves, just like a series of drinking straws. When you sliced the celery in half and saw colored dots in the cross-section of the stalk, you were actually looking at the xylem vessels!

Xylem works within some basic physical principles to bring water from the ground up into the rest of the plant. The whole process starts out in the leaves: when the plant is photosynthesizing, it opens tiny holes in the underside of the leaf called stomata. The plant does this so that carbon dioxide can flow in, but it also has a downside: water also diffuses out of the stomata at the same time, drying out the inside of the leaf ever so slightly.

As the plant dries out from the leaves, it brings more water in from the xylem due to some interesting chemical properties. Water is a polar molecule, meaning that it’s slightly “sticky”—it forms temporary hydrogen bonds with itself. This creates cohesion; small quantities of water will tend to stick together rather than scattering and spreading everywhere (think of dew drops on grass). Water also sticks to the inside of small tubes due to a property called capillary action. These two properties allow the water to travel in one unbroken column through the xylem from the roots to the leaves.

What factors affect how water moves through the plant?

Water moves through plants thanks to a few basic principles, but none of these can work without the first step in the process: water loss from the leaves. This process, called transpiration, happens faster when humidity is low, such as on a hot, windy day. This causes water to evaporate quickly, so the plant needs to suck up more water from the ground (or from the cup) to catch up!

When you put the celery stalk inside the plastic box with water, it increased the humidity in the box, so the celery didn’t lose very much water from the leaves. On the flip side, when you placed the naked celery stalk in front of the fan, it was losing a lot of water! It needed to catch up, so it sucked up more water, and food coloring with it.

When you measured the amount of water left in the glasses at the end of the experiment, you found that the naked celery actually did suck up more water. And, in case you didn’t believe the numbers, you could actually observe that the naked celery had a lot more food coloring within its leaves.

Normally, we can’t see transpiration and water transport happening within plants, but rest assured: as long as it’s above freezing, this process is always happening on a mass scale all over the world!

Astronaut Bone Loss

Think about your favorite space action movie. The hero leaps into view with some sort of futuristic weapon, and he looks lean and ripped with muscles. Except, if this were reality, he’d be completely deflated in a puddle on the floor and probably look more like Jabba the Hutt than Han Solo. This will be a more accurate view of the future of space travel, unless scientists can figure out how to solve a big problem: how to stop astronaut’s bones from literally dissolving away.

bones in space

Battle of the Bone Cells

Although it might look like your bones are just long, dead rocks inside you, they are actually just as much alive as the rest of you. In fact, there are all kinds of cells that live just inside your bones. Two of the most important types are called osteoclasts and osteoblasts.

Osteoclasts behave like a demolition crew. They’re large, multinucleated cells that slowly crawl along, secreting a cocktail of acid and enzymes that dissolves away the bone, releasing proteins and minerals like calcium. Osteoblasts, on the other hand, are smaller cells that come in after the demolition crew has passed and build up new bone structure. These two types of cells work together to break down and build up new bone tissue.

osteoclasts

Bones’ Life on Land

Normally, osteoclasts and osteoblasts work together at the same rate so that your bones stay a constant size. Osteoclasts are continually breaking down bones so that some of the nutrients can be moved to other areas of your body when needed. For example, calcium is a major component of your bones, but it’s used in a lot of other places too, like in blood clotting or muscle contraction.

Osteoblasts are always working, too, but they can be stimulated to produce even more bone if you exercise and participate in weight-bearing activities. That way, your bones will always be just strong enough for the activity you do. A grandmother doesn’t need the same amount of bone mass as an Olympic weightlifter!

Sometimes these two processes get thrown out of whack. If the osteoclasts work too much, or the osteoblasts work too little, an imbalance will result. You can end up with too much bone, such as with Paget’s disease, or too little bone, such as with osteoporosis. Osteoporosis is far more common, especially among elderly people, but most young people will never have to worry about imbalances in bone growth—as long as they stay on Earth.

Bones’ Life in Space

In space, though, things work differently. Astronauts float around and have to do almost no weight-bearing activity at all, thanks to the microgravity environment. When this happens, the osteoclasts still keep chugging away and removing bone structure, but the osteoblasts don’t catch up to them anymore.

Bone loss begins slowly, over the first few days, and speeds up until it hits a peak several months into the space flight. The blood calcium levels of the astronaut start to climb as excess calcium is released into the bloodstream by osteoclasts, causing a whole host of other problems. While in space, the astronauts will actually lose as much bone mass in one month as elderly people on Earth will lose in one year! Some long-term astronauts have lost as much as 20% of their bone mass in some long bones while in space.

As far as scientists know, this process of bone loss in space continues indefinitely, i.e., theoretically, an astronaut’s bones could dissolve to nothing, if they stay in space long enough. This is why it’s so important for scientists to figure out how to stop bone loss. We don’t want to turn into gelatinous puddles!

bones-in-space

Finding a Solution

Scientists are fairly certain that bone loss in astronauts is partially due to the lack of weight-bearing activity in space. There are probably a lot of other things at play too, but we just don’t fully understand them yet. It’s just too expensive, and there haven’t been enough studies done in space to find out. Regardless, scientists are already taking steps to limit bone loss in space.

One of the biggest things that astronauts do now is to physically strap themselves down and lift weights, just like they would on Earth. It’s had some success, but it doesn’t prevent all bone loss; scientists are still working hard to find new and better solutions.

Regardless of how it’s done, it’s still a big problem that will have to be solved for certain if we’re ever to live permanently in space!

Molecular Clock

You read and hear it all the time—“this is an ancient, million-year-old species,” or, “this animal has been around for hundreds of thousands of years.” But, how do scientists really know how old these species are? It’s not like they can use a time machine to see—not yet, at least. But the molecular clock can help make some estimates.

It’s not magic. It’s not even just a random guess. It’s actually just a basic math problem. Scientists make a few measurements and plug the numbers into an equation to get an estimate of a species’ age. This technique is called the molecular clock, and it was thought up by scientists Linus Pauling and Emile Zuckerkandl in 1962.

MOLECULAR-CLOCKS-ARE-AWESOME

How does the molecular clock work?

Measuring the age of a species with the molecular clock technique requires just two simple things: an estimate of the number of genetic mutations between a species and its closest relative and the average genetic mutation rate (i.e., how many mutations show up in a population in a specified time frame, such as 5 mutations per year).

To show how this works, let’s take a simple hypothetical example. Let’s pretend that we’re taxonomists—biologists who study how organisms are related to each other. We’re given the job of trying to figure out how different turkeys are related to each other, and there are two species—the Ocellated Turkey (Meleagris ocellata) and the Wild Turkey (Meleagris gallopavo).

Let’s say we analyze the DNA of the two species and find that there are 5,000 mutations that are different between them. We also know the mutation rate: the species will show 1,000 new mutations every million years, or 0.001 mutation/year. If we divide the number of mutations by the mutation rate (5,000 mutations ÷ 0.001 mutation/year), we find out that these two turkey species are about 5 million years old. Ta da!

This approach doesn’t come without limitations, though. You need to assume that the genes mutate at the same rate. If the genes go through periods where they change very quickly and then don’t change at all, then it’s like having a yardstick with random ticks on it. You can’t use it to measure distance (or time) any more.

Because of this limitation (and others), there is actually a lot of science and math that goes on behind the scenes of a lot of these calculations. But at its essence, it’s just measuring the passage of time by using the mutation rate as a yardstick.

MOLECULAR-CLOCK

How do scientists use the molecular clock?

The molecular clock basically measures the amount of time since two species have diverged from each other. Obviously, this would be really useful information for someone who is putting together a family tree for related species (called a phylogenetic tree), but scientists can use this information for more than just planning really epic family reunions.

Phylogenetic trees help us make sense of the world. We can see which species are related and how closely, and we can use this information for conservation measures. For example, some scientists have proposed bringing back wooly mammoths (Mammuthus primigenius) with the help of elephants. Indian elephants (Elephas maximus) are the closest living species to the wooly mammoth, having split from each other about 7 million years ago. By using similar, non-endangered species in conservation efforts for things like raising offspring, the chances of success are greatly increased.

Believe it or not, molecular clocks are also useful in forensics and epidemiology! Scientists have successfully used the molecular clock method to prove that one person infected another person with a disease, such as the case of this Spanish anesthetist who infected hundreds of patients with hepatitis C. Scientists also use the molecular clock technique to track evolving pathogens like the Zika virus or Mycobacterium tuberculosis.

The molecular clock – don’t leave home without it!

The molecular clock has proved to be an invaluable tool in an evolutionary biologist’s toolkit. Without it, we wouldn’t have a complete picture about the natural history of our world. For many organisms that don’t fossilize well, like jellyfish or bacteria, it’s the only technique that scientists can use to date the species.

Plant Memory

If reliably remembering where you put the car keys or what you came to the fridge for isn’t your strongest suit, spare a thought for plants; they can never remember anything at all. Or so you’ve been led to believe. Evidence to the contrary is increasingly emerging from plant science laboratories around the world, and it’s turning some fundamental stuff we thought we knew completely upside down.

Traditionally, animals have been considered “intelligent” and plants have not, end of story, period. Learning from experience was something done exclusively by higher organisms like us, while every organism without a brain (or at least a network of neurons) to its name was doomed to forget everything that happened to it throughout its uncomplicated life, and retain nothing learned by generations past.

Brains Aren’t Needed for Making Memories

That’s what we know now, thanks to studies like the one done in 2014 at the University of Western Australia that focused on “the sensitive plant.” Mimosa pudica closes its leaves in response to touch or sudden stress. And, through observing how M. pudica plants responded to repeatedly being exposed to a stressful situation that didn’t cause them harm, the researchers discovered that these plants could learn.

plant memory

The plants very quickly stopped curling their leaves (which takes precious energy) in response to being “alarmed” but not harmed, showing they had learned that, in this scenario, leaf-closing was a waste of time. What’s more, when exposed to the same “scary” situation one month later, the plants didn’t bother closing their leaves in response, demonstrating they had “remembered” that earlier lesson they’d learned.

So, how are memories made in plants?

Well, the mechanisms aren’t well understood, but scientists pin the ability of plants to make memories (despite their lack of a brain and neural tissues) on a sophisticated, calcium-based signaling network in their cells. Functioning a bit like memory processes in animals, these networks allow at least some plants to change their behavior as a result of past experiences, even in the relatively long term.

The Blurred Line Between Plants and Animals

Studies like the Western Australian one contribute to a growing grey area between plants and animals, and ideas that science has held firmly to for ages (such as only animals with nervous systems can learn) suddenly now need another look. Still, in the short term at least, you’d better not bank on friendly reminders from street trees and nature strip lawns next time you’ve forgotten where you parked.

Phototropism Experiment

Can Plants Really “See” the Light?

phototropismHave you ever noticed how plants bend toward light? How are they able to tell which direction the light is coming from, and how do they bend toward it? They don’t have eyes or muscles, after all.

Scientists call a plant’s ability to bend toward light phototropism. Even as far back as ancient Greece it’s been a big puzzle about how plants are able to do it. People experimented with how plants accomplish this amazing feat, but no one really figured out how it worked—until Charles Darwin came along, that is.

Although Darwin is most well-known for his studies on evolution, he was also a prolific scientist in general. The questions about phototropism piqued his curiosity, and he thought of an ingenious experiment to test how plants are able to see light. In this experiment, we’ll recreate what he did, and at the end we’ll dive further into the science.

Darwin's Phototropism experiment cartoon

Materials

3 small cups full of soil
Tape, a marker, and 3 sticky notes
Medium-sized box (such as a shoebox or a storage cube)
12 corn seeds
Aluminum foil
Small cookie sheet that fits inside the box (or another sheet of aluminum foil)
1 Straw
Water

Procedure

  1. Plant four corn seeds in each of the soil cups. Make sure they’re evenly spaced, and plant them just a half inch under the dirt.
  2. Create labels for each of the following using a sticky note, and stick to one of each soil cup:
    1. Control
    2. Tip
    3. Base
  3. Water the cups, and dump out any excess water (be careful not to tip the soil and seeds out). Place the cups on the cookie sheet or aluminum foil. This will prevent moisture and dirt from soaking through the box.
  4. Place the cups/cookie sheet setup inside of the box. Make sure it’s open on one side so that light is coming in from an angle. Place in a windowsill, with the open side facing the sun. (You might need to stack some books underneath it to support it, if your windowsill isn’t very wide.)
  5. Make four of each type of light-exclusion device:
    1. Shoot cap: Cut a small 2″ x 3″ square of aluminum foil. Wrap it around the tip of a straw to create a small, closed-ended metal cap, and slide it off. This will be placed over the tip of the growing shoot to cover any light coming in to the tip.
    2. Base sleeve: Cut a small 1/2″ x 3″ square of aluminum foil. Wrap it around the middle of a straw so it creates a small open-ended 1/2″ tall tube, and slide it off. This will be placed around the growing shoot so that it can grow through it.
  6. Check the cups each day. Once they send up a shoot about half an inch high, place either a shoot cap (on Tip seedlings) or a base sleeve (on Base seedlings) around them, depending on which cup they’re in. The control cup will get neither of the light exclusion devices. The seedlings might grow at different rates, so be sure to check each day to put the caps/sleeves on as needed. They grow fast once they germinate!
  7. Continue to water the seedlings as needed.
  8. Check the seedlings after a week. What has happened? Compare the seedlings with the caps and the sleeves to the control seedlings. Are any of them growing in certain directions?

How did the seedlings “see” the light?

If the experiment worked correctly, you should have noticed that the seedlings that were covered with caps at the tip grew straight up, while the control seedlings and the seedlings with the bases covered bent towards the light. This is phototropism in action.

Darwin correctly concluded that plants are able to “see” light using the tips of the plant shoots, rather than through the stalks. It wasn’t until a bit later that scientists figured out exactly why that was, though.

It turns out that plants are able to grow by using hormones such as auxins and gibberellins. Auxin in particular tells individual cells to reach out and grow longer, like Stretch Armstrong. It’s one of the ways that plants grow taller. Normally, plants growing with an unshaded light source will grow straight up towards the sun because auxin is evenly distributed all around the shoot.

But when the light is heavily shaded and comes in from an angle, something interesting happens. Auxin starts to concentrate on the shaded side of the plant instead, and as a result, the cells on the sunny side stay the same size but the cells on the shaded side grow longer. This causes the plant to tip and grow towards the light.

phototropism - auxin

Auxin is primarily produced in the tips of the plants. This is why the plant grew straight up when you covered the tip with a cap—it couldn’t “see” the light anymore! The tips of the control seedlings and the seedlings with the bases covered could still sense the light, so they grew towards the sunlight.

Thanks to Charles Darwin and modern science, the mystery of how plants grow towards light was finally solved.

Learn more about phototropism:

To understand plant tropisms, you first have to understand plant hormones. We created an excellent page about Plant Growth Hormones here and here.

Digestion

Michigan’s Mackinac Island in the early nineteenth century didn’t seem like a very likely place for someone to discover how digestion worked, but that’s exactly where Army surgeon Dr. William Beaumont found himself when he made such a discovery in 1822.

Beaumont was caring for young French-Canadian fur trader Alexis St. Martin who had a gaping hole in his side after suffering an accidental gunshot. Beaumont patched him up as best as he could, but he didn’t think St. Martin would live.

St. Martin surprised everyone though; not only did he live, but his stomach, which had also been hit, fused with his skin to create a permanent opening (or fistula) from outside of his body directly into his stomach.

Beaumont realized that he had something unprecedented on his hands. Up to that point, no one really knew how digestion happened; with this patient, the doctor had a human guinea pig where he could literally see digestion happening before his eyes. He tricked St. Martin into signing an agreement to be his servant for many years, during which time he also experimented on him. He put different types of food into St. Martin’s stomach for different lengths of time to see what happened. He collected St. Martin’s gastric juices to study them.

The results of Beaumont’s studies clarified exactly how a stomach works, but it came at a great cost for St. Martin. When the patient died in 1880, his family even let his body partially decompose before they buried it, lest any more scientists come to poke and prod their loved one.

How Stomach Digestion Works

The first thing that a bite of swallowed food (called a bolus) encounters when it reaches the stomach is the cardiac sphincter. This tight, circular muscle closes off the top of the stomach like a purse string and keeps in gastric acid.

The cardiac sphincter relaxes to allow the bolus to pass in and then closes up tightly behind it. If you’ve ever suffered from heartburn after eating, you know exactly how painful it can be if the cardiac sphincter doesn’t close all the way and lets acid into your esophagus!

The stomach itself is basically a big muscle bag. There are three separate layers of muscles, each of which contract in a different direction, smashing and mixing your food with gastric juice into a soft, pulpy mess called chyme. By turning food into chyme, the surface area of your food is drastically increased, allowing digestive enzymes to get into all the nooks and crannies of your food and digest it more fully.

After the chyme is fully mixed together, your stomach slowly releases it through another purse-string muscle—the pyloric sphincter, at the end of your stomach. Don’t fear, though; even though the mixture is very acidic and could normally burn your tissues, it’s neutralized by a squirt of bicarbonate ions (produced by your pancreas) as it enters the small intestine.

It’s the Pits: Gastric Pits in the Stomach

But where does the acid come from, and how does it not digest your stomach itself?

The answer is the pits—the gastric pits. These deep, microscopic tunnels go all the way into the lining of your stomach. At the end of each tunnel is a cluster of three types of cells that produce gastric juice.

Parietal cells are responsible for producing the hydrochloric acid for which gastric juice is so well-known. Chief cells produce pepsinogen—an inactive form of pepsin that only works once it comes into contact with hydrochloric acid. Mucus neck cells (a horrible name for anything, by the way) produce a lot of mucus that coats and protects the lining of your stomach. Even with this protection, though, the life of a cell lining the stomach is rough: they generally live for about 5 days only. To compensate, your stomach is constantly growing new cells.

What does gastric juice do?

Gastric juice seems like an odd thing for the human digestive system to tolerate. Why bother with a dangerous acidic cocktail that often backfires on unsuspecting victims?

Gastric juice (and its potency) is important for three main reasons. First, it starts the process of digesting protein, which is one of the main types of macromolecules needed by your body. The acid itself starts to unravel some of the tightly-wound protein molecules (a process called denaturation) in your food so that digestive enzymes can get in and start breaking it down. Acid also activates the pepsinogen into pepsin; once the long chains of proteins are unwound, the pepsin can get in and start slicing and dicing the bonds holding the protein together.

Second, the gastric juice also kills any pathogens (bacteria, viruses, and fungi) that may be in your food. It’s not a perfect system, though, which is why sometimes we still get food sickness. But it would probably be a lot worse without the acid bath.

Finally, gastric juice is important because it lubricates your food and makes it easier to flow down the rest of your digestive tract where digestive enzymes can get in and digest your food more fully. You don’t want to get plugged up!

Osmosis Experiment

How does osmosis keep you healthy?

Right now, as you read this, there are millions of things happening throughout your body. The food you ate just a bit ago is making its way through a watery slurry inside your stomach and small intestines. Your kidneys are working hard to excrete waste and extra water. The lacrimal glands near your eyes are secreting tears, which allow your eyelids to close without damaging your eyeballs. What’s one thing that all of these processes have in common? They all rely on osmosis: the diffusion of water from one place to another.

Osmosis factors heavily in each of these processes and is an important force for keeping every single cell in your body healthy. Osmosis is hard to see without a microscope. But if we create our very own model of a cell, using a shell-less chicken egg, we can see what happens when we manipulate the osmotic balance in the “cell”!

dissolving-egg-shell-experiment-4

Materials

  • 3 eggs
  • 3 glasses (large enough to fit the egg plus liquid)
  • 3 butter knives
  • White vinegar (about 3 cups)
  • Distilled water (about 2 cups)
  • Light corn syrup (about 1 ¼ cups)
  • Slotted spoon
  • Measuring cup (1 cup)
  • Measuring spoons (1 tablespoon and ½ tablespoon)
  • Sticky notes and marker
  • Scale (optional)

Procedure

Note: It’s okay to touch the eggs, but remember to wash your hands afterwards to avoid any nasty surprises!

1. Place one egg in each glass. Pour in enough vinegar to cover each egg. Bubbles will start to form around the egg, and it’ll float up. To keep it submerged, put a butter knife in the glass to hold it down.

2. Put the three glasses in the refrigerator and allow to sit for 24 hours.

3. Gently holding the egg in the glass, pour out the old vinegar. Replace with fresh vinegar, and let sit in the refrigerator for another 24 hours. Repeat this process until the shells are fully dissolved and only the membrane remains. This should take about 2-3 days.

4. Gently remove the eggs using the slotted spoon and rinse with tap water in the sink. Rinse out the empty glasses as well.

5. Gently put the shell-less eggs aside for a moment on a plate.

6. Prepare three different sugar-water solutions as follows, labeling with sticky notes:

Glass 1: Label “hypertonic”. Pour in one cup of corn syrup.

Glass 2: Label “isotonic”. Add 1 ½ tablespoons corn syrup to the one cup measuring cup, and fill the remainder with distilled water. Pour into glass (make sure you get all the corn syrup out!) and stir to dissolve.

Glass 3: Label “hypotonic”. Pour in one cup of distilled water.Gently put one shell-less egg in each of the glasses, and let sit in the refrigerator for another 24 hours.

osmosis-graph

7. Remove the glasses from the refrigerator, and gently put the eggs on a plate. If you weighed the eggs before putting them in each solution, weigh them again. What happened to each of the eggs?

egg-experiment-3

How does osmosis work?

Osmosis is the scientific term that describes how water flows to different places depending on certain conditions. In this case, water moves around to different areas based on a concentration gradient, i.e. solutions which have different concentrations of dissolved particles (solutes) in them. Water always flows to the area with the most dissolved solutes, so that in the end both solutions have an equal concentration of solutes. Think about if you added a drop of food dye to a cup of water – even if you didn’t stir it, it would eventually dissolve on its own into the water.

In biological systems, the different solutions are usually separated by a semipermeable membrane, like cell membranes or kidney tubules. These act sort of like a net that keeps solutes trapped, but they still allow water to pass through freely. In this way, cells can keep all of their “guts” contained but still exchange water.

Now, think about the inside of an egg. There’s a lot of water inside of the egg, but a lot of other things (i.e. solutes) too, like protein and fat. When you placed the egg in the three solutions, how do you think the concentration of solutes differed between the inside of the egg and outside of the egg? The egg membrane acts as a semipermeable membrane and keeps all of the dissolved solutes separated but allows the water to pass through.

How did osmosis make the eggs change size (or not)?

If the steps above work out properly, the results should be as follows.

In the case of the hypertonic solution, there were more solutes in the corn syrup than there were in the egg. So, water flowed out of the egg and into the corn syrup, and as a result the egg shriveled up.

In the case of the isotonic solution, there was roughly an equal amount of solutes in the corn syrup/water solution than there was in the egg, so there was no net movement in or out of the egg. It stayed the same size.

In the case of the hypotonic solution, there were more solutes in the egg than in the pure water. So, water flowed into the egg, and as a result, it grew in size.

Osmosis and You

Every cell in your body needs the right amount of water inside of it to keep its shape, produce energy, get rid of wastes, and other functions that keep you healthy.

This is why medicines that are injected into patients need to be carefully designed so that the solution has the same concentration of solutes as their cells (i.e. isotonic). If you were sick and became dehydrated, for example, you would get a 0.90% saline IV drip. If it were too far off from this mark it wouldn’t be isotonic anymore, and your blood cells might shrivel up or even explode, depending on the concentration of dissolved solutes in the water.

Osmosis works just the same way in your cells as it does in our egg “cell” model. Thankfully, though, the semipermeable membrane of the egg is much stronger, so you don’t have to worry about the egg exploding as well!

The Human Lifespan

In 2012, the average American citizen was estimated to live to 78.8 years. That’s a relatively long time, but it’s still a far cry from the oldest human on record. Those bragging rights went to Jeanne Calment, a feisty Frenchwoman who died in 1997 at the age of 122.

Most people will never live for 12 decades. Thanks to advances in the health sciences, though, the average age grows higher and higher each year. But how long can people live for?

The Hayflick Limit and The End of the Road

It turns out that there is a limit on how often your cells can divide to keep you young and fresh. This limit, known as the Hayflick limit, is dictated by the physical length of a unique cellular feature called telomeres.

As Derek Muller explains in How Long Will You Live?, telomeres are the end caps on your chromosomes. They function to keep chromosomes wrapped up tightly in a nice, neat package and prevent them from fraying and binding to all the other little things within your cells. Telomeres are a handy feature, but they also have a downside; each time a chromosome is copied to make another cell, the cellular copying device has to cut off a tiny bit from these end caps.

Over time, the telomeres get shorter and shorter until eventually they’re no longer there at all, and the cell stops dividing and may eventually die. This is what happens when we age. Among other things, our skin stops replenishing itself, we get wrinkles, and our bones become brittle and frail. We simply wear out.

It seems like the easy solution would just be to rebuild the telomeres so that they never shorten, thus creating an endless fountain of youth. In fact, there is an enzyme that does just this, called telomerase. This enzyme actually does occur naturally in humans, but not in the most beneficial way.

Like in comic books where a good scientific premise has gone bad, telomerase seems benign but is actually quite harmful. It does make your cells live forever, but only in the form of cancer. Unfortunately, we currently lack the cellular mechanisms to harness telomerase for good purposes.

The Immortal Woman

One of the craziest stories about telomerase has to do with a line of cells called HeLa cells that are currently being used in biomedical research. Rebecca Skloot describes this fascinating story in her book, The Immortal Life of Henrietta Lacks.

In 1951, an African American woman named Henrietta Lacks felt sick and went to see a doctor. They took a biopsy and found out she had cervical cancer. In those days, scientific ethics were unscrupulous at best, and scientists cultured her cells without letting her know or even asking for her permission. Within a few months, Henrietta was dead, but the cells from her cancer lived on.

Her cancer cells were unusually prolific and lent themselves well to medical research. Thanks to telomerase, her cells will never run out of telomeres. Given the right environment and enough nutrients, they will live forever. Even though Henrietta’s been gone for a long time, she still lives on in petri dishes and flasks around the world.

Died From “Natural Causes…”

Even though there is a limit to how many times our cells can divide, many of us won’t reach that limit. There are myriad ways to die, and only some of them are the result of our cells reaching the ends of their lifespans.

Up until about a hundred years ago, most people died well before their telomeres ran out due to infectious diseases like tuberculosis and influenza. Thanks to advances in medicine and sanitation, though, it’s pretty rare to hear of people dying from these things nowadays, and as a result, the average lifespan has increased dramatically.

Still, though, we generally don’t reach the theoretical limit of how long we can live because we’re dying prematurely of other diseases that are a result of damages resulting from less-than-optimal life choices. Now, people are more likely to die prematurely from things like cancer and heart disease.

While some of these premature deaths are just due to bad luck or less-than-stellar genetics, many of them are preventable through healthy lifestyles. By doing things like quitting smoking, putting down the Twinkies, and using sunscreen, most of us will live to ripe old ages.

And who knows? Maybe someday we’ll be able to safely harness the power of telomerase so we never grow old.

What Will You Look Like When You’re Old

Aging Pic 30 to 60

Did you know that you can actually predict to some reasonable degree what you might look like when you get older? In 2009, Jonas visited a research institute in Scotland that was doing just that. We made a video on it for our 2010 middle grades series. Even if you’re not a 6th grader, we thought you might enjoy this segment.

Adjusting to Altitude

Living on the Edge: How Do High-Altitude Humans Do It?

When Felix Baumgartner shattered the world record for the highest skydiving jump at 127,852 feet in 2012, it was only a matter of time before it was broken again. Two years later, Alan Eustace, a top Google executive, went even further in an equally amazing (but less well-publicized) stunt: he attached himself to a helium balloon and jumped from 135,892 feet.

high altitude jumping

Neither Felix or Alan would have been able to complete these awesome, high-altitude feats without the help of a small army of engineers, technicians, and scientists – not to mention numerous technological tricks and tools. Humans cannot survive unassisted at those altitudes due to a lack of oxygen…for now.

Ever since humans first arrived on the scene, we’ve been pushing the limits of how high we can go. Felix and Alan used modern technology to do it, but in less extreme cases, we use what nature gave us to alter our own biology. As we travel to higher altitudes most people experience biological changes without even knowing it in a reversible process called acclimatization. There are also many groups of humans that have evolved permanent long-term adaptations to such altitudes.

alpine-tundra-rob

Short-Term Altitude Acclimatization

Our bodies are streamlined oxygen-consumption machines. There are hundreds of anatomical features and physiological processes involved in making sure cells have enough oxygen when and where they need it most. When we travel to altitudes where there’s less oxygen, these features and processes are thrown out of whack slightly and need to readjust or acclimatize.

The body monitors its blood oxygen levels with special sensors called carotid bodies, which are located in the carotid artery within the neck. As we travel higher, the carotid bodies sense blood oxygen levels decreasing in real time. In order to increase blood oxygen levels, the brain kicks into high gear and sends out frenzied signals all over the body.

Alaskan-Alpine-Tundra

At higher altitudes, you’ll notice several changes happening immediately. You’ll begin to breathe faster, and you might even feel your heart beating faster in order to increase the amount of oxygen your blood can pick up in the alveoli of your lungs. One weird side effect of this is that it makes your blood more alkaline, so your kidneys attempt to balance blood pH by getting rid of excess bicarbonate ions in your urine. Unfortunately, this means you’ll need to pee more as well.

Even with all of these changes, it’s easy to become exhausted and out of breath while even moderately exercising, as I discovered recently after having to haul all of my furniture into a second-floor apartment after moving from Fairbanks, AK (436 feet above sea level) to Fort Collins, Colorado (5,003 feet above sea level). These changes are only short-term solutions, so our bodies will begin to look for longer-term solutions.

If you remain at a higher altitude, over the course of the next few days and weeks, your body actually begins to restructure itself on a microscopic level in order to make things easier for you long term. Your kidneys begin producing a hormone called erythropoietin, which stimulates stem cells in your bone marrow to produce more and larger red blood cells. You begin growing more capillaries throughout your body to deliver more blood, and hence more oxygen, to your tissues.

Long Term Altitude Acclimatization

The Highlanders: Pushing Long-Term Adaptations to the Extreme

Almost anyone can acclimatize to higher altitudes. There are some groups of humans, however, who have lived in high-altitude areas for so long that they’ve actually evolved unique physiological and anatomical adaptations that help them live successfully at the edge of high-altitude human limits.

Although the movie Highlander proclaims that “there can be only one,” the truth is that there are many different groups of highlander people throughout the world. Groups of native people have inhabited the Tibetan, Andean, and Ethiopian highlands at altitudes of up to 16,732 feet for thousands of years. In that time, they’ve evolved some neat tricks to help them cope in ways that lowlanders cannot – such as changes to their hemoglobin to make it more efficient at pulling oxygen out of thin air, or structural changes in the lungs to give them greater volume.

The Altitude Limit

Although humans have likely been living at high altitudes for as long as we’ve been a species, there is still an upper limit to even the most extreme of us. Most mountaineering experts refer to altitudes above 26,000 feet as the “death zone” – where humans cannot survive long-term without supplemental oxygen.

As humans continue to live in high-altitude places, it’s likely we’ll continue to develop new mechanisms and adaptations to cope with low oxygen levels. Who knows how high we’ll be able to go up unassisted some day

Learn more: Untamed Science Video

In this short Untamed Science video, Rob travels to the home of the olympic training facility in Colorado Springs, CO to try and understand why athletes train at altitude.

Alpine Tundra Biome

The Alpine Tundra is one of my favorite places in the world. I’m a native Coloradan, after all, so it’s kinda in my blood. Plus, I’ve climbed my fair share of mountains. I’ve even made a few movies on mountains, like a 3D movie on the Grand Teton and the “original” Alpine Tundra Video with The Wild Classroom. It seemed appropriate for me to give a quick overview of this biome.

The word tundra comes from the Sami people of Northern Finland, Sweden and Norway and means “land of no trees.” Similar to the arctic tundra, the Alpine Tundra also has no trees.

Yet unlike the arctic tundra, which is restricted to high latitudes, the alpine tundra can be found anywhere on Earth. It is dependent only on elevation. Anywhere you have high enough elevations to keep trees from growing, you can find the alpine tundra. That means you can have alpine tundra on high mountains in Mexico, Kenya, Colorado and Alaska.

The Merriam Life Zones

Just as the desert can fade into rainforest depending on a gradient of rainfall, a gradient of biomes or life zones can also be established around elevation. This is exactly what C. Hart Merriam did in the late 1800’s. He was a land surveyor who mapped the West from the bottom of the Grand Canyon to the top of the mountain peaks. He noticed distinct plant communities as elevation increased. The lowest were prairies, followed by dry steppes, Ponderosa Pine, montane forests, subalpine forests and finally the Alpine Tundra. In each of these zones, the plants were well-adapted to the climate that existed.

The Climate of the Alpine Tundra

The Alpine Tundra, while high in elevation, mirrors the Arctic Tundra in many ways. One of the most notable similarities is the tendency for the Alpine Tundra to get covered by snow for a large portion of the year. This makes the growing season short for most plants. Wind at these elevations can also cause a great deal of desiccation (drying out the plants).

Alpine Tundra Filming Expedition

The Diverse Landscape of the Alpine Tundra

Don’t think that the Alpine Tundra is an unchanging habitat sitting on top of a mountain. Quite the contrary. In fact, small changes in elevation and patches of snow and rock can create small habitats that different critters can take advantage of. For instance, a small depression in the ground can decrease wind and sun intensity so that snow accumulates there year round. These snowbanks are hard places for plants and animals to grow. Some of the major micro-habitats found in the Alpine Tundra are meadows, snow-beds, talus fields, and fell-fields. You can only imagine how different the plant communities might be in these different habitats.

Animal Adaptations

Very few animals are found in this habitat year round. Some of the few that do make their home here year-round are yellow-bellied marmots, pikas, and ptarmagins. Each has unique adaptations to allow them to live here. Yellow-bellied marmots that live in Colorado will hibernate for as many as eight months out of the year. Pikas don’t hibernate; they hide from the weather under rocks in the boulder fields. They store food in haypiles and munch them until real food is available. Pikas are related to rabbits and hares, not rodents.

Alaskan-Alpine-Tundra

Plant Adaptations

  • The dark colors of alpine plants absorb heat.
  • The plants have anthocyanins, pigments that create red or blue, and can convert light into heat.
  • Plants are slow-growing, making them vulnerable to human foot-traffic.
  • Most plants are long-lived perennial plants. They don’t grow stems, leaves, flowers and fruit each season.
  • Plants are matted against the earth, keeping them away from harmful wind.
  • Some plants have hairs which allow them to trap heat and diffuse the harmful solar radiation.
  • Some plants are succulents, storing water in their leaves (waxy leaves that prevent desiccation).

rebecca

Alpine Tundra Animals

A few of the common North American animals if the alpine tundra are Marmots, Mountain Goats, Bighorn Sheep, and Pika. However one of the most famous worldwide is the Snow Leopard.

snow-leopard-macpedia

Alpine Tundra Plants

Horshoe-Basin---4-mile-creek---CO---RN-(21)
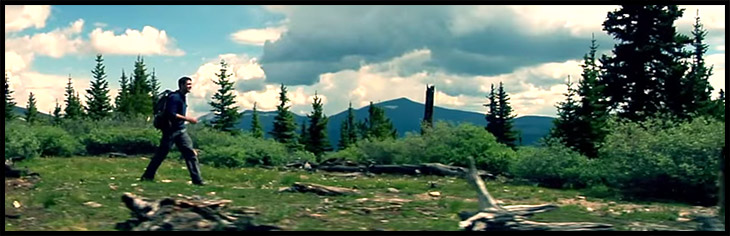
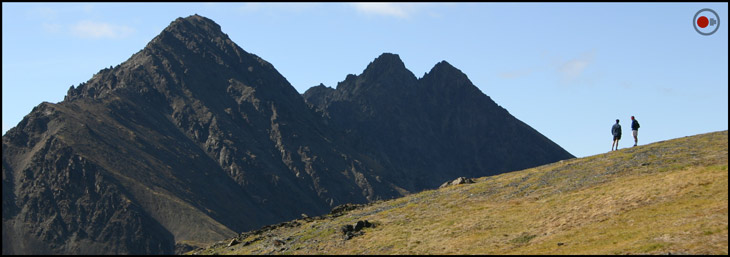
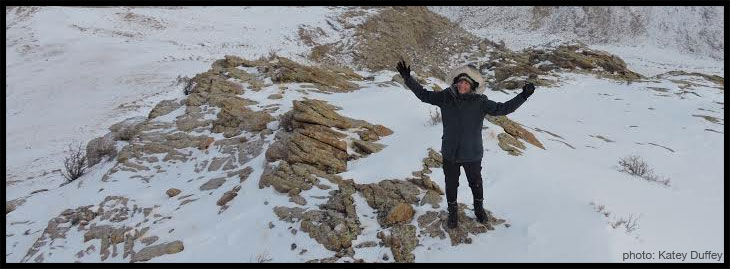
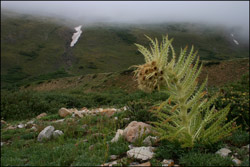
There are lots of different plants that grow in the alpine tundra. In fact, many of the species that grow in these mountainous zones are found only on a handful of mountains. That’s because the tops of the mountains are often isolated from one another.

Notable plants that grow in this area though are the Bristlecone Pine (the oldest tree in the world), Forget-me-nots, Alpine Sunflowers, and Saxifrags.

Next time you’re wandering through the mountains in the summer, take a second to look at the plants that grow here. Just make sure you’re careful not to disturb this habitat as they take a long time to grow back. That means you should stick to designated trails and hop from rock to rock if you have to go off-trail.

Researchers that work in the Alpine Tundra

Katey Duffey

Katey is a snow leopard researcher. She spends her field seasons in the mountains of Mongolia whereby she tries to track down these elusive cats. They’re not easy to find. In fact, its very rare to see one in person. Most of the time you find their scat (poop) or see glimpses of them on the trail cameras. Read more about what life is like for Katey here.

katey-duffey-mongolia