The filmmaking term for shooting slow-motion video (or high-speed video) is over-cranking. Technology has progressed a lot since the days of film, and the realm of high-speed filmmaking has taken on new dimensions; there are a wide range of options for everyone from the broadcast professional to the hobbyist.
An Example
One of my favorite shows that use high-speed filmmaking is the Discovery channel show “Time-Warp.” The show often takes a behind-the-scenes look at some of the many things you can slow down. For an episode on water, they used the setup of still photographer Martin Waugh of Liquid Sculpture and showed him what they can do with high-speed video. The results are amazing!
Professional High-end Equipment
The key to getting amazing high-speed video is using a high-quality camera that can take extremely fast pictures. Just as in macro video, you’ll also need a lot of light. However, while macro video needed increased light so that it could decrease the aperture size (giving a high depth of field), now we need to decrease the shutter speed so that we can take thousands of frames per second.
There are two major groups of high-speed cameras. The first are those designed for industrial purposes. Vision Research has a wide range of models that can be used for all sorts of applications, such as analyzing automotive crashes and examining NASA launches. The second application of high-speed cameras is for broadcast purposes. Unless you plan to use these cameras every day, you’ll probably want to rent one. Plan to budget anywhere from 1000 to 3000 USD per day, including a technician to help operate it.
Here are some options:
Photron cameras SA1, SA3 and Fastcam BC2
Photron makes several cameras, such as the SA1 (used for Timewarp), SA3, SA5, and the Fastcam BC2. They are about 1000 to 2000 USD to rent by the day and about 100,000 USD to buy. These cameras are capable of filming a bullet coming out of a gun or a water balloon popping at 20,000 frames per second (fps). The exact specs on these sorts of cameras change from year to year, so we’ll leave finding out the specifics to your Google searches.
Phantom Flex
The Phantom Flex is Vision Research’s top-of-the-line camera. It seems to have slightly slower high-speed shooting than the Photron cameras but are still a top of the line slow-motion camera manufacturer.
Entry-level Equipment
For those that would like to add a high-speed shot into their films without the expense, there are a few entry-level high-speed cameras that we’ve found many YouTube filmmakers using. For example:
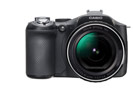
Sony FS700 series
With a purchase price of about 8000 USD, the Sony FS700 is a bit more of a prosumer slow-motion camera. It shoots up to 900 fps at 1920×1080 HD though. It’s a great camera for mixed shooting as it can also serve as your main camera on a shoot.
Casio High-Speed EX-f1
This camera is fairly prosumer with a price tag of around 2800 USD. The real benefit of this camera is quality high-speed recording on a tiny camera. Users can select a recording speed of 300 fps, 600 fps, or 1200 fps. Resolution drops with the highest frame rates as follows: 512 x 384 (300 fps), 432 x 192 (600 fps), 336 x 96 (1200 fps).
Casio High-Speed Exilim EX-FC100
On the affordable end of the spectrum is the Casio High-Speed Exilim EX-FC100. The image quality isn’t great, but at less than 300 USD you can hardly beat it. The best features are that it shoots 210 fps and one-second 30 fps (at 6 megapix) burst mode. In very low resolution, it will shoot 1000 fps.
Iphone / Gopro
Let’s not forget that both the new iPhones and new GoPros shoot some very high rates – up to 240 Fps.
Faking Slow Motion
If you don’t have a high end camera for slow motion, you can still get some amazing shots. You just have to be careful how you shoot them. Here is a video we did on that subject.
Time-lapse photography is the opposite of slow-motion; you capture a bunch of photos of the same thing over a period of time then play them back in sequence in a shorter amount of time. It is my favorite technique in Untamed Science videos; if done properly, it can look beautiful and tell a great story. I’ve taken well over 500 time-lapses and made a lot of mistakes. I also find a lot of people that want to get into making time-lapses but don’t know where to start. That’s why I made both this guide and the videos here. To start things off, you need to know how to do the basics, start to finish. I think this video I shot in Peru, is a good start.
Finding a Camera for Time Lapses
Many cameras today have the ability to change the rate of recording from within their menu. When you’re shooting a time-lapse you are doing what’s called under-cranking (the term comes from when film cameras were hand-cranked). One of the first cameras we used back in the day was the Panasonic HVX200. This HD digital video camera helped revolutionize the way video media was captured. With this camera you could change the frame rate in the menu to take a single frame anywhere from once every 16 frames to once every 10 minutes. This method worked amazingly well for short time-lapses. The only problems came when the length of the time-lapses exceeded the length of battery life. If you don’t have a power source for the camera and lose power even briefly, you can lose the entire sequence. This can be problematic with longer time-lapses like growing plants, so, for long sequences, we use digital still cameras. By taking a series of photos, you not only get extremely high resolution images, but you’re storing the media as you go.
Digital SLRs
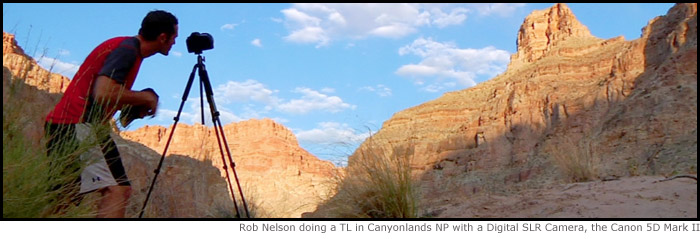
Our favorite method of shooting time-lapses is with a digital SLR hooked up to a remote trigger. We currently use a Canon 5D Mark III hooked up with a matching Canon Remote (do a few searches to find the right remote trigger for your camera).
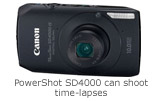
Point and Shoot Cameras
There are several point-and-shoot cameras on the market today that have intervalometers built in which count intervals for you and simplify the process. But you’ll need to become familiar with manipulating the camera’s manual functions.
GoPro cameras
Believe it or not, you can actually take a decent time-lapse with a simple GoPro. For only a few hundred bucks, it takes some amazing time-lapses. If your’e thinking about this, take a quick look at this amazing time-lapse shot completely on a GoPro.
Things to Think About
Use a Tripod
The fact that you need a solid, stable tripod might seem obvious, but it’s often overlooked. Flimsy tripods tend to shake slightly, even with a small amount of wind, causing a jitter in the final video. To secure the camera, you can give it extra stability if you weigh it down by hanging a backpack under the main head. This small amount of weight goes a long way in stabilizing the shots.
If you don’t have a tripod, you can set the camera on the ground or on a camera bean bag. It’s a bit trickier to get the right framing, but it can work. Generally, hand-holding a camera does not lead to great results unless you’re doing some sort of hyper-lapse technique.
Set the interval according to your subject
Clouds look great in time-lapse. I like to shoot clouds at either one frame every two seconds or one frame every 5 seconds. The two second interval is great for fast-moving cumulus clouds. I use the longer frame-rate for cirrus clouds, but even that is often not fast enough. Fortunately, you can speed it up in post-production.
Plants can really come to life when you use time-lapse to capture their growth. I use one frame every 10 minutes for most plants. This seems to work well for growing seedlings and blooming flowers.
Stars are fun to shoot but require more advanced time-lapse skills. First, you need to have a camera that will let you keep the aperture open as long as possible. I set my camera manually to stay open for about 30-45 seconds (I do this on the intervalometer while the camera is set to bulb mode). Too much longer blurs the stars and shorter doesn’t allow for enough light. Then, I set the interval at three to five seconds longer than the camera is open, maybe 50-second intervals. The camera is basically only taking very short breaks in a much longer time-lapse. The results are fantastic if you’re patient! Here is a short tutorial we did in the grand canyon.
Pregnancy is one of the longest time-lapses I’ve taken. It was about an 8-month project and required keeping the camera as still as possible. My problem was that I travel a lot, and my camera had to come with me. I found a way to mount the camera on the wall so that my wife and I could get pictures once a day for the entire pregnancy. Sometimes we missed days, but it didn’t matter so much.
The other thing I love taking in time-lapse are people in motion. You might even consider this a form of stop-motion. I set the camera so that I can move between intervals, about two seconds. If you go longer, it makes the process extremely tedious. If you’re close enough to hear the camera taking pictures, you can move in-between shots.
Exposure, ISO, and White Balance, Focus
For the most part you want to lock the ISO, white balance, focus and exposure settings on the camera. If your camera is automatically determining the exposure and coloration at any given time, it may cause noticeable differences in each frame, creating an unwanted flicker effect.
The only time you need the camera to automatically adjust exposure (and other manual settings) is if you’re trying to capture the transition from day to night on a clear day.
Fancy Stuff
The Panning / Dolly Time-lapse
There are few things cooler than a moving time-lapse. It requires a bit of fancy machinery. Basically, you need a long dolly hooked up to an intervalometer. I’ve attempted to build this myself and failed miserably, but Dynamic Perception sells great time-lapse dollies.
Hyper-lapse: A Moving Time-Lapse with Great Scale
This technique is much like the moving time-lapse on a slider, except the camera moves over a much larger area. You piece them together with advanced image stabilization techniques (warp stabilizer in AfterEffects for example) and the results are amazing! It’s also our most popular time-lapse technique tutorial on Youtube.
Aerial Timelapses
In the past, these sorts of time-lapses were impossible. Now, you can send up a small GPS stabilized drone, and with only a little bit of post-processing, create some amazing images of clouds moving by a landscape.
Tilt-shift: Making your scene look like a miniature
A new, artsy technique in time-lapse is tilt shift, which makes the scene look miniature. It basically adds a blur to the video so that it seems as though there is a shallow depth of field. This effect happens naturally when you shoot small things because its hard for large lenses to get everything in focus. While you can achieve it with several programs, Boinx software’s iStopMotion allows you to quickly add this filter to your time-lapses. Here is a short sample clip.
Troubleshooting: How to Fix a Flickering Timelapse Shot
If you went out to shoot a time-lapse and didn’t set everything to manual then you may get a flickering time-lapse shot. If you do, you can actually fix the time-lapse. In fact, I produced a quick tutorial here to show you how to deflicker a time-lapse.
Putting it all together
Making the movie in Quicktime player
One of the easiest ways we’ve found to create time-lapse sequences out of still photos is in Quicktime 7 Pro. Use the “Open Image Sequence” command under “File.” It ends up being really easy to do, and you can export video as large as you like. I generally choose Apple ProRes 1080p. I also save the raw files so that I can make larger quality movies in the future.
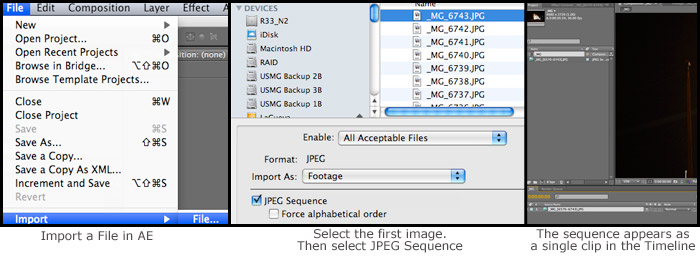
Another technique is to use FCPX or AE to piece the still images together. If you’re using either of these then I created a quick tutorial on the post production process at the end of my complete time-lapse tutorial video.
Using After Effects
Creating a time-lapse using After Effects (AE) allows you some of the best control over the final output. You can apply filters, pan across a large picture, stabilize the video and manipulate individual frames, if needed. Here is a quick summary we put together.
If you don’t have these programs, start by watching my Complete Time-lapse Tutorial to give you the overview. Then you can adapt it to your own style.
Before you can tell the world about your topic, you need to know as much as possible about it in order to tell the complete story. Since our theoretical film is about manatees, we need to research and define everything about them, from how they live to why they die and everything in between. Though the story is going to be supported by expert interviews, you need to know what crucial questions to ask to obtain the most relevant answers. You also want to appear credible to your interviewees. Research also helps tremendously in mapping out the logical development of the story during shooting and later during editing.
Learning about the science behind your story should be fun. Think of research as another way to help save the manatee (or whatever your film’s message may be). Once you have learned everything you can about your topic, you can make a film that stands on its own and does not need an audience that already has a master’s degree or doctorate on the topic. Your research helps you act as a mediator between the general public and the array of well-informed experts you have assembled. Because an unfounded or poorly researched film is either weak in its story or is destined to fall flat on its face under public scrutiny, you need to be thorough with your research.
Not only will the facts you gather give your film validity and credibility, you owe it to your financial partners and the species or science topic you are featuring to be accurate. Consider for a moment how embarrassing and costly it would be to make and distribute your film only to be publicly denounced afterwards because some key facts were flawed or erroneously presented. However, if your film is about presenting different and possibly slanted, controversial, or error-ridden theories on a subject, by all means reveal them honestly.
It’s equally important that you find the right sources for your research. If you do a Google search on “manatees,” the first reference will likely include a page from Wikipedia, the free online encyclopedia. Though it can offer some helpful background information and provide a good overview, don’t rely on it completely for its scientific accuracy. The information comes from a variety of sources and some of it may be outdated or questionable.
Your next series of information hits could be from special interest groups that also want to save the manatee. Their intentions may be good, but beware any source that comes with a vested or slanted interest. If it’s overly biased, it may not present all of the factual information. You also should consider if you want to be associated with that group’s bias. If you use this information, make sure you recognize the bias and tell your audience about it or else you might appear biased or even ignorant of all the facts behind your film. Reasonably unbiased, accurate facts tell a credible story.
Though it is okay to build your general knowledge of your topic using Wikipedia and special interest sites, you also need information that is recognized by the scientific community. Go back to the Wikipedia site and scroll to the bottom of their page. Under “Notes” and “External Links,” you will find more sources of information. Look for sources from government agencies, research institutions, or scientific journals. That is where you will be able to confirm your vital facts. For instance, the scientific Journal of Mammalogy likely offers more unbiased manatee science than a local newspaper that may have sensationalized a story to sell papers.
If you really want the nitty-gritty science on a subject, use Google Scholar for access to technical and research papers. It not only gives you detailed science from peer-reviewed journals, it may even help you identify some great experts to include in your production. Also consider browsing the websites of well-known science communities such as National Geographic, the Smithsonian, the Library of Congress, or Encyclopedia of Life.
That brings us to the final phase of research: on-camera experts. Revisit all those websites that you may have disregarded because they demonstrate a potential bias. To make a film that presents a balanced story while also introducing tension and conflict, you will want as many perspectives and personalities as possible giving their opinions in front of the camera. If our film only has one manatee scientist telling his perspective on the biological facts of a manatee, it may not engage the audience. However, if we also interview an impassioned person from a protect-the-manatee organization, a water discharge engineer, a commercial sport fishing captain, a manatee rescue veterinarian, and a tourism official, we would likely get diverse opinions from a number of credible and unique characters. Diverse opinions will also add interest and help the conflict of the story develop naturally.
At Untamed Science, we use a spreadsheet to build a list of potential interview contacts and experts and track their contact and biographical information. As our research evolves, we add names that keep appearing in journals, websites, or other media pertinent to our film. (Consider creating a Google Drive document that you can share and edit with the rest of your team; team members who call or email these experts can add notes.) By calling someone on the phone and asking a few questions about the topic, you will quickly get a sense of how they will probably sound in front of the camera. If they sound unsure or hesitant, they might feel insecure about appearing in a film or they might not be a good fit for your project.
In addition to gathering a list of interviewees, you should consider shoot locations. Making a location contacts list is as important as your interview contacts list; you might combine the two. Consider every potential angle you might use to tell your story, and try to brainstorm an image that could correspond with that angle. For example, our list of potential location contacts might look like this:
Manatee zoos or parks
Manatee tours on boats
Manatee congregation locations
Boat harbors in manatee areas
Manatee research sites and programs
Manatee protection group headquarters
Water discharge sites in manatee areas
Scuba or snorkel tours in seagrass beds
When making your location shoot list, don’t overlook difficult-to-acquire footage that will support your film. For instance, quality underwater footage of manatees might be available from local underwater videographers.
Now that you have developed your research and have a list of experts and potential shoot locations, it is time to start crafting your compelling story. Putting your story together in an engaging manner is perhaps the most important element of your entire production.
Today there are several ways educate yourself in the art of science filmmaking. In this little article I’ll walk you through some of the key players in the industry, but first here is a short explaining the pros and cons of actually attending school for science filmmaking.
Schools
Going to school to become a science filmmaker was unheard of before the turn of the 21st century, but today there are a few different schools that offer courses to get you started in the field. Each offers a slightly different perspective and thus is worth looking at for its strengths and weaknesses.
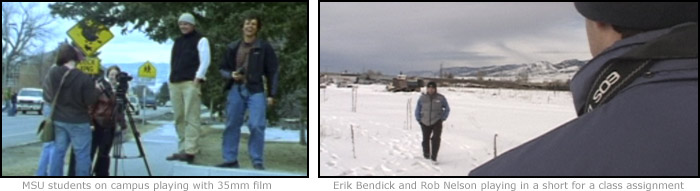
Montana State University: Science and Wildlife Filmmaking Program
The Science and Natural History Filmmaking Department at Montana State University offers the most rigorous program of this type in the United States. It is a three-year, terminal degree program in the fine arts, after which you receive an MFA. Graduates pursue filmmaking careers and are also qualified to teach at the university level.
Each new group of students accepted into the program forms a “cohort,” 12-15 people who will go through all classes, projects and other assignments together. The first two years of the program are spent doing coursework in Bozeman, creating tight bonds among those that know each others’ work and progress intimately. In the second year, a film project is require. The third year ends with a thesis film and a written Master’s thesis paper.
First, there is no better way to jump-start a career than to start living and breathing science filmmaking with people as passionate as you. The relationships with filmmaking colleagues and professors a student will be interacting with on a daily basis will last their whole career. Secondly, this program is academically rigorous. It helps students think about filmmaking from different points of view. “Why are we making these films?” and “What really is nature?” are common philosophical questions in the program. Too many filmmakers, it seems, make their films without paying attention to these larger questions. Finally, students from the program have consistently proven the worth of an MSU degree by making some quality films and will help you get a job. Historically, NASA, Smithsonian TV, and National Geographic have acknowledged the quality of the MSU student. That’s a good thing in a small field like science and wildlife filmmaking.
The negatives:
Any student that is looking into a program like this should also know the downsides. In reality, this program, unlike other academic fields, is not paid for by grants from professors. Students pay their tuition which, over the course of the entire time there and with other costs added up, may be somewhere in the 70K to 100K range. Most students apply for and get student loans. This financial burden can weigh heavily on young filmmakers after their degree. In-state tuition costs are lower. Student’s should also remember that they won’t have a job for the better part of those three years, so there will be little money coming in to offset the costs. Fortunately, the program has implemented some tuition wavers and financial assistance for graduate teachers. But, this is a career move, so it is a great way to jump-start one’s job potential.
From a filmmaking perspective, the program’s goal is to train producers and directors. If your interest lies in becoming a cameraman, sound recordist, or host, there may be better options for you. With that said though, some of the best cameramen, sound recordists and hosts I know came out of the program. That may in part be that specializing in the program like this makes you valuable with all the student projects happening. You become the go-to person and have a lot of networking potential.
Montana State University is also a long way away from almost everything. Flights in and out of Bozeman tend to be expensive, so travel on a student budget is limited. Bozeman also has a higher cost of living, considering US averages. Plus, Bozeman is a small town saturated in science filmmakers. To successfully get a job post-degree, most graduates will have to leave Bozeman. (*UPDATE* The school contacted me recently to remind me that flights aren’t as much as they once were, and that there are lots of good jobs in Bozeman. That’s all probably true, but it’s still a tad higher than other places.)
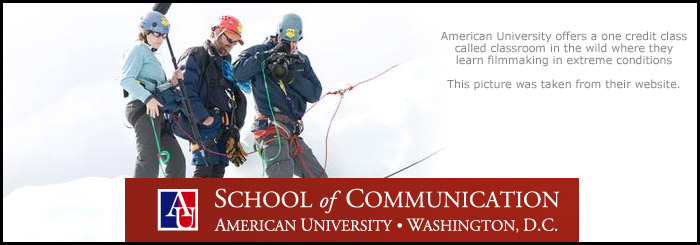
American University is a fair competitor to the Montana program. It’s based in Washington, DC, and is directed by the market-savvy Chris Palmer. One selling point for this school is that it is in the same city as National Geographic, Discovery, and the Smithsonian channel. It is a great way to get close to some of these production houses and start producing films.
University of Otago
The University of Otago offers a one-year postgraduate diploma in Natural History Filmmaking and Communication or a two-year Master of Science Communication. Based in Dunedin, New Zealand, this program has a close partnership with Natural History New Zealand (NHNZ), one of largest the producers of factual television.
Taught by a mix of academic and industry professionals, the classes are geared toward a range of film and communication theory and hands-on practice. The first year is spent on five classes, or papers, ranging from storytelling to editing and camera techniques. The second year is spent producing a commercial-length film and writing a thesis. (If opting into the one-year program, a short film is created in lieu of a commercial-length, and the thesis is omitted.)
The classes are limited to 12 students a year, which creates a fun and intimate dynamic. And the relationship with NHNZ is particularly beneficial, as students get an insiders perspective on the industry.
Benefits
Access to NHNZ and working industry professionals are valuable aspects of this program as it exposes the students to the working reality of the natural history filmmaking industry. The course instructors tend to have a long history with filmmaking and science communication outside of a university setting, which adds to the real-world perspective. Additionally, artists, writers, photographers, and other creative professionals are invited to be guest lecturers.
Students get a crash course in production, and within two years, they will have producing, sound, lighting, and editing experience under their belt. Unlike the MSU course, the Otago course focuses more on technique and practice over theory. This tends to lead to edgy, industry-relevant films, rather than classic blue-chip pieces.
The location of the course—the south island of New Zealand—is a nature-lover’s dream, with rainforests, mountains, glaciers, oceans, and farmland within a two-hour drive.
Negatives
Unlike some Master’s courses, there are very few grants available for this type of study. As an international student, tuition can be expensive.
The classes and instruction are not as structured as typical Masters programs in the US. Students have access to great mentors with great experience but must be willing to hustle and go above and beyond to take advantage of it.
Dunedin is the hub of Natural History Filmmaking; this creates a great community but saturates the job market. In an industry based on who you know, international students may find that the New Zealand-based connections they create during the program may not be of assistance as they initiate careers in their home countries.
Other schools
A few other schools have popped up that give degrees related to wildlife filmmaking. Here are a few to consider.
Offers post-graduate degree in Wildlife Filmmaking. This course is taught in Bristol, a current hub for wildlife filmmaking in the world, and thus has some very good instructors to teach the course. It’s step in the right direction if you want to make this your career and live in England.
Offers an MSc in Science Media Production. This school has a reputation for being a bit old-school and is centered around traditional broadcast and journalism.
Non-School Options
If you’re not interested in actually enrolling in a filmmaking program, you can learn in other ways. Film festivals, such as Wildscreen and the Jackson Hole Wildlife Film Festival, offer great workshops and panel discussions. It’s an alternative way to get into the industry. At these festivals you may just run into the right people and land an internship with someone like National Geographic! Then you’re learning by doing!
This short article is an excerpt from the famous David Attenborough. I post it here because I can’t find it anywhere else on the web and I think it’s a great read, especially for us wildlife filmmakers.
Natural history filmmakers should be allowed to manipulate images but not distort the truth
by David Attenborough
Do natural history programs on television distort reality? Of course they do. Go for a walk in a tropical rainforest after watching a program about one and you will be in no doubt of that. On television, all kinds of animals appeared continuously all over the place.
In reality, you may be lucky to see a single bird or monkey. But are there distortions that are more serious than that? Does it matter that a program about the life of a polar bear, filmed for the most part in the Arctic, includes shots of a mother bear giving birth that were taken in a zoo – and that the commentary did not say so? That depends on the program. If the program claimed to be recording the actual adventures of an Arctic explorer then that would clearly be wrong. But if its aim was to document the life history of the polar bear then I believe that could be acceptable. Filming a polar bear birth in the wild is virtually impossible. Trying to do so might well endanger the lives of both the cameraman and the cub, were the mother to be disturbed. So the only way to include shots of that crucial event in a bear’s life is to film it in captivity.
Is it acceptable – on occasion – to use film to suggest that something happened which did not? Sometimes it is. That swoop by a peregrine falcon did not, in fact, result in the death of a grouse. The puff of feathers rising into the sky was thrown into the air by one of the film crew. With such a shot at his disposal the skillful film editor was able to create a sequence representing a successful peregrine hunt – without it costing the life of a bird. But such stagings must be done with care. Sometimes, a film shows an event that not only did not take place on that occasion, but has never happened – ever. The most notorious example comes not from television but from the cinema.
Producers working for Disney in the years when the organization regularly produced natural history documentaries, made a film about the Arctic. Its highlight was a sequence featuring lemmings. Every few years, according to a widely-believed story, lemming numbers increase to such an extent that the animals, swarming over the tundra, eventually deliberately commit suicide by swimming out to sea and drowning themselves .
So the Disney film team working in northern Canada paid local children to collect live lemmings. A few dozen were then taken down to an enclosure on the banks of a river and filmed in such a way that the few dozen appeared to be a plague. They were then chivvied until they came to the edge of a river bank and tumbled over it into the water. And the
film-makers had their sequence. But two things were wrong. First the lemmings that gave rise to the story were not Canadian ones but a quite different species that occurs in Scandinavia. And second the story is, in any case, a myth.
Populations of Scandinavian lemmings in some years, do vastly increase in numbers. And then they do indeed start searching for food with such desperation that they will occasionally swim across rivers. But they don’t commit suicide at sea. None the less, the film gave such a convincing portrayal of the story that many still believe it – on this
evidence alone.
The need for such tricks has, over the years, become less and less. Lenses have become more powerful. The large film cameras driven by clockwork that we had to use a few decades ago have been replaced by electronic cameras, some no bigger than a lipstick that can be strapped to an eagle’s back or lowered down a mouse-hole. We can now, with infra-red light, record what goes on in what appears to both animals and ourselves to be total darkness. But, paradoxically, these huge advances in our ability to record reality have coincided with other developments that enable us to falsify more convincingly than ever.
Just as computer imaging can bring long-extinct dinosaurs back to life, so the same techniques could also make living animals appear to do things that a cameraman failed to film in reality – maybe because he was unlucky or because, in spite of what some book said, the animal in fact never behaves that way.
We can now combine pictures so perfectly that a natural history presenter could appear to be crouching within a yard of a ferocious animal that he has never ever seen. That has not happened yet – as far as I know. It would be nice to say that if you or I looked closely enough we could spot it. But electronic techniques are now so ingenious that such deceptions could be almost undetectable.
In these circumstances, television producers and the organizations which transmit their work have to guard their reputations for honesty with greater care than ever. The BBC Natural History Unit already has a code governing the treatment of animals during filming. The welfare of the subject is more important than the success of the film. There should be no lighting that makes it easier for one animal to hunt another. It also lays down rules about deceptions. Telling the story of an animal identified as an individual but using shots of several is now impermissible. Other tricks and techniques we have used
in the past, no matter how well-intentioned, are no longer acceptable.
And quite right too. The natural world contains enough astonishment. Who would believe that spiders throw silken lassos at their prey, that dolphins work in well-drilled teams to drive fish up on to a mud bank, that baby shrews dance the conga with their mother in the lead to make sure they don’t get lost.
“But we saw that in a program the other night” some will say. Let’s not get to the stage when someone else can reply, “You don’t want to believe what you see on the telly – even in natural history programs.”
As film-makers trying to illuminate the natural world, we must be allowed to manipulate images and use all the devices that recent technological advances have given us. But we must also recognize our responsibilities to scientific truth. The events and the creatures we chronicle are more than just entertainment that can be jazzed up to taste.
In pre-production, you consolidate your initial plans and take the next steps for shooting your film. The essential information you will need to think about includes:
Refining your concept
Research
Writing an outline or script
Creating a shoot list
Assembling production crew and on-camera talent
Planning shoot logistics
Raising funds and establishing sponsor relationships
As science and wildlife documentary filmmakers, we have a great deal of public responsibility. Much of what the public learns about the natural world comes from the films we make. If we explain the aerial acrobatics of the great white shark, the mating behavior of paradise birds, or the burrowing habits of the pygmy armadillo, people should trust that what we’re telling them is true.
Specifically, we are trusted to share science and natural history stories as accurately as possible and to interact responsibly with animals while we’re in the field.
Telling a Truthful Story
Science and wildlife filmmaking is about telling stories, but there is a delicate line between fact and fiction. Most audiences know they can’t believe everything they see in the movies or in fictional television programming, but we don’t want to get to the point where they are doubtful of natural history programming, too.
A few years back, the filmmakers of a popular show on a respected science documentary channel got into trouble. The show claimed to be a two-man crew following the host as he was trying to rescue himself in the wild. It proved to be a false statement. People were outraged when they found out that the crew actually spent a few weeks shooting the purported three-day survival trip and that the two-person camera team actually consisted of closer to a dozen people, all staying in nice hotels at the end of the day. After this was leaked to the public though, the show remained on the air with only a small disclaimer at the beginning of the show claiming that not everything was real.
A colleague of mine accompanied this crew to the tropics as their survival expert. They wanted to tell the story of how to avoid a piranha attack. He told us of one particular shoot where they wanted to show a piranha hunt. He fished a bunch of piranha from the river, put them into a small backwater pool, and fashioned a bow for the host to use. Unfortunately the host couldn’t shoot the arrows well enough to catch a piranha, so our expert shot the piranha then threw the host the bow as the camera panned up. Is this kind of truth-bending okay? Are they breaking any fundamental ethical rules in documentary filmmaking?
Another recent ground-breaking show took the technology of Jurassic Park and put a natural history story to dinosaurs. Unlike other shows that theorized how dinosaurs might have behaved in the wild, this show used high-tech computers to render the life of dinosaurs from birth to death, often making up facts in order to tell the story.
A third wildlife documentary from the 1950s about the Arctic contains a famous scene of the mass suicide of lemmings. The lemming populations increase dramatically, only to run out of food and force them to commit suicide into the ocean; we saw it for the first time on the film. The idea was later proved to be fake and there were accusations of animal cruelty.
We give these three examples so you can start thinking about the issues. Where is the line?
Treating the Animals Right
Telling animal stories in nature is innately difficult. Consider shooting a film on wolves, for example. Most people will never see a wolf in the wild. Now imagine trying to tell the story with a 70-pound IMAX camera loudly whirring and scaring away the subject. Filmmakers may get past these problems by using tame wolves. If an expensive film shoot demands it, why not get trained animals to perform for the camera?
It might depend on the narration of the film. If the film claims the wolves are wild, then this is untruthful storytelling. However, the narration could be written to tell the natural history of the wolf and avoid mentioning whether these particular wolves on camera are wild. It allows audiences to see how wolves behave and earn an appreciation for their beauty without endangering them. We’d argue that this protects wild wolves.
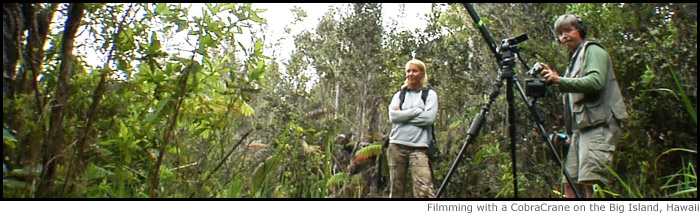
Under no circumstances should filmmakers put animals in physical danger simply for a shot. We’ve heard horror stories where a group of filmmakers pulled an exhausted wildebeest out of a mud pit in order to film the kill by waiting lions, or a film about Hawaii where a pig was tied down to be included in a shot panning through the forest. Untamed Science takes the stance that filmmakers must avoid all acts of animal cruelty when making wildlife documentaries.
Ethical Code of Conduct
Fortunately, there are certain codes that organizations like the BBC and Filmmakers for Conservation have instated for wildlife filmmakers. We support and follow these guidelines.
Principles
Always place the welfare of the subject above all else.
Ensure that your subjects are not caused any physical harm, anxiety, consequential predation or lessened reproductive success by your activities.
Don’t do anything that will permanently alter the natural behavior of your subject. Be aware that habituation, baiting, and feeding may place your subjects at risk and may be lethal.
It is unacceptable to restrict or restrain an animal by any means to attract a predator.
Subjects should never be drugged or restrained in order to alter their behavior for the sole purpose of filming.
Be aware of and follow all local and national laws regarding wildlife where you are filming.
Be courteous to your contributors (give appropriate credit where it is due). Whenever possible give copies of the finished program, a copy of a long edit of an appropriate scene, and/or publicity photographs to the people who helped you.
Images or script that give an audience abnormal, false or misleading information about a subject or its behavior should be avoided.
Always research your subject prior to filming.
Guidelines for Working in the Field
Restore all sites to their original state before you leave (for example: tie back rather than cut vegetation).
Be aware and take precautions, as some species will permanently quit a site just because of your odor.
Keep film, video equipment, and crew members at a distance sufficient to avoid site or subject disturbance.
Night shooting with artificial lights can require precautions to avoid making the subject vulnerable to predation.
Be prepared to meet unexpected conditions without damaging the environment or subject. Be especially prepared and deal with any people attracted by your activities as they could put the subject at risk.
Be aware that filming a den or nest site could attract predators.
The use of tame or captive animals should be acknowledged. If so, ensure the subject receives proper care; the subject’s trainer or custodian should always be present during filming.
A good bottom line to consider is, if it feels wrong or questionable then it probably is.
After mastering the filmmaking basics, you may want to integrate some fancy techniques to make your film stand out. Adding movement, slowing down a shot or speeding it up—this requires special techniques. Maybe you want to produce a 3D film with your story, or maybe you’re working with large animals. We’ve researched all of these techniques in order to give you a jumpstart. The menu to the right lists some of the techniques you can easily learn and master with some practice.
The greatest tool you have as a filmmaker is the drive to engage and inspire your audience. Your passion can help create change and drive useful action. You will come up with an idea, determine your audience, and start making your film. But be sure to begin with an idea that truly drives you in order to inform change and inspiration in others.
In 2005, Jean-Michel Cousteau, the son of legendary ocean explorer Jacques Cousteau, traveled to the Northwest Hawaiian Islands, the uninhabited chain of islands 1600 miles northwest of the main Hawaiian Islands. On the expedition, the diversity of sea life in the area completely blew the team away. However, they also witnessed a myriad of trash piled up on the beaches, washed there from the wind and waves of the Pacific Ocean. Watching the debris affect the fragile ecosystem, Cousteau and his crew knew they had to do something. It seemed only natural to make a film that would demonstrate the delicate nature of the area and warn people about the harmful impact of pollution. Like every filmmaker, Cousteau hoped the film would make a difference. He didn’t realize then just how important it would become.
Only a year after making the film, Voyage to Kure, Cousteau found himself in the company of President George W. Bush and a powerful White House committee dedicated to preserving the environment. After watching the film, Bush turned to the committee and said, “Let’s get it done.” He proceeded to set aside the entire Northwestern Hawaiian Island chain as a protected monument. Cousteau’s passion and story motivated this special audience to take action, and it changed the course of history for one very delicate ecosystem.
Though few viewers wield Presidential-sized power, many of them, if motivated, can still influence powerful decision-makers or take action to ensure a message is heard. You never know who will see your film or be influenced by it.
In the past, breaking into the science and wildlife filmmaking industry was a costly and difficult process. Jean-Michel Cousteau is a living legacy of his father; that family connection no doubt helped him establish his name in the business. Fortunately for you, times have changed in the industry. You no longer need the fortune of family connections or independent wealth to become a successful filmmaker.
You do, however, need some basic equipment, education, a willingness to meet people, and a little ingenuity to begin.
Equipment
In the past, the 35mm film camera that was typically used to shoot wildlife footage was the cost equivalent of a modest home. If you combined the purchase of the camera, film processing, and a professional editing suite, you are now in the price range of a very nice home!
But thanks to the dawn of the digital age, filmmaking has become much more affordable. Today you can buy a high-quality, HD camera for several hundred US dollars. The same goes for a laptop with editing software. Even more good news: today’s cameras capture directly to digital storage, eliminating the need for expensive tapes and tape decks to play back and digitize footage. So with a (relatively) small investment almost anyone with the motivation can afford to make science or wildlife films.
If you are unable or unwilling to spend that much money, don’t worry. You don’t need the latest and greatest gear, and you might be surprised by what you find online in affordable, used, or discounted HD video cameras and digital equipment. The specific equipment you will need for various settings will be addressed in later chapters. Though your gear is important, remember that equipment does not define you as a filmmaker. What does? Keep reading.
Education
There are numerous ways to educate yourself about filmmaking. In addition to the many websites devoted to filmmaking techniques, a handful of schools have emerged to lead the way in teaching the specifics of science filmmaking. They allow beginning filmmakers to formally learn the trade with a small group of fellow students, guided by instructors who have established themselves in the industry. Some of these prestigious schools include Montana State’s Science and Natural History Filmmaking program and New Zealand’s University of Otago. (We discuss these and other programs in more detail here.)
Networking
Like many other professions, learning the craft of making films also relies heavily on networking with other filmmakers. Making connections is an integral key to success. There will be a point in your filmmaking career when you will need to sell others on your film concept; having meaningful relationships with other filmmakers and producers will help you in this cause.
Networking may seem intimidating early in your career, but remember that every filmmaker, producer, director, host, or broadcaster you meet was once a beginner, and few forget what that was like. The people who are making their first films at the same time as you will be your peers in the industry for years to come. (If you’re lucky, you’ll also come away with creative and amazing friendships.) Here are a few tips to consider when trying to establish and expand your connections in the business.
Seek out Internet affiliations. This is even more important if you’re planning to distribute your films online!
Contact other science filmmakers on the Internet. Compliment their work; ask questions; offer to meet when in town. Most are willing to help, so don’t hesitate to ask or to begin a conversation with someone whose work you admire. I’ve reached out like this to nearly everyone I now work with (including my wife, Haley).
Attend local film clubs, or, if none exist start your own with a regular movie night.
Join broadcaster or filmmaker associations.
A Little Ingenuity
Decades ago, one way for a beginning filmmaker to get his or her film in front of an audience was to produce multiple VHS tape copies and distribute them. This made for another costly investment, and unfortunately, the advent of DVDs did not reduce these distribution costs very much. In fact, without some funding mechanism, it is cost-prohibitive for most beginning filmmakers to reach a broad audience with their films. Broadcast television is typically exclusive to established production houses. Your chances of gaining immediate recognition as an independent filmmaker through these mediums are limited, so, in an effort to save your friends and family members from watching countless hours of your films, you should consider alternate ways to broadcast your films. But fear not…
The digital age has again given you a distinct advantage over your predecessors. It has never been easier to “broadcast” your films to either a small target audience or a mass audience with broad appeal. The Internet allows you to broadcast films on your own science or wildlife Internet channel, via iTunes or YouTube.
We started Untamed Science because three of us, fresh out of a science education, wanted to produce science and natural history films that would impact the classroom. The twist behind our films is that we are trained scientists who use action and adventure to portray ideas and concepts. We mix in humor, high-adrenaline situations, and genuine action in our videos, elements that we thought classroom science films needed to connect with students. This approach was pretty atypical of science films at the time, and our iTunes channel quickly became popular. Soon we were having meetings with publishing companies and broadcasters like Nat Geo and Discovery. Eventually we were contracted to produce more than 200 science-education videos for the world’s largest publisher of science textbooks. These films are currently being watched by half the K-12 students in America. Hopefully, our films will inspire these students.
Our story may be unique, but having passion and just starting the process are so important. We bring this ideology to our filmmaking process, and it’s fundamental to our success.
Of course, the craft of science and wildlife filmmaking is also a business whose ultimate success depends on the right blend of passion, using that passion to motivate yourself and others, and marketing your ideas in the right way and to the right people. Now let’s start planning that film!
Finally, it’s worth noting that you should try something new every week, even if you’re already a professional. Here is our new series where we have a new thing to teach each week. See the full blog with every video here:
Jacques Cousteau produced some of the world’s greatest underwater videos. These videos inspired thousands of deep-sea explorers and avid wildlife filmmakers, including Untamed Science. As a result of his work, many people saw for the first time new species of flora and fauna, famous historical shipwrecks, and unexplored underwater caves. Thus, Cousteau’s films gave underwater filmmaking greater prestige and attention. Now the world relies on underwater videographers to share this uncharted environment with the rest of the world.
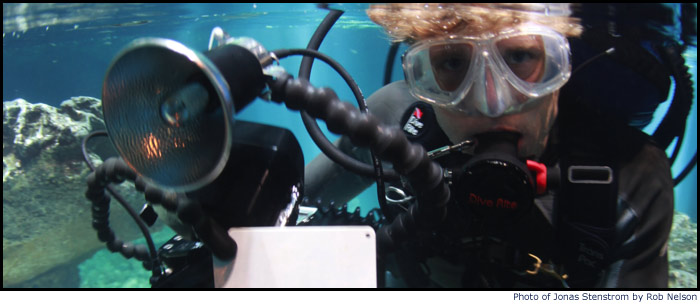
Not all of us can become Jacques Cousteau, but preparation and hard work can make you an exceptional underwater filmmaker. Here, we introduce some of the key elements you must consider before beginning your underwater adventures. From learning how to SCUBA to adjusting for light and color, this guide will wade through the basics of underwater filmmaking.
Preparation
Learn to Dive
Becoming a certified SCUBA diver is perhaps the most obvious requirement for underwater filmmaking. Filmmakers often bypass the bulky SCUBA equipment when taking video of large animals such as whales, but you’ll need to learn the basics of SCUBA diving to take your skills to the next level. Understanding how to dive properly will allow you to get close to coral without damaging it or capture footage of wild marine life without endangering yourself. It will also help you learn to keep a camera steady while the animals perform their behaviors.
In addition to SCUBA training, we also recommend that you learn to free-dive. The disadvantage of traditional SCUBA is that you often scare large fish and marine mammals with bubbles. Free-diving allows you to swim freely with these creatures. But be safe; always practice free-diving with a buddy around.
Rebreathers
If you don’t want to make bubbles but you need to stay down for extended periods, you can use closed circuit rebreathers, self-contained dive units that recycle the air we breathe so as not to release any bubbles. A rebreather adds oxygen to the system and filters out carbon dioxide. These systems generally allow a diver to stay underwater for a long time.
Know the Underwater Environment
When shooting video underwater, you want to make sure you don’t break or damage anything in proximity. This may sound obvious, but it can be a bit difficult maintaining your focus on your subject while making sure you are not sinking, floating up to the surface, or crashing into rare coral or dangerous rocks.
If you are diving in blue water without a fixed reference, it can be hard to know if you are heading up or down. This can induce vertigo and lead to a potentially dangerous situation. Before you start playing with the camera, be sure to practice good buoyancy skills so that you can stay at a constant depth.
To get close to wildlife underwater, you want to stay relaxed. Move slowly and controlled; don’t chase fish or other marine life, or you are likely to scare them off. Plus, your footage will look better if you pace yourself.
Avoid kicking up silt and dust from the bottom. It will get in front of the camera and make the water murky. There is nothing worse than thinking you have a great shot only to discover later that the cloud of dirt you just kicked up ruined the clarity of the image.
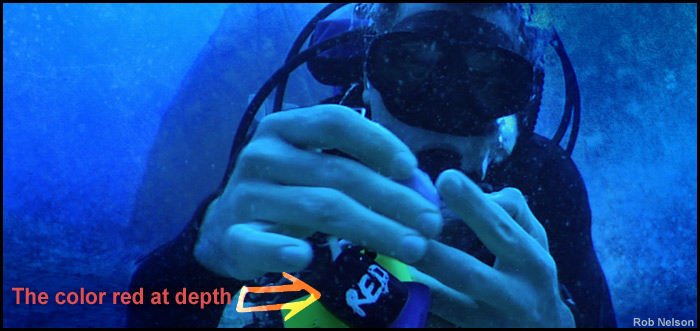
Colors and Light
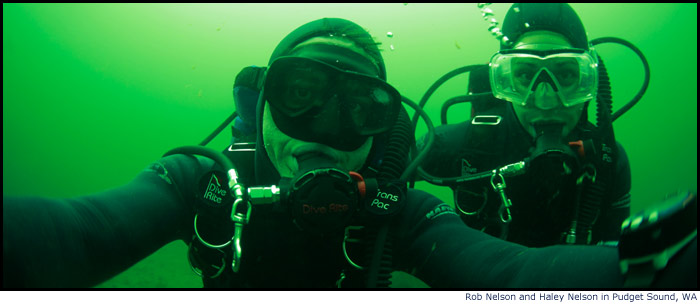
Colors are different underwater than they are above. The intensity of certain colors like red and yellow diminish quickly the deeper you dive. This image shows how different colors diminish with depth.
The red-colored tank topper looks almost black and the diver’s skin looks blue! With increased depth, water absorbs color at different rates. Water absorbs red first causing video to appear more blue or green than you hoped. In clear tropical waters, blue remains the longest, and when you are diving in temperate waters, plankton and other particles create a strong green hue.
There are two easy ways to compensate for these color issues when underwater. The first one is to use a color filter on your camera, usually red. It will bring back some of the red in the image you are shooting, making it appear richer. The second option is to use underwater lights. If you are shooting in shallow water, or in clear tropical waters, you probably won’t need them. Always make use of the natural sunlight. The deeper you go, the darker it will be. When you know you will be diving to depths where sunlight is limited, you will need to bring a few extra lights.
Here is a short video we produced about the topic of light underwater. Be patient, the good diving takes place after the first few minutes.
Equipment
Underwater Camera Housing
The underwater housing for your camera is arguably the most important (and expensive) item for underwater filmmaking. It is also the best investment you will make because it protects the camera from the hazardous elements of an underwater environment.
For the hundreds of cameras on the market there are relatively few underwater housings. If you don’t already have a camera, you should first look for a quality housing and let that lead you to a camera. In other words, shop for housing first and camera second.
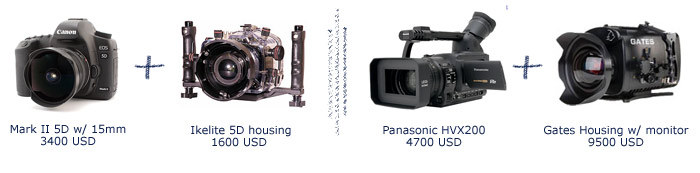
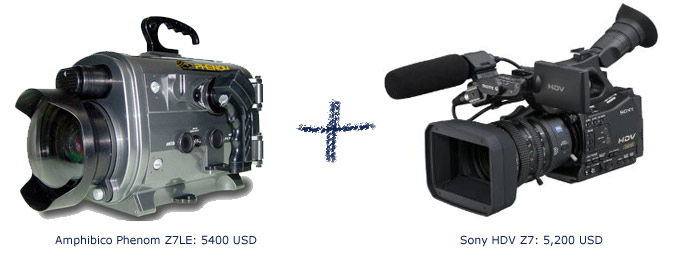
In general, camera housings are mechanical, digital, or a combination of the two. For instance, Amphibico housings are made to work digitally. They usually tap into a digital port on the camera. Many cameras, such as those made by Panasonic, don’t have this port and can’t be used in an Amphibico housing; they require a mechanical housing. Knowing the advantages and disadvantages of each setup will help you choose a camera that suits your needs and filmmaking style.
Mechanical Housings
At Untamed Science we have two different mechanical housings. Generally, they have buttons and pins that go through the hard casing to physically push buttons and turn switches on your camera. The benefit of a mechanical housing is that parts can be replaced if something breaks in the field. The buttons and switches have to be kept in good condition so they don’t jam or get stuck, but you don’t need to worry about electronics getting wet and ruining the electronic board. Gates and Ikelite are two manufacturers who make mechanical housings. There is a huge difference in the final price, but, oddly enough, we tend to like the resulting footage equally.
Digital Housings
Digital housings plug into a port on the camera and operate all the camera functions from digital controls on the housing. They are often constructed so that the buttons are in an ideal place for the diver to control in the underwater environment, usually where your thumbs would naturally grab the camera. This is a real plus. But be advised; an occasional failed circuit board can leave you stranded if you are in a remote location.
Amphibico housings work well with Sony cameras and are a great example of a quality digital housing.
Watertight bags are a less expensive option, but they tend to restrict your range of depth. In our experience, some tend to leak slightly when you dive below 15 feet or so.
Lights
HID (High-intensity Discharge) Lights
More and more underwater videographers are using HID lights with greater effect than conventional halogen lights. Traditionally, they have a much bluer light than halogens. However, their battery time is limited. HIDs also require large battery packs that mount to your light rig.
LEDs
More energy-efficient LEDs are also gaining popularity with deep water filmmakers. With greater battery life and the decent colors they produce, they are a reasonable alternative to HIDs.
Halogen
Small halogen lights are what most divers carry with them to see things at depth. But these lights cannot be used for video work, as they produce a concentrated and focused beam. If you want your video to look like daytime, you would have to get stronger halogen lights made specifically for use with video equipment.
You also want to consider how you are going to hold both the camera and the light or lights. Most divers use a mounting mechanism that attaches to the camera housing. Lights and mounting is are usually bought separately. If you are customizing your own lighting system, just remember that you will want to be able to adjust the lights underwater without much effort.
More and more underwater videographers are using HID lights with a greater effect than conventional halogen light. Traditionally, they have a much bluer light than halogens although their battery time is a limited. HIDs require large battery packs that mount to your light rig.
The Intricacies of Filming Underwater
White Balancing
To compensate for the change in the color of light at depth, you will need to adjust the white balance as you descend. Remember, white balance is basically the camera’s way of calibrating what white is and all you have to do is hold down the camera’s white balance button when shooting something that you know is white. You can improve the quality of your shots if you consistently adjust white balance as you descend to different depths. All you have to do is remember to bring a white slate. Experienced underwater cameramen may use white dive fins in order to achieve white balancing without hauling along extra equipment.
Focusing underwater
Most of the time, you’ll want to turn off the auto-focus feature on your camera. The camera’s auto focus features work by finding “edges” to focus on. If the camera pans up towards the endless, fuzzy blue of the ocean, the camera will start searching for a focus. At Untamed Science we avoid this by focusing on an object that is about 6 feet in front of us. If you’re always shooting with a wide angle, (you’re not zoomed in) while shooting, this puts almost everything in sharp focus. From here you can fine-tune the manual focus settings.
Think About the Angles
To make your underwater video feel more alive you’ll need to consider the perspective of your shots. Novice underwater filmmakers tend to shoot the entire time from a diver’s perspective: facing down. We encourage filmmakers to get as low as possible and shoot slightly up towards the surface. This creates some very cool effects from the sunlight coming down and illustrates the perspective of an underwater creature.
Stable Shots
If you have a cleared area where you can set the camera down without damaging anything, you could stabilize the camera for a steady shot. Do this by diving with soft dive weights on a weight belt. Then set the weights on the camera at depth. Traditional tripods are difficult to use underwater, especially with a large heavy underwater housing.
Now that you understand some of the basics of underwater filmmaking, have fun and experiment with your own creative style. Jacques Cousteau did not become the world’s preeminent underwater explorer by doing everything according to a book.
 Photron makes several cameras, such as the SA1 (used for Timewarp), SA3, SA5, and the Fastcam BC2. They are about 1000 to 2000 USD to rent by the day and about 100,000 USD to buy. These cameras are capable of filming a bullet coming out of a gun or a water balloon popping at 20,000 frames per second (fps). The exact specs on these sorts of cameras change from year to year, so we’ll leave finding out the specifics to your Google searches.
 The Phantom Flex is Vision Research’s top-of-the-line camera. It seems to have slightly slower high-speed shooting than the Photron cameras but are still a top of the line slow-motion camera manufacturer.
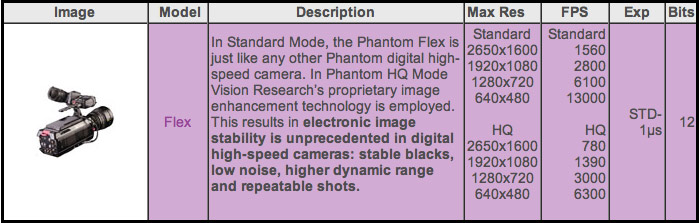
 This camera is fairly prosumer with a price tag of around 2800 USD. The real benefit of this camera is quality high-speed recording on a tiny camera. Users can select a recording speed of 300 fps, 600 fps, or 1200 fps. Resolution drops with the highest frame rates as follows: 512 x 384 (300 fps), 432 x 192 (600 fps), 336 x 96 (1200 fps).
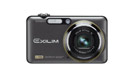 On the affordable end of the spectrum is the Casio High-Speed Exilim EX-FC100. The image quality isn’t great, but at less than 300 USD you can hardly beat it. The best features are that it shoots 210 fps and one-second 30 fps (at 6 megapix) burst mode. In very low resolution, it will shoot 1000 fps.