Can you really beat roulette with science?
What wouldn’t you do for a large sum of money?
It is not the first time we’ve come across articles claiming that scientists or physicists have found a “way to beat roulette”. We’ve also probably heard of several attempts done throughout history by certain individuals who, by using physics, managed to come up with methods or even machines, to try and beat the casino. Now that it’s 2018, and almost 2019, in an age of great technological advancement, one would think this task wouldn’t be so hard to undertake.
Before we can get into the how’s and what if’s of the game, we need to have a basic understanding of how the game is actually played as well as understand how physics can be the key to beating the long-time popular game of roulette.
Rules of Roulette & Isaac Newton’s Laws of Motion
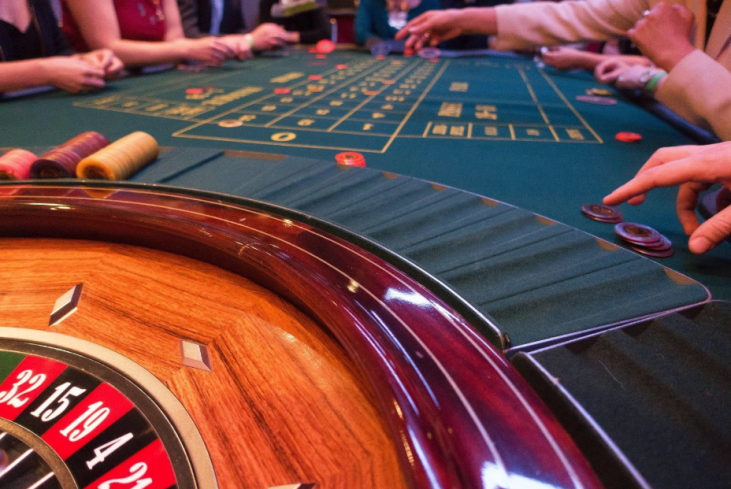
You don’t need to be an advanced gambler to know how to play roulette. But, taking time to understand the game and learn a roulette strategy can certainly be helpful. The only thing you need to know is how to place your bets. Basically, in a game of roulette, the croupier spins a wheel in one direction and a ball in the other direction.
Players then have to place bets on where the ball will land by choosing either a single number, a range of numbers, the colors red or black or odd or even numbers. Now it’s good to note that we’re talking about the land-based game here – although the same rules apply when it comes to online roulette, beating the online version would be an entirely different ball game since the numbers are generated by a software.
When it comes to the land-based game, however, some simple physics is all there is to it. How? Thanks to Newton’s laws of motion we have a pretty solid understanding of the movement of the ball and the wheel – in that, as the ball slows, gravity takes hold, eventually leading the ball to fall into one of the numbered compartments. Because of this, we can pretty much predict when the ball will leave the rim, but, the route it takes to a numbered slot is less so since the ball bounces around quite a bit as it strikes various obstacles. The most accurate outcome can be predicted if one had to take note of the precise location of the ball before it is released, as well as calculate the relative speeds of the ball and wheel when the croupier sets it in motion.
Although we would not be able to predict the exact number the ball will land in, we can, however, be able to predict the area of the wheel the ball will land, which can easily help you gain a massive advantage over the casinos, in some cases more than 40%.
Albert “Al” Hibbs & Roy Walford (1940s)
According to an article by Forbes, in the late 1940s, two friends at the University of Chicago, mathematics graduate student Albert “Al” Hibbs and medical student Roy Walford, decided to take on a bit of a different challenge when they hit the casinos in Nevada – the only state where gambling was legal at the time. They visited a few casinos to study the properties of roulette wheels to try and find weaknesses to exploit.
Back in those times, the wheels weren’t as well made as to today’s and they often had defects. Such defects, the students knew, offered the key to successful prediction. The students quickly developed predictive models and managed to win thousands of dollars. Much of their winnings were used to buy a boat and sail around the world. Years later, they revealed all to the world, and as you would guess, it wasn’t long after that the casinos started upgrading their equipment.
Edward Thorp (1950s)
Having learned about Hibbs and Walford’s successful endeavors, Thorp decided to follow in their footsteps but this time he had a harder task as the roulette wheels at the casinos no longer had discernible defects – he had to adopt a new strategy. Thorp successfully created the world’s first “wearable” computer that could be worn inconspicuously under a shirt and that was powerful enough to record things like the speed at which the wheel is spun, and the precise time the ball is launched, and make the appropriate calculations that would predict where the ball would land. This computer would then transmit this information by radio to another person wearing another computer, and who was a participant in the game. It’s no wonder why Thorp’s often known as the “man who beat the casino”.
Doyne Farmer & Colleagues (1970s)
Farmer and his colleagues tried to take things to a whole other level with the technology offered to them at the time. Basically, two people wore computers that had different functions. The “brain” behind the whole operation was the computer that was built into one of the person’s shoes as it performed two very important functions: firstly, to calculate the speed of both the wheel and the ball, determining where the ball would finally land, and secondly to transmit these predictions via signals to the person wearing the other computer.
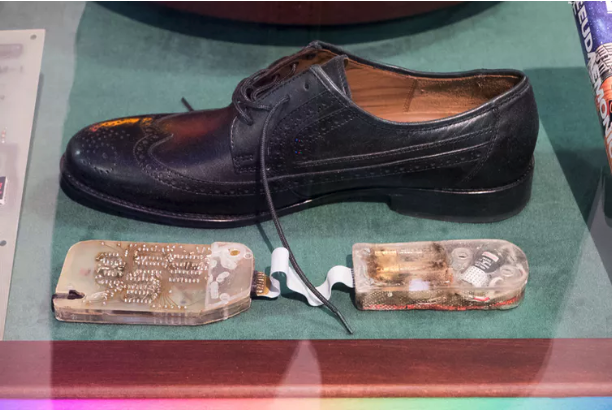
Shoe Computer. Source: Wikipedia
Sounds like a great plan, right? – but in truth, there were a lot of problems, and things didn’t go exactly as planned. From weak or lost radio connections to wires becoming loose and getting electrocuted thanks to short circuits caused by sweating, things were far from being accurate. But this didn’t stop the team, which continued to grow to 20 people, from working on a better system and trying it out again a few years later. This time, both computers were placed in custom-built shoes.
This not only protected the operator from being electrocuted but would also make it harder for the casino to detect. In order to avoid problems due to sweating or loose wires, the team also built the computers in resin blocks, with only the toe-operated switches and the solenoids that drummed against the feet, being visible. They tested the new system Binion’s casino in Las Vegas and succeeded. Once the parameters had been set, the first prediction was to bet in the third octant which included the numbers 1, 13, 24 and 36. The ball landed in 13 and the team got paid off at 35-1.
Needless to say, this gave the team hope that all those years of work would finally start to pay off, however, eventually the solenoids started to act randomly, failing to transmit the predictions from one computer to another. The team suspected it was due to the electronic noise present in casinos, and after a while, they felt they had no choice but to abandon the idea.
Today
Pulling something like this today is highly questionable. On the one hand, we know that technology has come a very long way and in fact, we’re pretty confident that a computer the size of a fingernail could be created to perform the same function of the old systems described above, and the probability of them failing would be so much less.
Yet, on the other hand, the technology and security at the casinos have also improved throughout the years. It’s much easier for someone to get detected at casinos than 20 years ago. There are so many checks in place.
But technically speaking, putting the casinos’ ability to detect fraudsters aside, it is very likely that scientists would be able to create a foolproof system to outsmart casinos and beat the classic game of online roulette.